
Few things disrupt a digital workflow more abruptly than a beloved browser refusing to cooperate. For many Windows 11 users, the recent update KB5037591 has inexplicably triggered a frustrating phenomenon: Google Chrome windows closing immediately after launch, displaying blank screens, or crashing entirely. This widespread issue, while perplexing given that other browsers like Microsoft Edge often remain unaffected, signals a compatibility or configuration conflict introduced by the update. This comprehensive guide is designed to empower you with targeted, effective steps to diagnose and rectify the problem, ensuring your Chrome experience is restored to its reliable and stable best.
1. Pinpointing the Culprit: Testing with a Fresh User Profile
One common, yet often overlooked, cause of application instability stems from a corrupted user profile or problematic Chrome user data. By creating and testing Chrome within a completely new Windows user account, you can quickly ascertain if the issue is system-wide or isolated to your existing profile.
Your Action Plan:
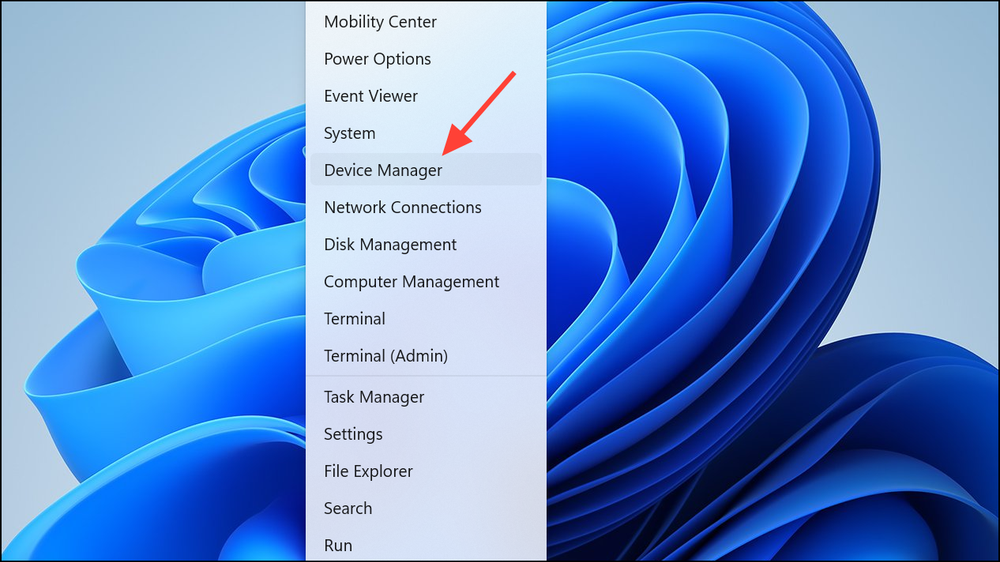
1- Open Administrative Terminal: Right-click the Start menu (or press Windows key + X) and select Terminal (Admin) or Command Prompt (Admin) to open a shell with elevated privileges.
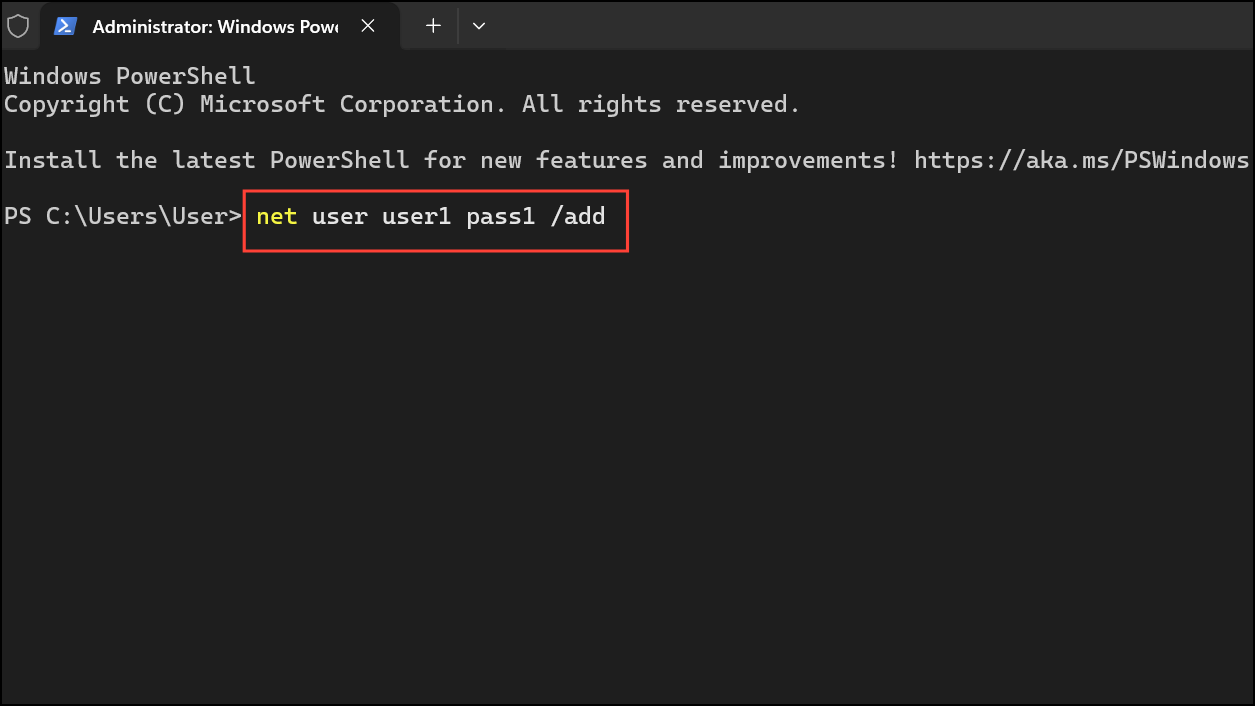
2- Create a New Administrator Account: Type the following commands, pressing Enter after each: net user newuser newpassword /add net localgroup administrators newuser /add Replace newuser and newpassword with your desired username and a secure password.
3- Log In to the New Profile: Restart your computer. On the login screen, select the newuser account you just created and sign in.
4- Test Chrome Installation: Download and install Google Chrome from its official website within this new user profile. Launch Chrome and observe its behavior. If Chrome now opens and runs without crashing, the issue very likely resides within your original Windows user profile’s data or Chrome’s local user data.
2. Bypassing Restrictions: Launching Chrome with Special Options
Occasionally, a specific Windows update might introduce security enhancements that inadvertently conflict with how Chrome initializes. Using a special launch flag can temporarily bypass certain security features, helping determine if this is the root cause.
Your Action Plan:
1- Access Chrome Properties: Locate your Google Chrome shortcut (on your desktop or in the Start menu). Right-click it and select Properties.

2- Modify the Target Field: In the “Target” field, add -no-sandbox to the very end of the existing path, ensuring there’s a space before it. Example: "C:\Program Files\Google\Chrome\Application\chrome.exe" -no-sandbox

3- Apply and Test: Click Apply, then OK. Now, try launching Chrome using this modified shortcut. The -no-sandbox flag disables Chrome’s security sandbox, which can sometimes conflict with system-level changes.

Important Note: If Chrome launches successfully, test its functionality. However, it is crucial to remove this flag after troubleshooting, as running Chrome without its sandbox significantly reduces your browser’s security.
3. Fine-Tuning Security: Adjusting Exploit Protection Settings
Windows Security’s Exploit Protection features, while vital for system safety, can sometimes become overly zealous and flag legitimate application behavior as a threat, especially after a fresh update. Temporarily adjusting these settings for Chrome can pinpoint compatibility issues.
Your Action Plan:
1- Open Windows Security: From the Start menu, search for “Windows Security” and open it.
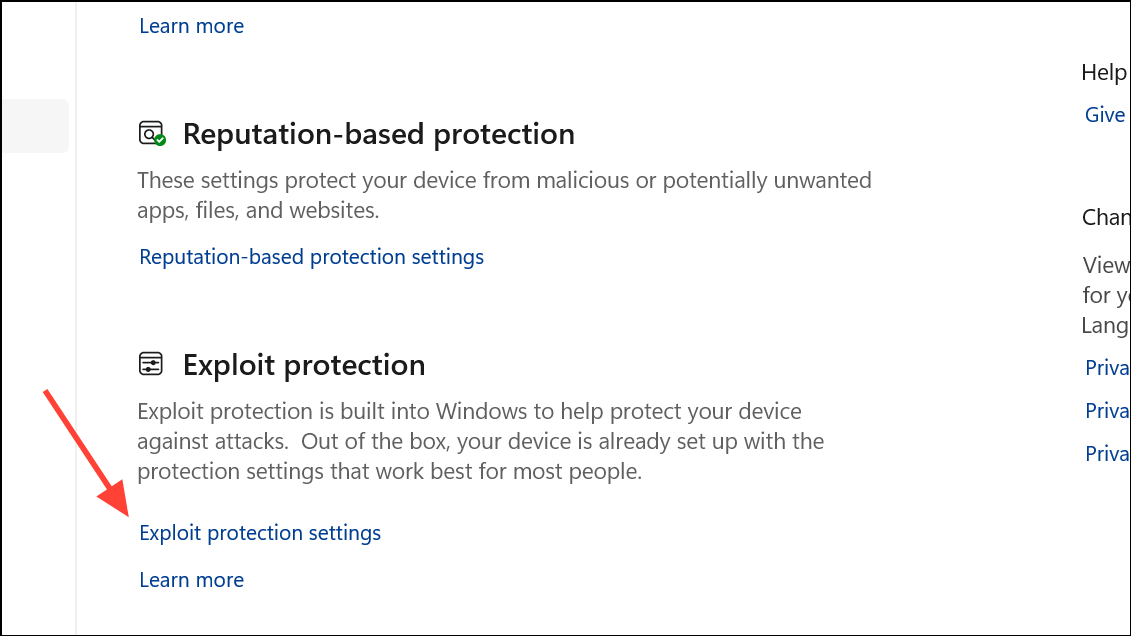
2- Navigate to Exploit Protection: Go to App & browser control, then click on Exploit protection settings.
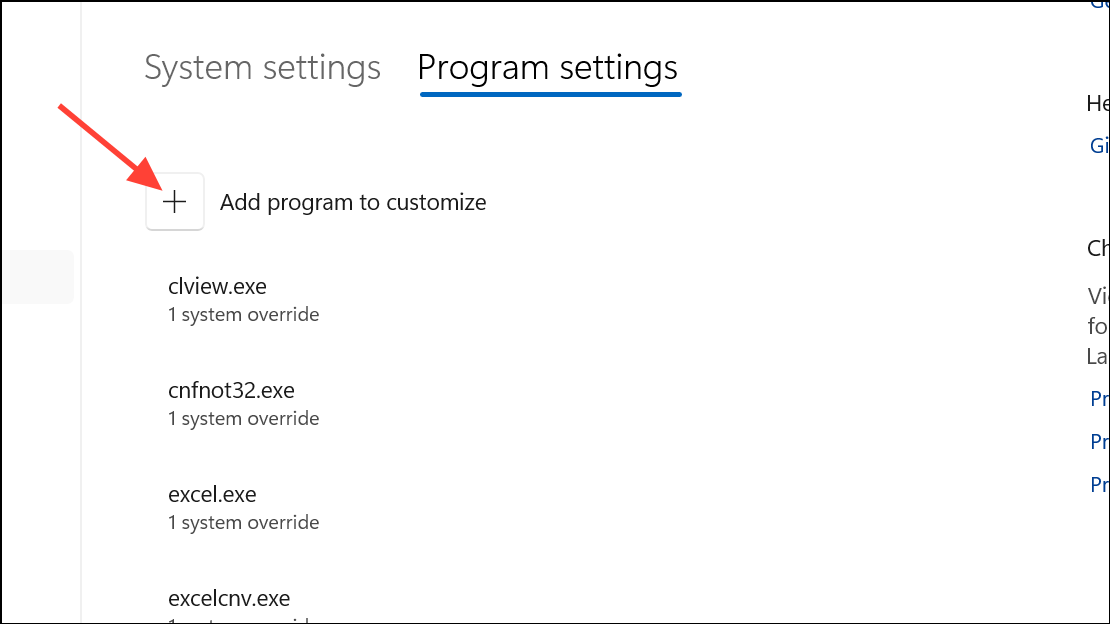
3- Add Chrome to Program Settings: Under the Program settings tab, click Add program to customize and choose Add by program name. Type chrome.exe and click Add.
4- Modify Specific Setting: Find Hardware-enforced stack protection in the list, click Edit, set it to Override system settings, turn it On, and select Audit only. This change allows Chrome to run while merely logging any potential conflicts.

Temporary Antivirus Disablement (Caution): For thorough testing, you may also temporarily disable Real-time protection within Microsoft Defender Antivirus. Reactivate this immediately after testing to maintain your system’s security posture.
4. A Clean Slate: Complete Reinstallation of Google Chrome
A corrupted Chrome installation or user data that survived previous attempts to uninstall can often lead to persistent crashing. A complete, clean reinstallation ensures all problematic files are removed before a fresh version is deployed.
Your Action Plan:
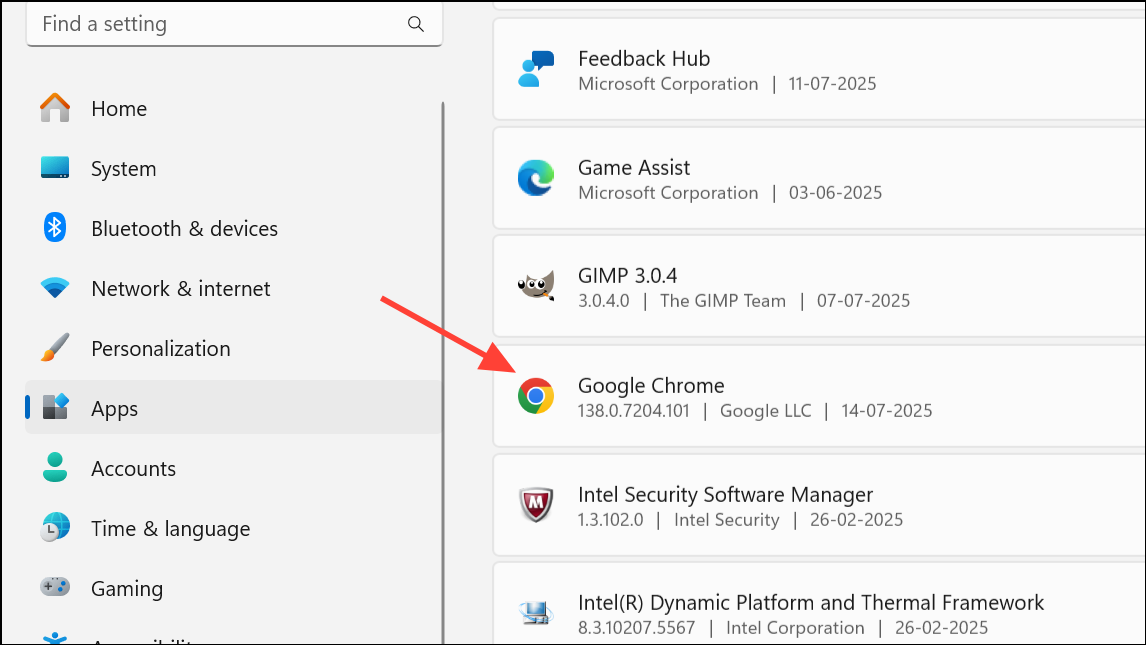
1- Uninstall Chrome: Press Windows key + I to open Settings. Go to Apps > Installed apps (or Apps & features on older versions) and find “Google Chrome” in the list.
2- Click Uninstall.

3- Delete Browsing Data: When prompted during the uninstall process, ensure you check the box to delete browsing data. This crucial step removes any potentially corrupted user profiles or settings.
4- Restart Your System: Reboot your computer to clear any lingering processes or temporary files.
Download and Reinstall: Download the latest Chrome installer directly from the official Google Chrome website and run the installer. This will create a brand-new, clean profile.
5. Optimizing Performance: Disabling Hardware Acceleration and Extensions
If Chrome manages to launch, even briefly, internal settings like hardware acceleration or problematic extensions can cause immediate instability. Disabling these can often stabilize the browser.
Your Action Plan:
1- Disable Hardware Acceleration: If Chrome opens for a moment, quickly click the three-dot menu (top-right) > Settings > System. Toggle off Use graphics acceleration when available. Restart Chrome. Conflicts between updated Windows drivers and Chrome’s rendering engine are often resolved this way.

2- Disable Extensions: Navigate to the three-dot menu > More tools > Extensions. Toggle off all extensions. Restart Chrome. If stability returns, re-enable your extensions one by one, restarting Chrome after each, to pinpoint the problematic one.
6. Staying Updated: Checking for Further Windows Updates
Microsoft often releases follow-up patches to address compatibility issues introduced by earlier updates. Ensuring your Windows 11 system is completely up to date can surprisingly resolve the problem.
Your Action Plan:
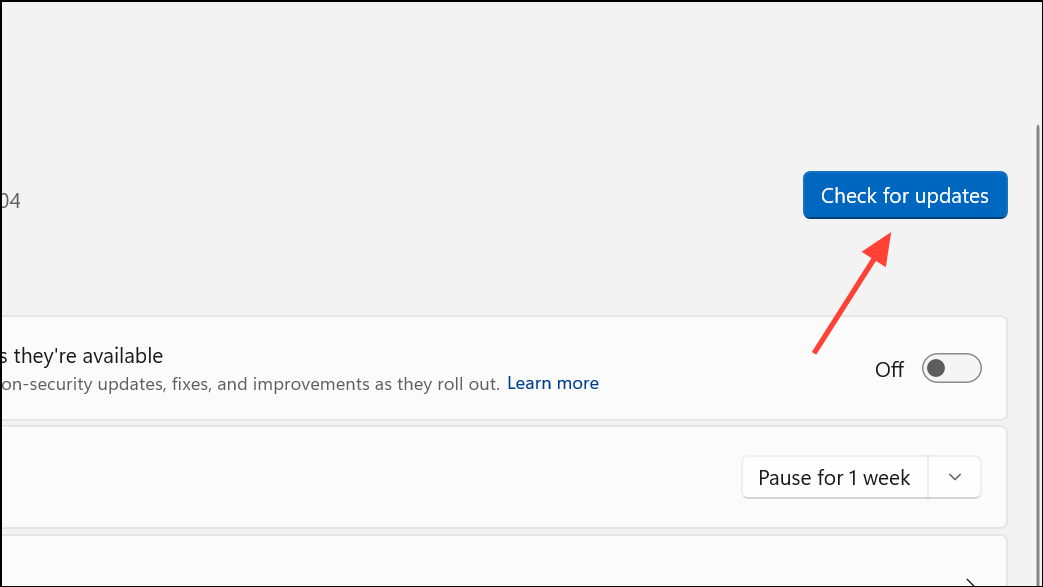
1- Check for Windows Updates: Press Windows key + I to open Settings. Go to Windows Update and click Check for updates. Install any pending updates, paying close attention to cumulative patches or .NET Framework updates.
2- Reboot: Restart your computer after installing all updates.
7. Securing Your System: Malware Scan and Antivirus Review
While less common, malware or unwanted programs can interfere with browser functionality, causing crashes. Similarly, an overprotective antivirus program might inadvertently block Chrome.
Your Action Plan:
- Run a Full Malware Scan: Utilize Windows Defender (built-in) or a trusted third-party antivirus solution to perform a comprehensive scan of your system.
- Review Antivirus Settings: If you use a third-party antivirus, check its quarantine or block lists. Ensure Chrome is not being prevented from running, and if necessary, add it as an allowed or trusted application.
Conclusion:
The sudden refusal of Google Chrome to launch after a Windows 11 update like KB5037591 can be incredibly disruptive, but it’s a fixable problem. By methodically working through these targeted troubleshooting steps—from isolating issues with new user profiles to reconfiguring security settings and ensuring clean installations—you can effectively pinpoint and resolve the underlying conflicts. While it might require a bit of patience, restoring Chrome’s reliability is well worth the effort. In the rare event that persistent crashes continue, utilizing Microsoft Edge or another browser as a temporary alternative can help maintain productivity while you await further official updates or community-driven solutions. With these strategies, you’re well-equipped to navigate the complexities of software updates and keep your digital life running smoothly.
And if you'd like to go a step further in supporting us, you can treat us to a virtual coffee ☕️. Thank you for your support ❤️!

We do not support or promote any form of piracy, copyright infringement, or illegal use of software, video content, or digital resources.
Any mention of third-party sites, tools, or platforms is purely for informational purposes. It is the responsibility of each reader to comply with the laws in their country, as well as the terms of use of the services mentioned.
We strongly encourage the use of legal, open-source, or official solutions in a responsible manner.
Comments