
In today’s fast-paced digital world, extracting text from images quickly and efficiently can save time and effort. Whether you’re copying text from a screenshot, PDF, or any on-screen content, Windows 11’s Snipping Tool now includes built-in Optical Character Recognition (OCR) to make this process seamless.
This guide will walk you through step-by-step instructions on how to use the Snipping Tool for text extraction, along with keyboard shortcuts, privacy features, and alternative methods for older Windows versions.
Step-by-Step Guide to Extracting Text with the Snipping Tool
Step 1: Open the Snipping Tool
There are multiple ways to launch the Snipping Tool in Windows 11:
- Keyboard Shortcut: Press
Win + Shift + Sfor a quick snip. - Latest Update Shortcut: Press
Shift + Alt + Sto open the capture bar, which includes text extraction. - Start Menu: Search for “Snipping Tool” and open it directly.
Step 2: Capture the Screen Area with Text
- The screen will dim, allowing you to select a rectangular, freeform, or full-window snip.
- Drag your cursor over the area containing the text you want to extract.
Step 3: Click the “Text Actions” Button
- After capturing, the image opens in the Snipping Tool editor.
- Click the “Text actions” button (usually a text icon or labeled option) to activate OCR.

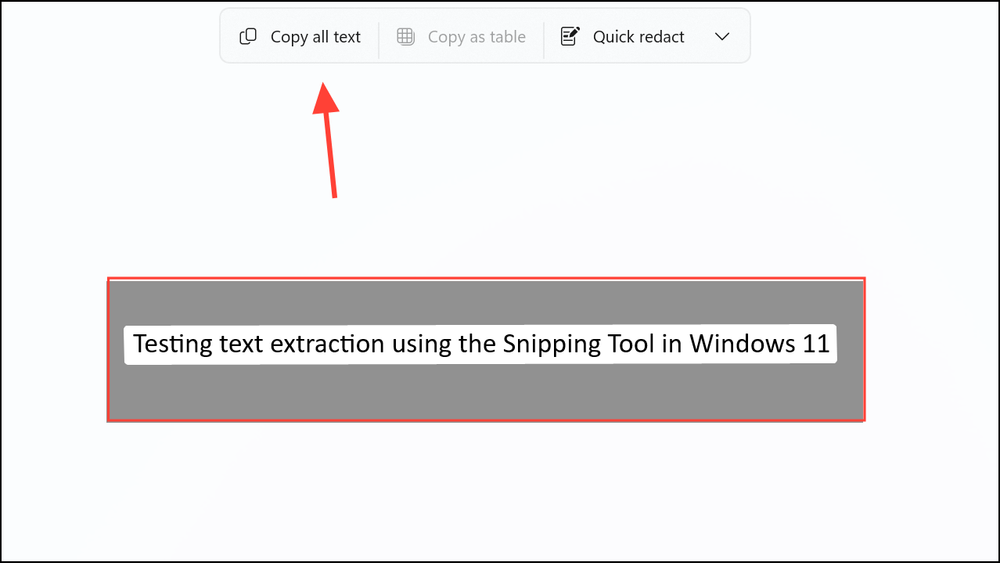
Step 4: Select & Copy the Extracted Text
- The tool highlights detected text as selectable overlays.
- Manually select specific text or click “Copy all text” to grab everything at once.
- For cleaner formatting, use the “Remove line breaks” option (found under the three-dot menu).
Step 5: Paste the Text Anywhere
- Press
Ctrl + Vin your preferred app (Word, Notepad, email, browser, etc.). - This eliminates manual retyping, especially useful for long or complex content.
Step 6: Use Quick Redact for Privacy (Optional)
- Before copying, use the “Quick redact” feature to hide sensitive info (emails, phone numbers, etc.).
- All processing happens locally, ensuring no data is sent to external servers.

Step 7: Generate a QR Code (Bonus Feature)
- Some versions allow converting extracted text into a QR code for easy sharing.
- Look for this option in the capture bar or toolbar.
New Keyboard Shortcut (Latest Updates)
Microsoft is testing Shift + Alt + T to directly launch text extraction without needing a screenshot first. Check if your Snipping Tool version supports this.
Alternative Text Extraction Methods
1. PowerToys Text Extractor (For Older Windows)
- Press
Win + Shift + Tto instantly copy text from any screen area. - Note: Microsoft may phase this out in favor of the Snipping Tool.

2. Third-Party Tools (Limited OCR Support)
- ShareX, Greenshot, Lightshot – Great for screenshots but lack built-in OCR.
- Adobe Acrobat / Dedicated OCR Software – More advanced but requires installation.
Conclusion
Windows 11’s Snipping Tool has evolved into a powerful OCR tool, making text extraction from images faster than ever. With features like Quick Redact, QR code generation, and keyboard shortcuts, it’s now a must-use utility for productivity.
For users on older Windows versions, PowerToys remains a solid alternative, while third-party tools offer flexibility for different needs.
Try these methods today and streamline your workflow!
And if you'd like to go a step further in supporting us, you can treat us to a virtual coffee ☕️. Thank you for your support ❤️!

We do not support or promote any form of piracy, copyright infringement, or illegal use of software, video content, or digital resources.
Any mention of third-party sites, tools, or platforms is purely for informational purposes. It is the responsibility of each reader to comply with the laws in their country, as well as the terms of use of the services mentioned.
We strongly encourage the use of legal, open-source, or official solutions in a responsible manner.
Comments