
Experiencing frustrating black screens when scrolling, switching windows, or even just moving your mouse in Windows 11? These intermittent display failures can severely impact productivity and make using your computer a chore. But don’t worry, you’re not alone! This comprehensive guide will walk you through proven solutions to banish those annoying blackouts and restore smooth, seamless visuals to your Windows 11 experience.
Meta Description: Annoyed by black screens in Windows 11? Learn how to fix display problems with easy troubleshooting steps, including driver updates and settings adjustments.
1. Graphics Driver Power-Up: Update and Reinstall
Your graphics card is the heart of your display, and its drivers are crucial for smooth operation. Outdated or corrupted drivers are a primary culprit behind black screen issues.
Step 1: Device Manager Access. Press the Windows key + R, type devmgmt.msc, and hit Enter. This opens the Device Manager, your central hub for managing hardware drivers.

Step 2: Driver Update Initiation. Expand the “Display adapters” section, right-click on your graphics card (e.g., NVIDIA GeForce RTX 3080), and select “Update driver.”
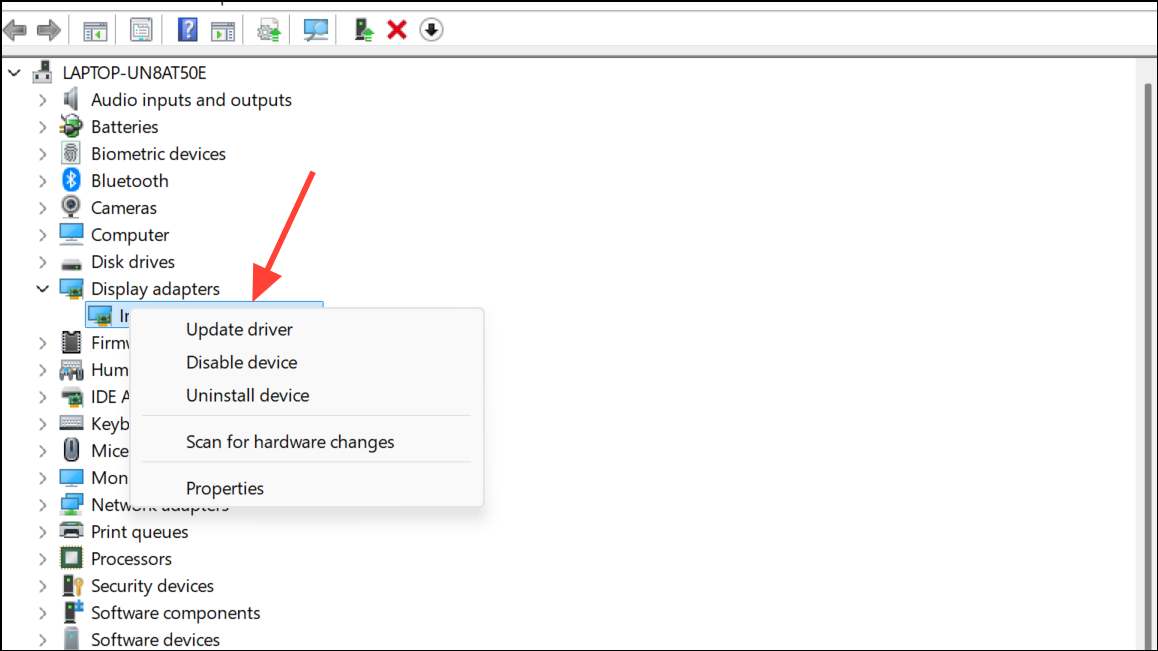
Step 3: Automatic Driver Search. Choose “Search automatically for drivers.” Windows will then hunt for and install the latest driver version. After it finishes, a system restart is a must.

Step 4: Driver Rollback Rescue. If the update causes new problems, roll back to a previous driver. Right-click your graphics card in Device Manager again, select “Update driver,” then choose “Browse my computer for drivers” and “Let me pick from a list of available drivers on my computer.” Select an older driver from the list and click Next. This can fix issues caused by recently introduced driver incompatibilities.

2. Monitor Driver Magic: Installation and Updates
High-performance monitors, especially those with high refresh rates or HDR capabilities, often require their own dedicated drivers.
Step 1: Driver Download Delight. Visit your monitor manufacturer’s support website and download the latest driver specific to your monitor model.
Step 2: Driver Installation. Run the downloaded installer. Take note of the folder where the driver files are extracted. If Device Manager doesn’t automatically recognize the updated monitor, move to the next step.
Step 3: Manual Device Manager Update. Open Device Manager, expand “Monitors,” right-click your display, and select “Update driver.” Choose “Browse my computer for drivers” and navigate to the folder where you extracted the driver files. This ensures your monitor is correctly recognized by Windows.
3. Graphics Card Control Panel: Fine-Tuning Settings
Your graphics card’s control panel offers settings that can greatly impact display behavior. Tailoring these settings can prevent black screen issues.
Step 1: G-Sync Configuration. Open the NVIDIA Control Panel (or the equivalent for your GPU). Navigate to “Set up G-Sync” and enable it for full-screen mode, especially if you use a G-Sync-compatible monitor. Some users report that incorrect G-Sync settings trigger black screens.
Step 2: Scaling and Position Adjustment. Go to “Adjust desktop size and position,” select your main display, and set “Scaling mode” to “Full-screen.” Under “Perform scaling on,” select “GPU” and check the box for “Override the scaling mode set by games and programs.” Choose your native resolution and preferred refresh rate to ensure optimal display management.
Step 3: Power Management Optimization. In “Manage 3D settings,” set “Power management mode” to “Prefer maximum performance.” This prevents the GPU from throttling down, which can cause instability and those dreaded black screens during less intensive tasks.
4. Hardware Check: Connections and Cables
Loose connections or faulty cables can be a silent source of display problems.
Step 1: Cable Inspection. Carefully inspect all display cables (HDMI, DisplayPort) ensuring they’re securely plugged into both your monitor and graphics card.
Step 2: Cable Replacement. If you suspect a cable issue, replace it with a certified, high-quality cable, especially if using high refresh rates or HDR. Defective cables may struggle to transmit data consistently, leading to black screens.
5. Display and Power Settings: Refine for Stability
Fine-tuning your display and power settings can also contribute to eliminating black screen interruptions.
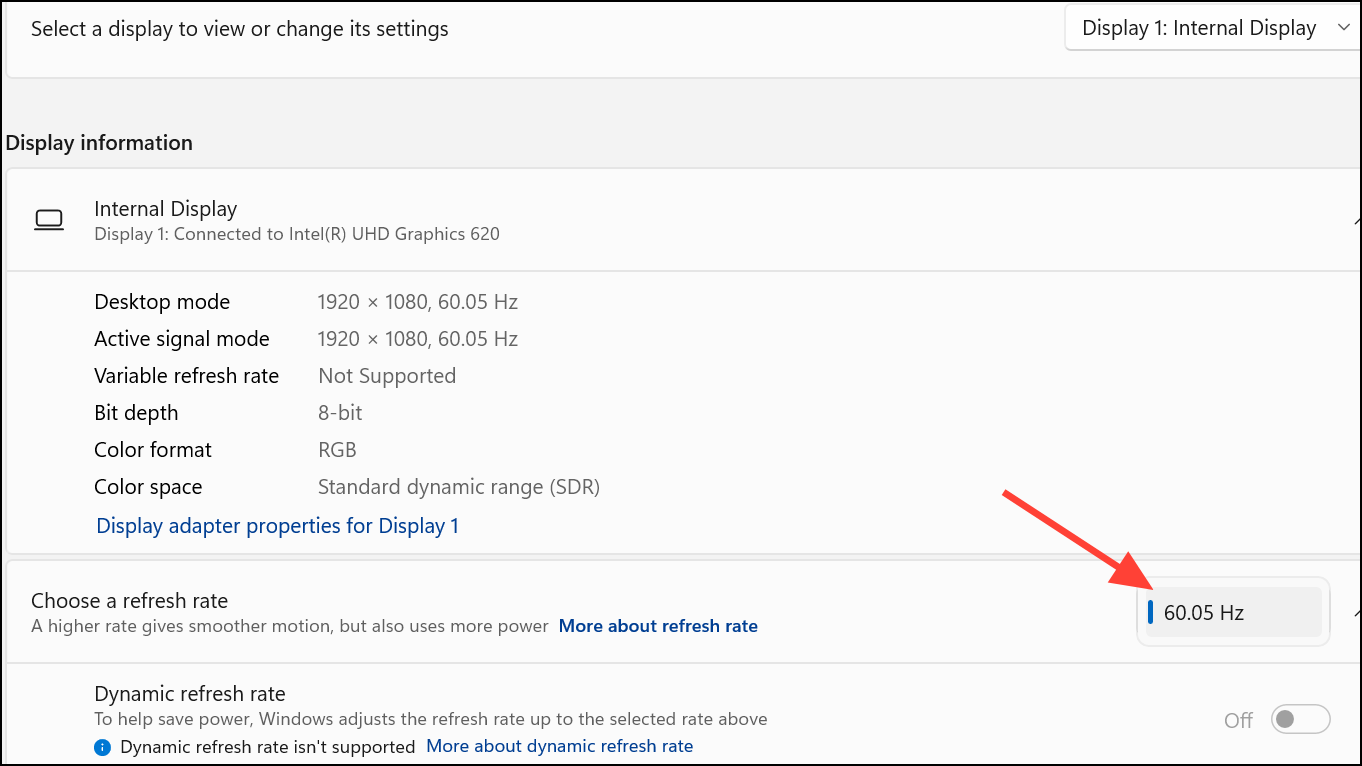
Step 1: Refresh Rate Adjustment. Ensure your display refresh rate is set to a stable value supported by both your monitor and graphics card. Sometimes, lowering the refresh rate (e.g., from 165Hz to 120Hz) resolves persistent black screen issues.
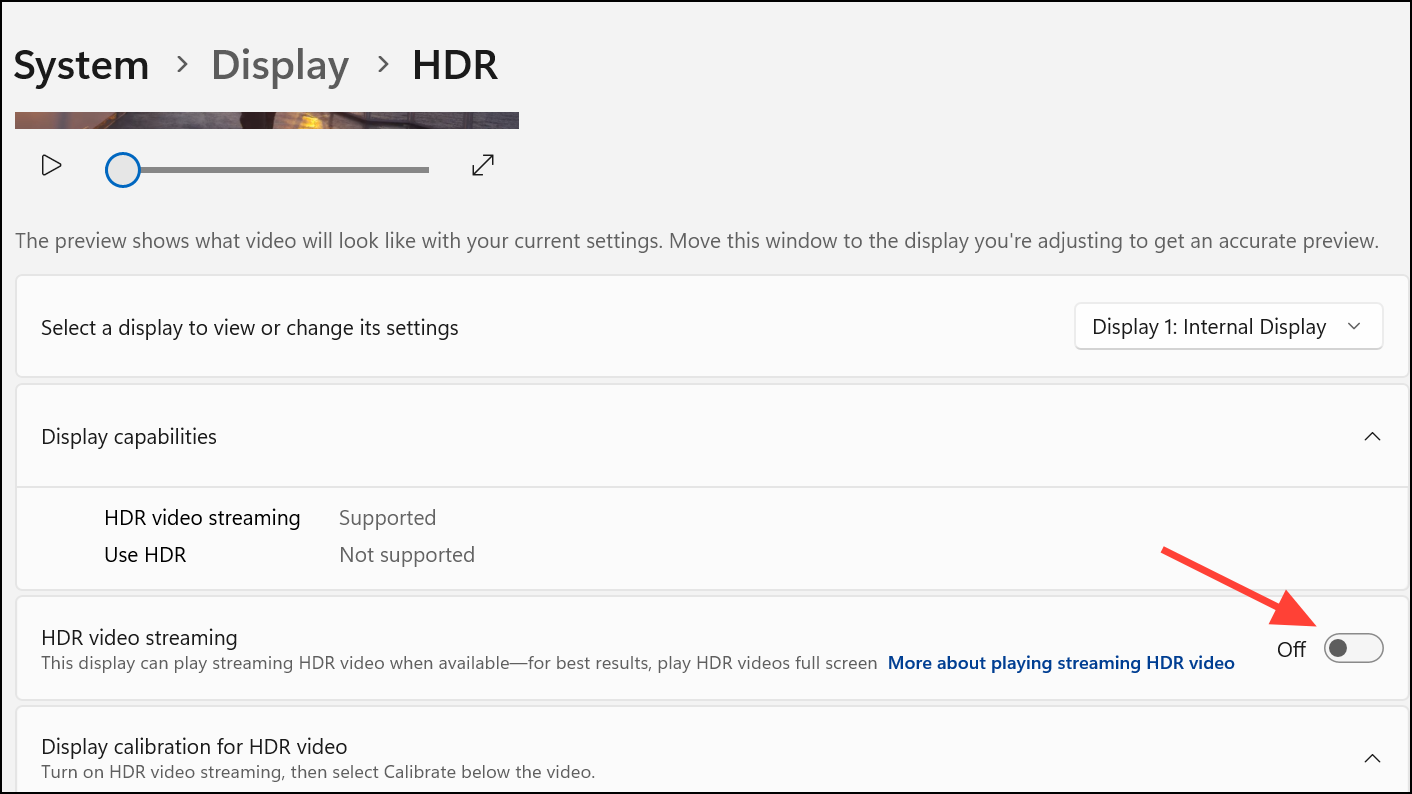
Step 2: Feature Experimentation. Try disabling HDR or G-Sync if the problem only occurs when these features are enabled. Running games or applications in borderless windowed mode can also help prevent black screens during transitions.
Step 3: Power Plan Selection. Go to Power Options in Windows and choose a “High Performance” power plan. This ensures your GPU and system components remain active and responsive, which can reduce display interruptions.
6. Additional Troubleshooting Arsenal
When the above solutions do not work, these steps can provide more options:
- Monitor Swap. Test with a different monitor to determine if the issue lies with your current display.
- Overheating Check. Check for overheating in monitor components or connector boxes. Consider cooling solutions, such as small fans, to stabilize performance.
- Manufacturer Contact. Contact your hardware manufacturer’s support for further assistance if the issue persists.
Conclusion:
Confronting black screen issues in Windows 11 can be frustrating, but by systematically applying these troubleshooting steps, you can identify and resolve the root cause. From driver updates to hardware checks and settings adjustments, you have the tools to restore a stable and enjoyable display experience. By keeping your system drivers up-to-date and using quality cables, you can ensure a reliable and visually pleasing Windows 11 experience. So, take control, banish those black screens, and enjoy a smooth and uninterrupted computing journey!
And if you'd like to go a step further in supporting us, you can treat us to a virtual coffee ☕️. Thank you for your support ❤️!

We do not support or promote any form of piracy, copyright infringement, or illegal use of software, video content, or digital resources.
Any mention of third-party sites, tools, or platforms is purely for informational purposes. It is the responsibility of each reader to comply with the laws in their country, as well as the terms of use of the services mentioned.
We strongly encourage the use of legal, open-source, or official solutions in a responsible manner.
Comments