
Windows 11, with its robust security features, relies heavily on Access Control Entries (ACEs) to manage file and folder permissions. These entries dictate who can access, modify, or delete specific resources. However, when these ACEs become corrupted, a frustrating error message – “This access control entry is corrupt. Delete it and create a new one” – can appear, effectively locking you out of your own data. This guide provides a detailed, step-by-step approach to diagnosing and resolving this common Windows 11 issue, ensuring you regain control over your files and folders.
This error typically surfaces when attempting to adjust permissions within the Advanced Security Settings. It can manifest due to various reasons, including damaged system files, unclear ownership of files and folders, or interference from Universal Windows Platform (UWP) applications. Restoring access requires a methodical approach, beginning with simple solutions and progressing to more advanced troubleshooting techniques. Let’s delve into the methods to eliminate this error and restore your system’s functionality.

1. Shutting Down Interfering UWP Apps
Sometimes, running UWP apps can inadvertently lock files, preventing permission changes. Closing these applications is often the first and simplest step to resolve the corrupt ACE error.
Step 1: Access the Task Manager: Press Ctrl + Shift + Esc to launch the Task Manager.
Step 2: Identify and Close UWP Apps: Navigate to the “Processes” tab. Look for applications like those downloaded from the Microsoft Store or pre-installed apps (e.g., pre-installed games). Under both “Apps” and “Background processes”, locate potentially conflicting UWP apps.
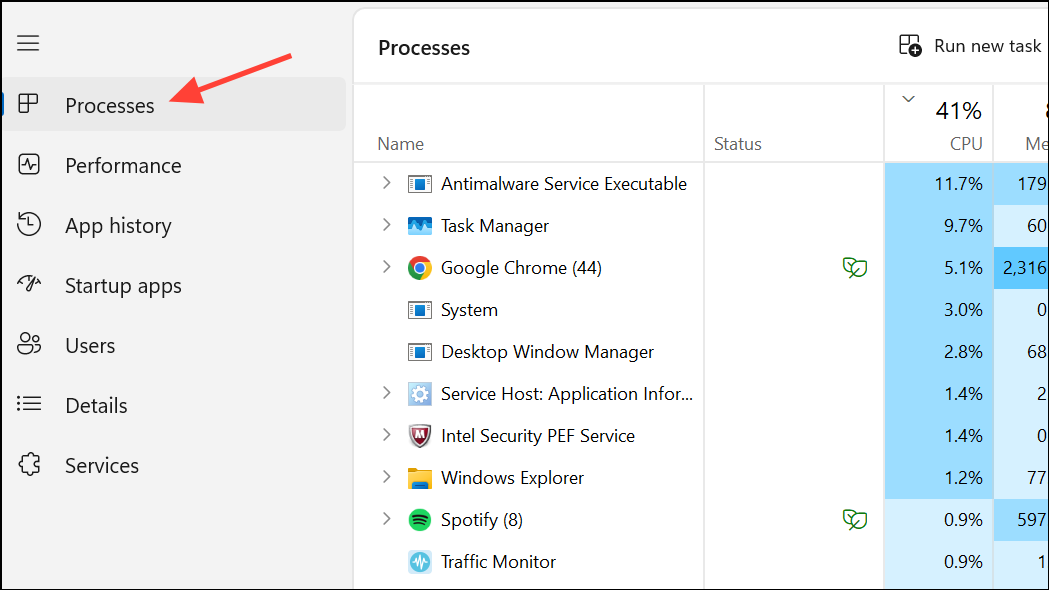
Step 3: End Task: Right-click each non-essential UWP app and select “End task”. Repeat for all unnecessary background applications.
After closing these apps, attempt to modify the permissions or ownership again. If the error persists, proceed to the next step.
2. Reclaiming Ownership of the Affected Files or Folders
If the file or folder’s ownership is undefined or incorrectly assigned, it can lead to the ACE corruption error. Taking ownership often resolves the issue by allowing you to regain control.
Step 1: Access Properties: Right-click the problematic file or folder and select “Properties.”
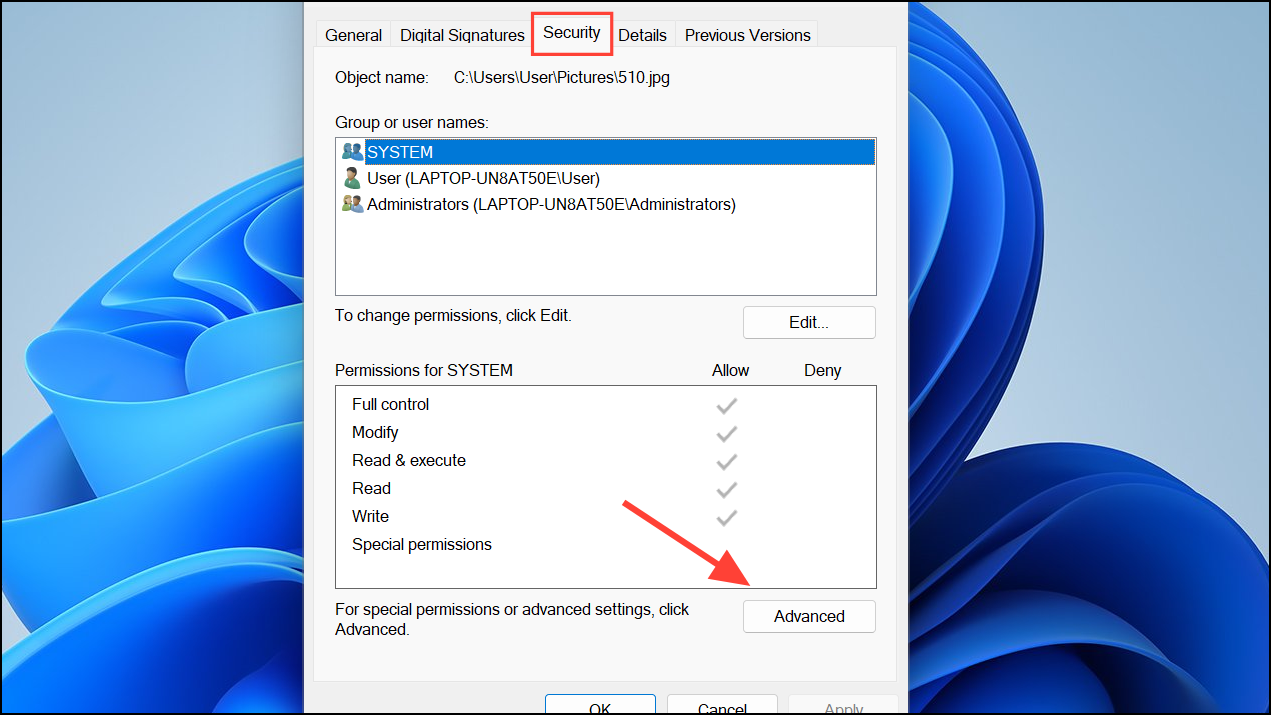
Step 2: Navigate to Advanced Security Settings: Go to the “Security” tab and click “Advanced” to open Advanced Security Settings.
Step 3: Change the Owner: In the “Owner” section at the top, click “Change.” Enter “Users” (without quotes) in the “Enter the object name to select” field and click “Check Names” to validate the entry. Click “OK” to confirm.

Step 4: Apply Changes to Subcontainers: Check the box for “Replace owner on subcontainers and objects” to apply ownership changes recursively to all items within the folder. Click “Apply” and then “OK.”
Step 5: Adjust Permissions: Reopen the Properties window, return to “Security” > “Advanced” and adjust permissions as necessary, potentially assigning “Full Control” to your user account. Click “Apply” and “OK” to save the changes.
Test to determine whether you can now successfully access or modify the file or folder. If the problem persists, continue with the troubleshooting steps below.
3. Utilizing System File Checker (SFC) and DISM
Corrupted system files are a primary cause of access control issues. Windows includes built-in tools, the System File Checker (SFC) and the Deployment Image Servicing and Management Tool (DISM), to detect and repair these corrupted files.
Step 1: Open Command Prompt as Administrator: Search for “cmd” in the Start menu, right-click “Command Prompt” and select “Run as administrator.”

Step 2: Run SFC Scan: In the Command Prompt window, type sfc /scannow and press Enter. Allow the scan to complete fully, which may take some time.
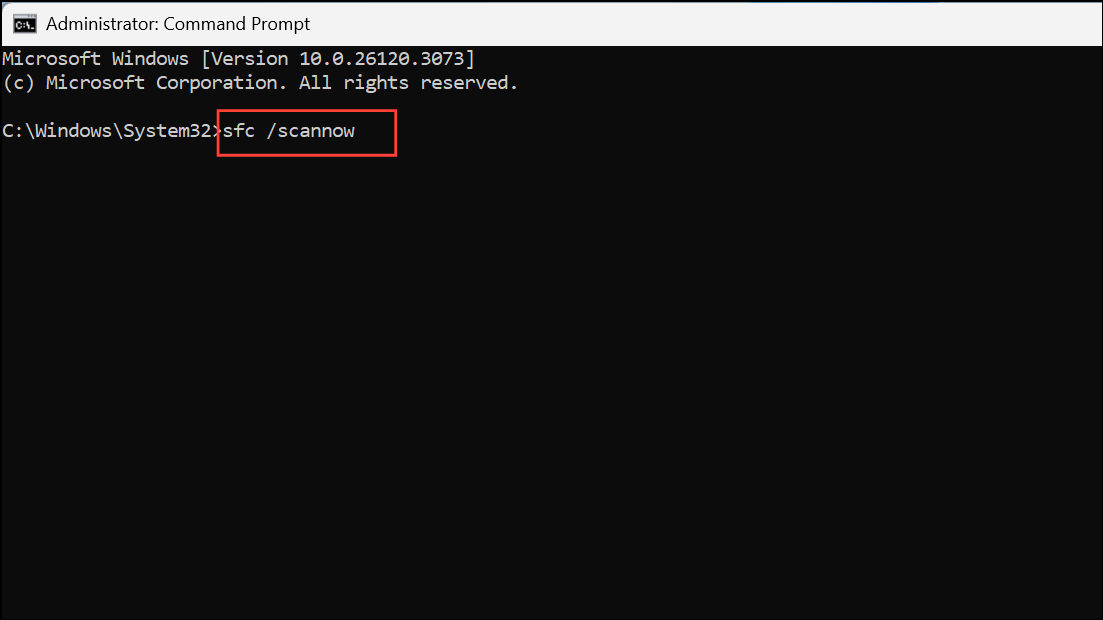
Step 3: Restart the Computer: After the SFC scan finishes, restart your computer if SFC reports that it has fixed any issues.
Step 4: Run DISM Commands: If the error persists after the SFC scan, return to the same elevated Command Prompt window and run these commands individually, pressing Enter after each:
DISM /Online /Cleanup-Image /CheckHealth
DISM /Online /Cleanup-Image /ScanHealth
DISM /Online /Cleanup-Image /RestoreHealth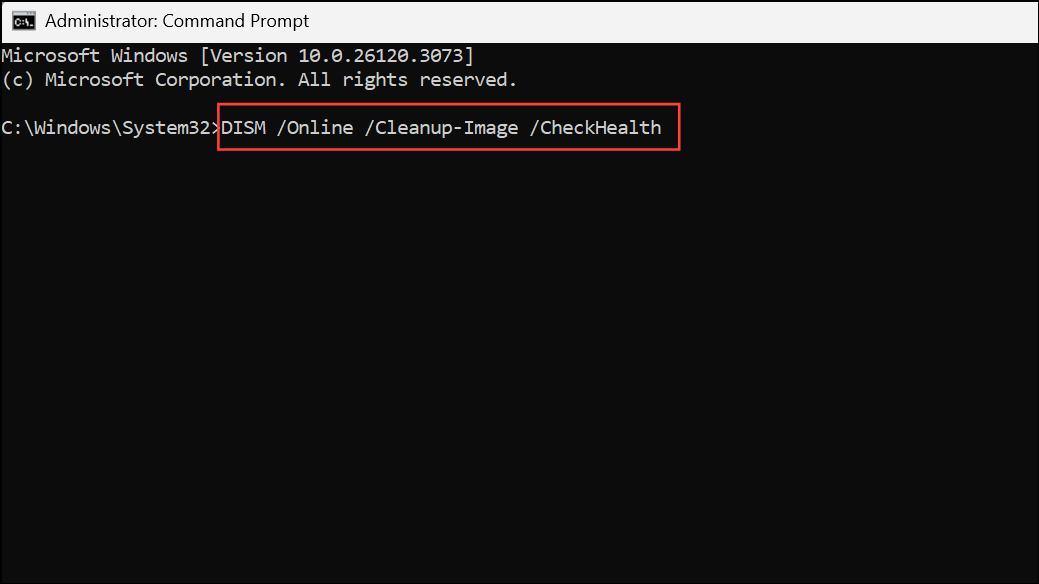
These DISM commands utilize Windows Update to replace damaged files. Ensure your internet connection is stable during this process. Once the DISM process completes, restart your computer and reattempt access to the file or folder.
4. Manually Resetting Permissions or Restoring ACLs
For more persistent issues, manually resetting permissions or restoring Access Control Lists (ACLs) may be necessary. This should be approached with caution, especially for system folders.
Step 1: Access Advanced Security Settings: Right-click the problematic file or folder, select “Properties,” go to “Security,” and then click “Advanced.”
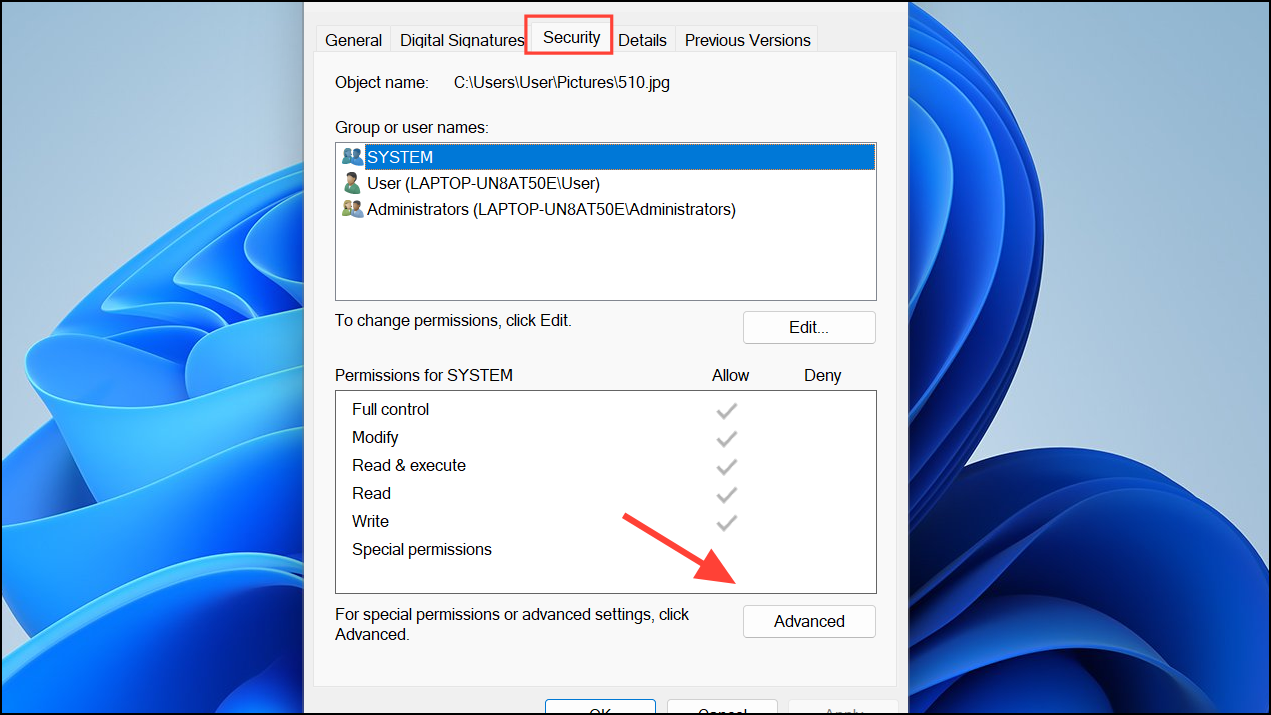
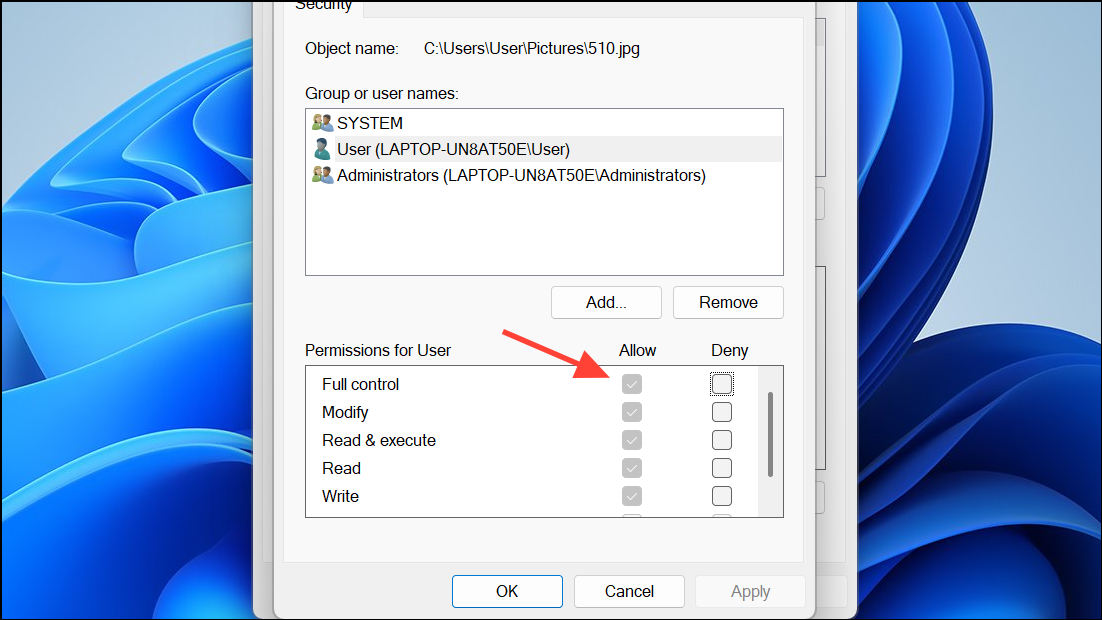
Step 2: Modify Permissions: Remove any user or group entries that are marked as corrupted or unrecognized. Re-add your user account or the “Users” group, assigning the necessary permissions.
Step 3: Reset Permissions (Advanced): If you suspect widespread permission corruption, consider resetting permissions to their default state using command-line utilities like icacls. For example, to reset permissions on a folder and its contents, use this command, replacing the placeholder with the actual path: icacls "C:\Path\To\Folder" /reset /T /C /Q
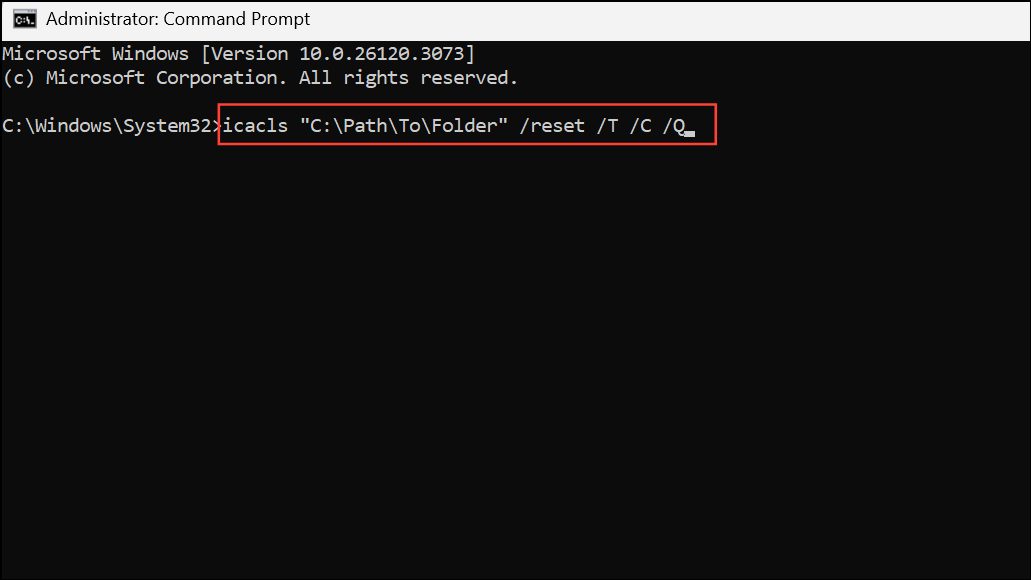
This command resets all permissions recursively. Back up your important data before executing this command.
5. Malware and Disk Error Checks
Malware and disk errors can also corrupt ACEs. Run thorough system scans to identify and eliminate potential threats.
- Malware Scan: Perform a full system scan using Windows Security (Defender) or your preferred antivirus program to identify and remove any malware.
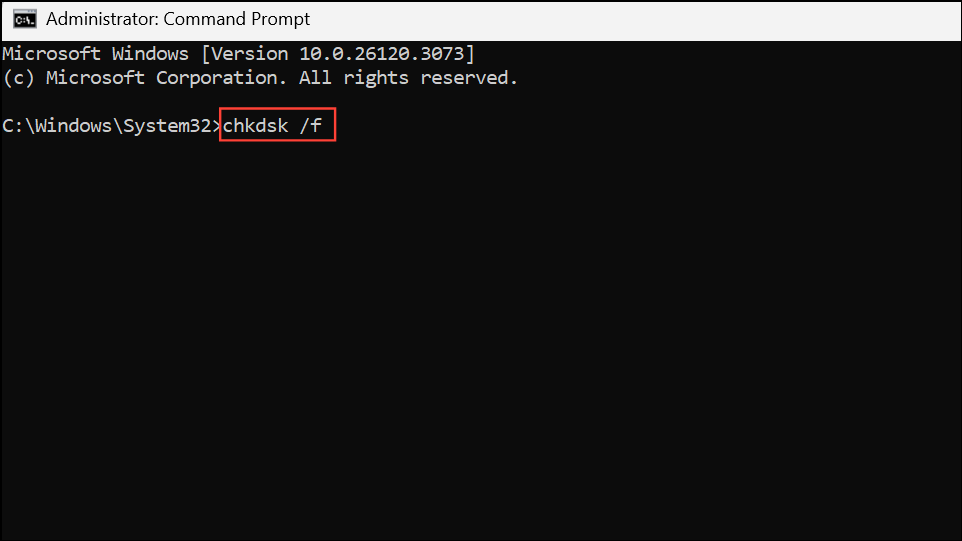
- Disk Error Check: Open Command Prompt as administrator and run
chkdsk /f. Follow the on-screen prompts to schedule a check for the next system restart if required. Resolve any disk errors found before reattempting permission changes.
6. Employing a Clean Boot or System Restore
If the preceding steps do not fully resolve the issue, consider these advanced troubleshooting options.
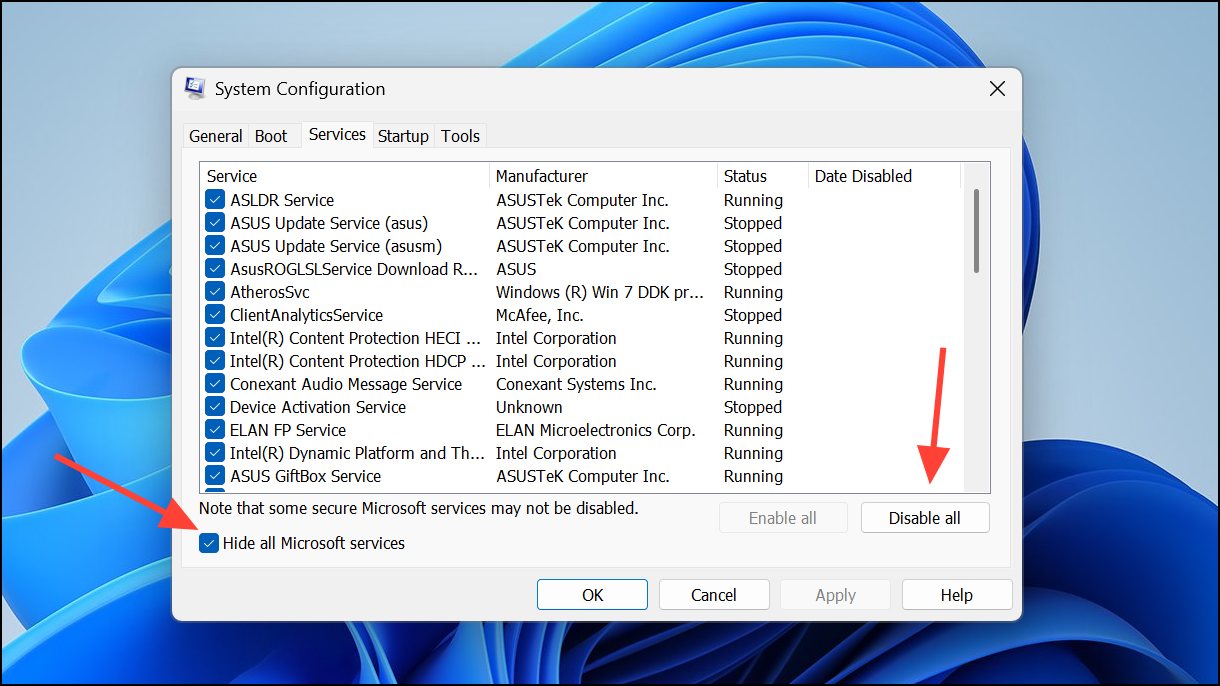
Clean Boot: A clean boot loads Windows with a minimal set of drivers and startup programs, which can help you identify if third-party software or drivers are causing the issue. Open “msconfig” from the Run dialog (Windows Key + R), disable non-Microsoft services in the Services tab, and then restart your computer. If the error is resolved, re-enable the services gradually to identify the culprit.
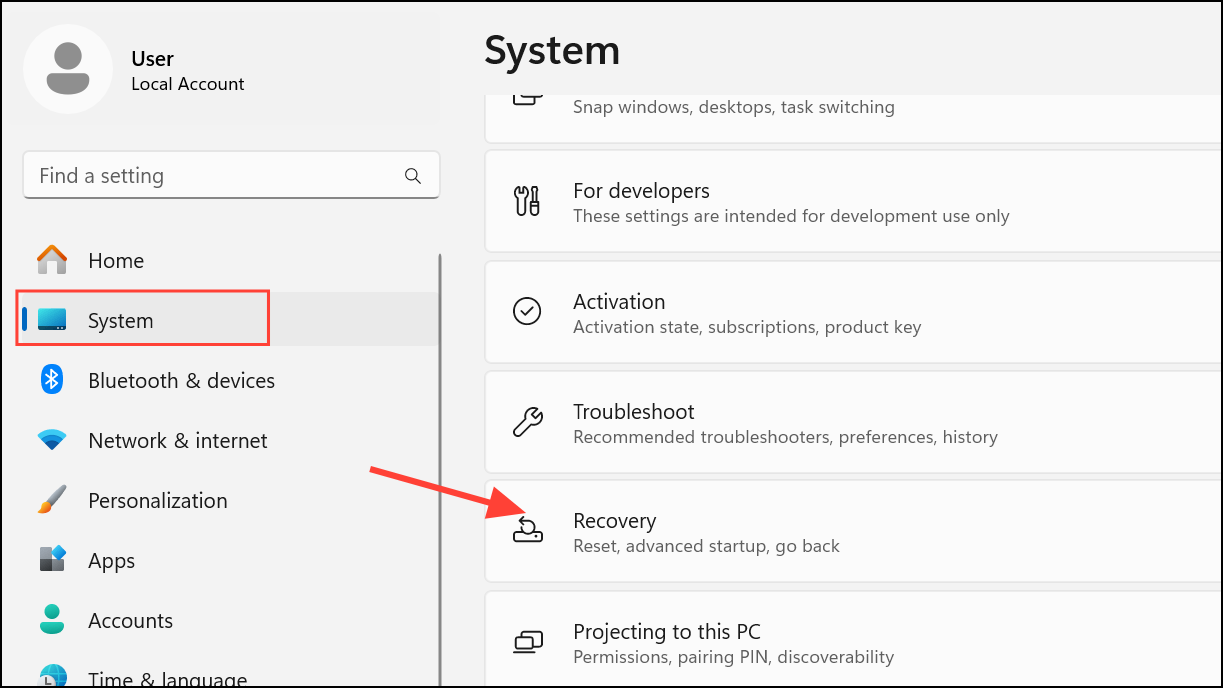
System Restore: System Restore can revert your PC to a prior state with correct permissions, if you have restore points enabled. Access System Restore via “Settings” > “System” > “Recovery” or through the Windows Recovery Environment.
Conclusion
The “This access control entry is corrupt” error in Windows 11 can be a source of significant frustration. By systematically applying these methods, from closing interfering applications to more advanced file repair techniques, you can effectively diagnose and resolve the issue. Employing regular system maintenance practices, backing up essential data, and being cautious when altering permissions, will prevent future issues and keep your Windows 11 system running smoothly. With these solutions, you can regain control of your files and folders, ensuring seamless access and efficient data management.
And if you'd like to go a step further in supporting us, you can treat us to a virtual coffee ☕️. Thank you for your support ❤️!

We do not support or promote any form of piracy, copyright infringement, or illegal use of software, video content, or digital resources.
Any mention of third-party sites, tools, or platforms is purely for informational purposes. It is the responsibility of each reader to comply with the laws in their country, as well as the terms of use of the services mentioned.
We strongly encourage the use of legal, open-source, or official solutions in a responsible manner.
Comments