

With the release of macOS 26 Tahoe, some users have noticed a new visual effect called Liquid Glass. While it adds a translucent, glossy look to windows and menus, not everyone likes it. In some cases, users report performance drops or visual distractions.
If you prefer a simpler, more traditional interface—or just want to disable this feature—this guide explains how to turn off Liquid Glass safely and easily.
Step 1: Check if Liquid Glass Is Enabled
- Open Terminal (you’ll find it under Applications > Utilities).
- Run the following command:
defaults read -g com.apple.SwiftUI.DisableSolarium
- If the command returns
1orTRUE, Liquid Glass is already disabled. - If it returns
0,FALSE, or an error saying “not found,” Liquid Glass is still active.
Step 2: Disable Liquid Glass
To disable the Liquid Glass effect system-wide, run this command in Terminal:
defaults write -g com.apple.SwiftUI.DisableSolarium -bool YES
Then restart your Mac for the change to take effect.
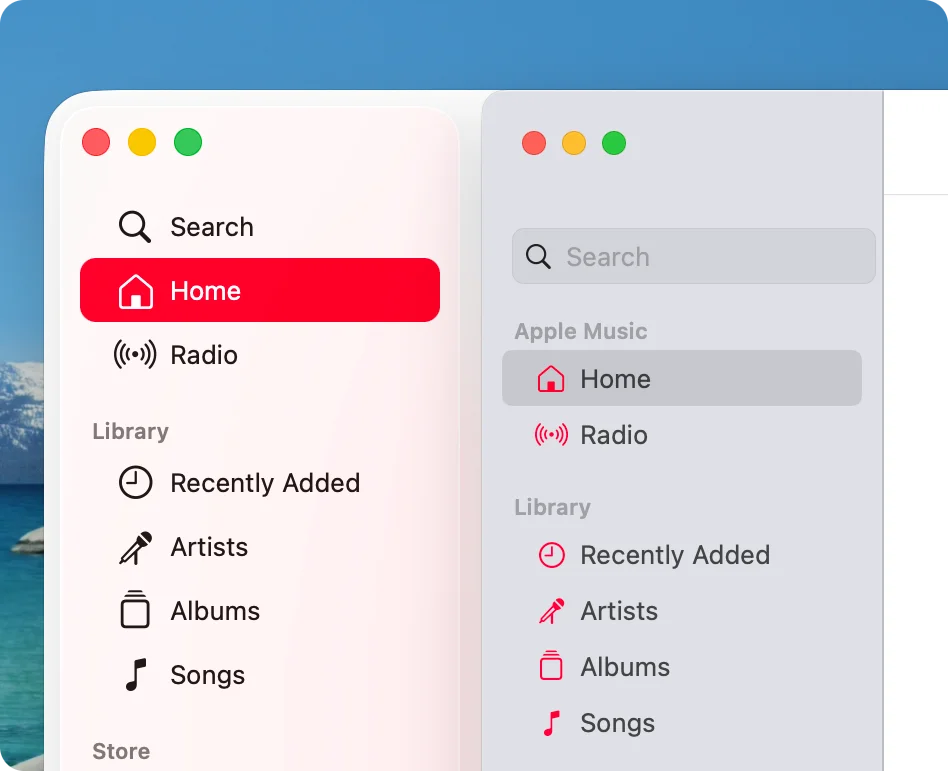
After rebooting, the glossy glass-like visuals should disappear, restoring a more classic macOS appearance.
Step 3: Re-enable Liquid Glass (Optional)
If you change your mind and want the effect back, simply run:
defaults write -g com.apple.SwiftUI.DisableSolarium -bool NO
Restart your Mac again to restore the default look.
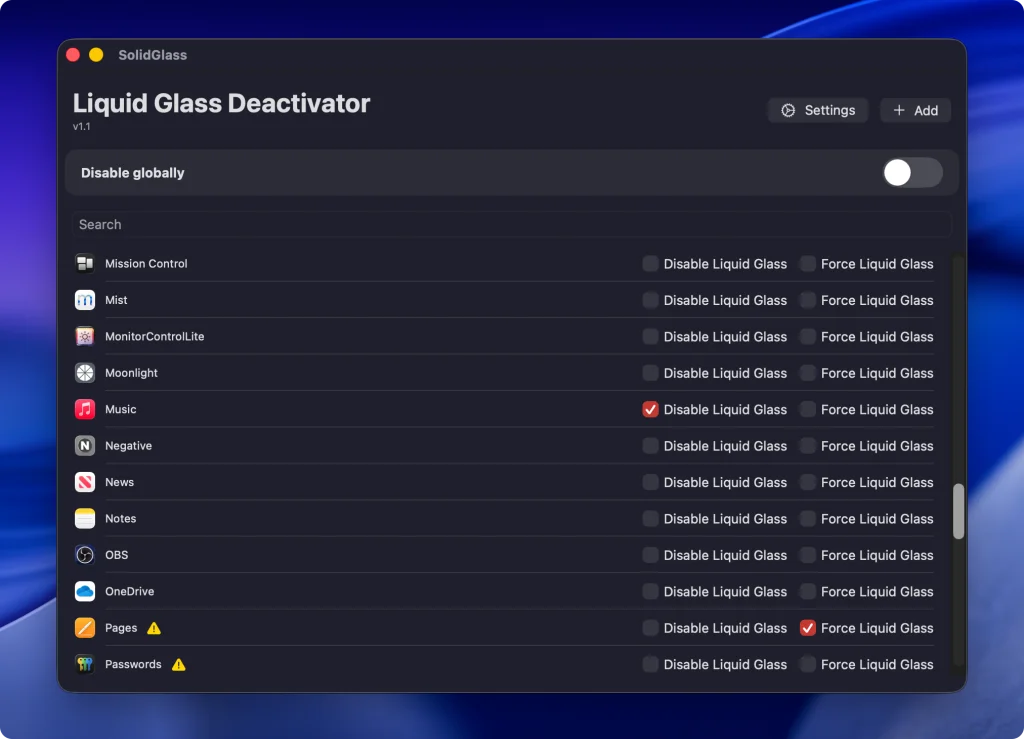
And for those who want to go even further, there’s SolidGlass, a small free and open-source utility that lets you disable Liquid Glass system-wide.
What does SolidGlass do?
SolidGlass runs terminal commands to disable the Solid Glass effect for specific apps or system-wide. While you could technically do this yourself through the terminal, SolidGlass simplifies the process with an intuitive interface and a collection of practical, easy-to-use features.
Conclusion
Disabling Liquid Glass in macOS 26 Tahoe is quick and reversible.
This tweak only changes the visual layer—it doesn’t affect performance, system integrity, or app compatibility.
As always, make sure you save your work before making system-level changes, and restart your Mac afterward to ensure everything applies correctly.
Add Tech2Geek as a preferred source on Google to see more of our latest tech articles.
Support Tech2Geek ❤️
Did this guide help you? If Tech2Geek saves you time or helps you solve a problem,
consider buying me a coffee. ☕
Your support helps keep Tech2Geek independent and free.
Comments