

If you’ve ever saved hundreds of bookmarks and then struggled to find anything later, a traditional browser bookmark system probably isn’t enough.
Hoarder is an open-source, self-hosted bookmarking and knowledge-management application designed to keep your links, notes, and images in one place. It combines bookmarking with tags, lists, full-text search, browser extensions, and optional AI-powered organization.
The project has also evolved under the Karakeep name, so you may encounter both Hoarder and Karakeep when searching for the application, its documentation, or its repositories.
Unlike services that store your bookmarks on someone else’s infrastructure, self-hosting gives you control over where your data is stored. You can run the application on a home server, NAS, VPS, or another machine that supports Docker.
In this guide, I’ll show you how to install Hoarder/Karakeep with Docker Compose, configure its environment variables, access the web interface, and manage the installation afterward.
What Is Hoarder/Karakeep?
Karakeep is an open-source application for saving and organizing online content.
You can use it to save:
- Web pages and bookmarks
- Personal notes
- Images
- Articles and other online content
- Tags and categories
- Lists of related items
The application can automatically retrieve information from saved pages, including titles, descriptions, and preview images when the website allows it.
It also supports full-text search, making it much easier to find information inside your saved content instead of relying exclusively on bookmark titles.
For users who want more automation, AI features can be configured to help generate tags and organize saved content.
Why Use Hoarder Instead of Traditional Bookmarks?
Browser bookmarks are useful, but they aren’t really designed to function as a personal knowledge base.
With Hoarder, you can combine bookmarks with notes, images, tags, lists, and search.
For example, you could create lists such as:
- Linux Resources
- Windows Guides
- Research
- Programming
- AI Tools
- Recipes
- Travel
- Personal
You can then tag individual items and search across your saved content later.
This makes the application useful for researchers, developers, students, writers, and anyone who regularly saves large numbers of links.
Key Features of Hoarder/Karakeep
Here are some of the features that make it different from a basic bookmark manager:
- Save bookmarks, notes, and images
- Automatically retrieve webpage titles and descriptions
- Automatically fetch preview images when available
- Add manual tags
- Generate tags using AI
- Organize content into custom lists
- Search saved content using full-text search
- Archive, favorite, edit, or delete bookmarks
- Chrome browser extension
- Firefox browser extension
- Mobile applications
- Web-based interface
- Dark mode
- Self-hosting with Docker
The combination of bookmarking + search + tagging + notes is what makes it particularly useful as a personal knowledge-management tool.
Hoarder Browser Extensions
One of the easiest ways to save content is through a browser extension.
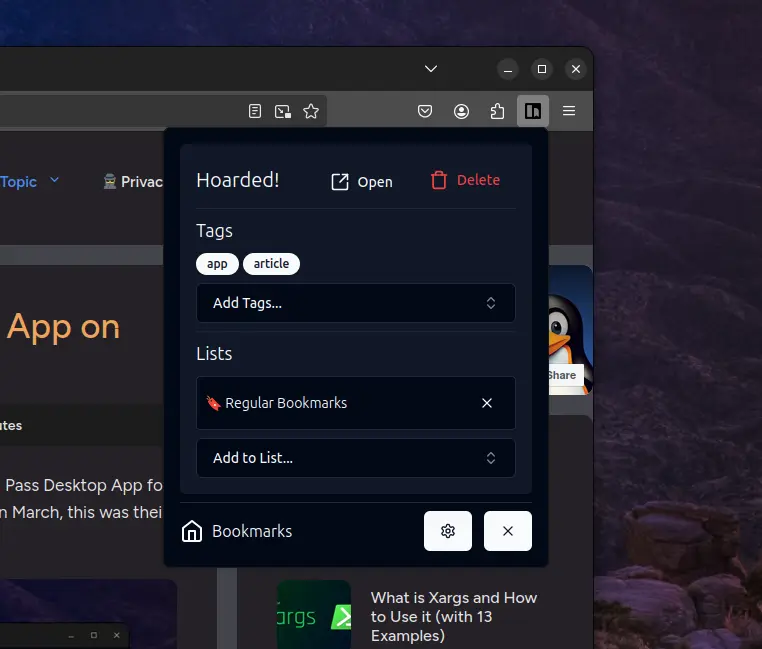
Hoarder/Karakeep provides browser extensions that let you save a webpage without opening the main dashboard.
The extension can be used to:
- Save the current webpage
- Add tags
- Add the bookmark to a list
- Manage saved content directly from the browser
This makes it practical for quickly collecting articles while browsing.
Hoarder/Karakeep browser extension for Chrome
Hoarder/Karakeep extension for Firefox
Mobile Apps
If you save links while using your phone, you can also access your self-hosted library through mobile applications.
The project provides mobile clients for iOS and Android, allowing you to save and access your content without having to open the desktop website every time.
That makes a self-hosted installation considerably more convenient for people who collect links throughout the day.
Install Hoarder/Karakeep With Docker
The easiest way to deploy Hoarder/Karakeep is with Docker Compose.
The same basic approach can be used on Linux, Windows, macOS, a home server, or a cloud VPS, provided Docker and Docker Compose are available.
Before starting, make sure Docker is installed and working on your system.
Step 1: Create a Directory for Hoarder
Create a dedicated directory for the Docker Compose configuration:
mkdir -p ~/hoarder
cd ~/hoarder
This directory will contain your Compose configuration and environment variables.
Step 2: Download the Docker Compose File
Download the project’s Compose configuration:
wget https://raw.githubusercontent.com/hoarder-app/hoarder/main/docker/docker-compose.yml
If wget isn’t installed, you can download the file through the project’s GitHub repository instead.
Step 3: Configure the Installation
Open the Docker Compose file with your preferred text editor if you need to modify storage locations or optional settings.
For example:
nano docker-compose.yml
If you want to enable AI-powered features, you’ll also need to configure the appropriate AI provider credentials according to the current Hoarder/Karakeep documentation.
Never publish your API key in a screenshot, article, Git repository, or public configuration file.
Step 4: Create the Environment File
Create a .env file in the same directory:
nano .env
A basic configuration can look like this:
HOARDER_VERSION=latest
NEXTAUTH_SECRET=YOUR_RANDOM_SECRET
MEILI_MASTER_KEY=YOUR_RANDOM_MASTER_KEY
NEXTAUTH_URL=http://localhost:3000
Generate Secure Secrets
Don’t copy secrets from an online tutorial.
Generate your own random values instead:
openssl rand -base64 36
Run the command separately for the required secret values and paste the generated strings into .env.
For example:
NEXTAUTH_SECRET=your-generated-secret
MEILI_MASTER_KEY=your-generated-master-key
If you’re deploying Hoarder on a server rather than accessing it only from the same machine, configure NEXTAUTH_URL for the address you’re actually using.
For example:
NEXTAUTH_URL=https://bookmarks.example.com
If you’re putting the application behind a reverse proxy, HTTPS is strongly recommended.
Step 5: Start Hoarder
Once your configuration is ready, start the containers:
docker compose up -d
Docker Compose will download the required images and start the Hoarder services in the background.
You can check the running containers with:
docker compose ps
If something goes wrong during startup, check the logs:
docker compose logs
For a specific service, you can also use:
docker compose logs -f
Access the Hoarder Dashboard
Once the containers are running, open your web browser and visit:
http://localhost:3000
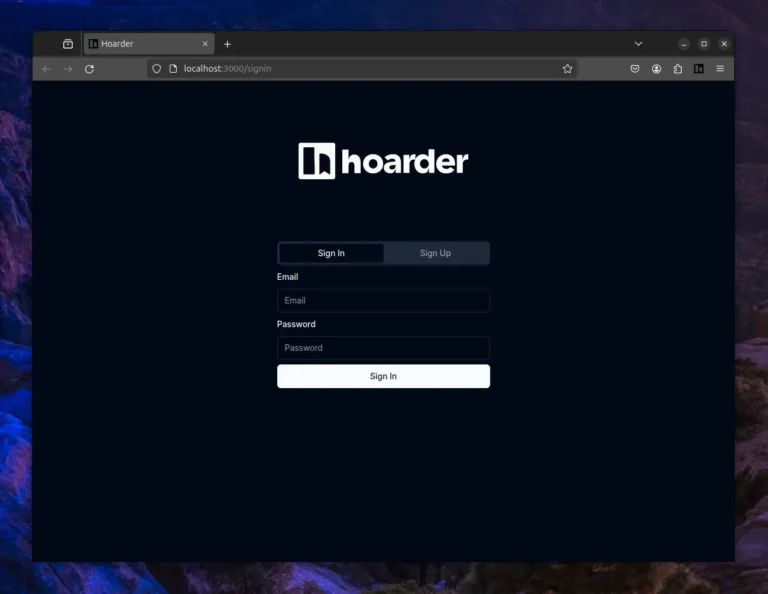
If you’re running the application on another server, replace localhost with the appropriate hostname or IP address.
You should see the Hoarder/Karakeep login and registration interface.
Create Your First Account
The first time you access the installation, you’ll need to create an account.
Enter your:
- Name
- Email address
- Password
- Password confirmation
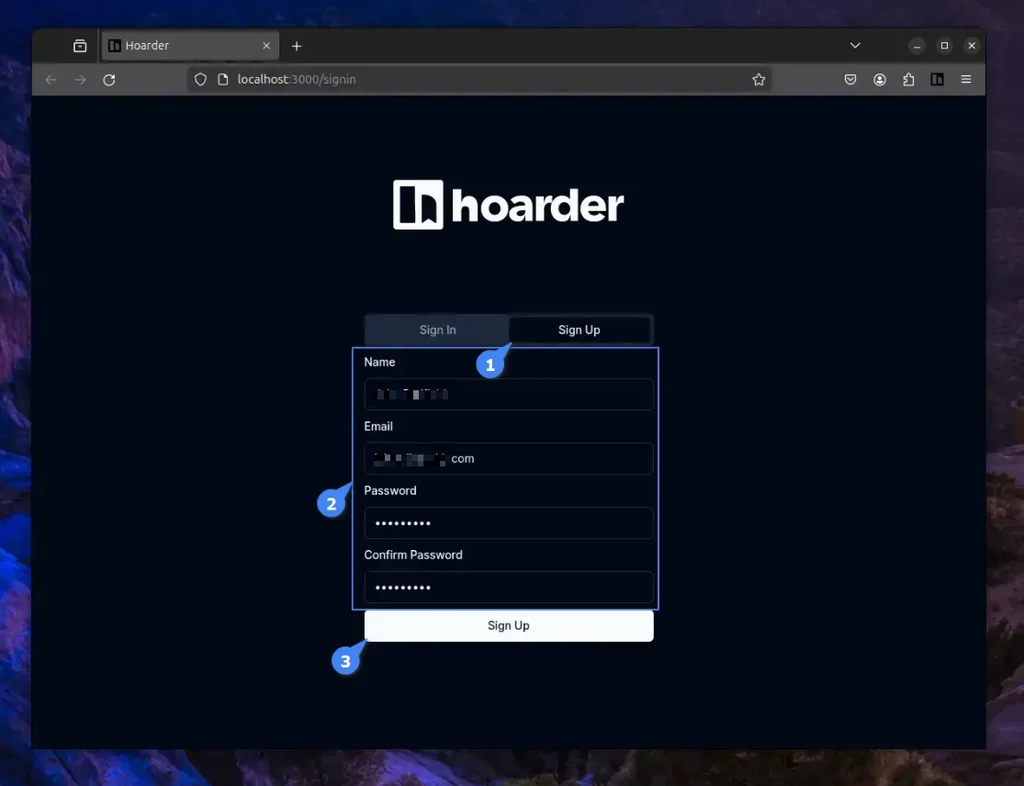
After registration, you’ll be taken to the main dashboard.
Your saved content can then be managed from one central interface.
Add Your First Bookmark
Adding content is straightforward.
You can save a webpage from the dashboard or use one of the browser extensions.
Depending on the content you’re saving, Hoarder can retrieve information such as the webpage title, description, and preview image automatically.
You can then add:
- Tags
- Notes
- Lists
- Favorites
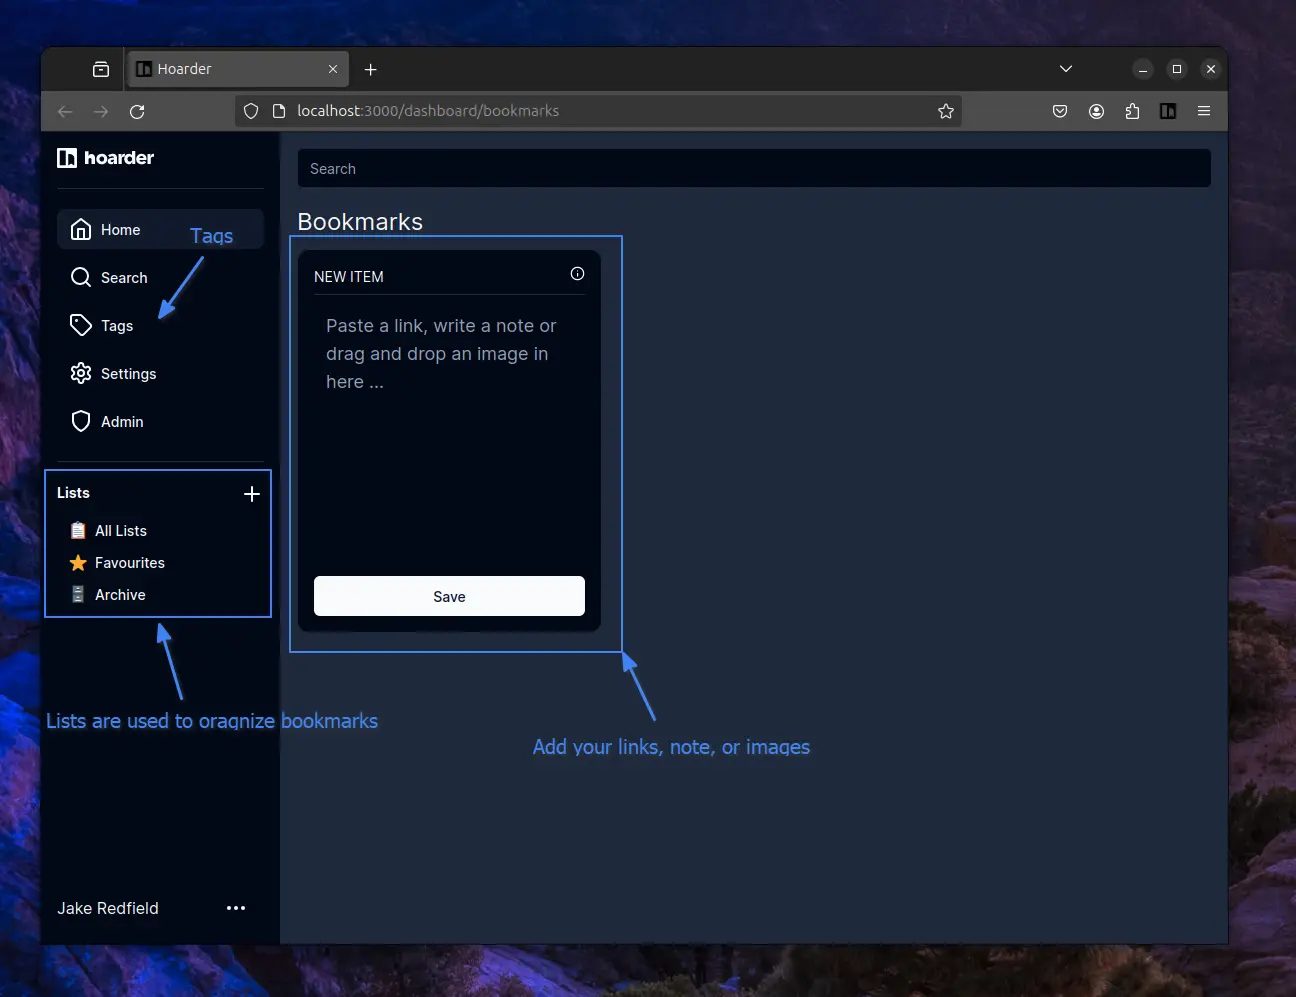
This makes it much easier to build a searchable personal archive over time.
Organize Bookmarks With Lists
Lists are useful when you want to separate different types of saved content.
For example, you could create:
Linux
for tutorials, commands, documentation, and useful Linux projects.
Research
for articles and references you want to read later.
Tech2Geek
for content ideas, technical references, and articles you want to revisit.
You can then combine lists with tags to create a more flexible organization system.
Change the Bookmark Layout
The web interface can display saved items in different layouts.
Depending on the current version of the application, you can choose between layouts such as:
- Masonry
- Grid
- List
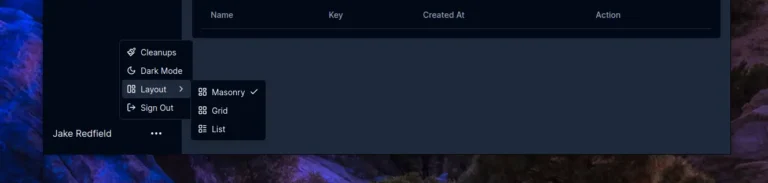
The best option depends on the type of content you save.
A grid or masonry layout works particularly well when your library contains many images, while a list can be more convenient when you’re primarily saving articles and links.
Search Your Entire Library
One of the biggest advantages of Hoarder/Karakeep is its search functionality.
Instead of scrolling through hundreds of browser bookmarks, you can search your stored content.
The application’s full-text search infrastructure makes it possible to find information based on indexed content rather than only the bookmark’s URL.
This becomes increasingly useful as your library grows.
A bookmarking application may seem unnecessary when you have 20 saved links.
With several thousand, however, searchable storage becomes much more valuable.
AI-Powered Automatic Tagging
Hoarder/Karakeep can also use AI to automatically generate tags for saved content when the appropriate AI integration is configured.
This can save time if you regularly collect dozens of articles.
Instead of manually assigning tags to every bookmark, the application can analyze the content and suggest or generate relevant tags.
However, remember that enabling an external AI provider can mean sending content to that provider.
If privacy is important to you, review the current AI configuration and provider policies before enabling the feature.
Manage Your Installation
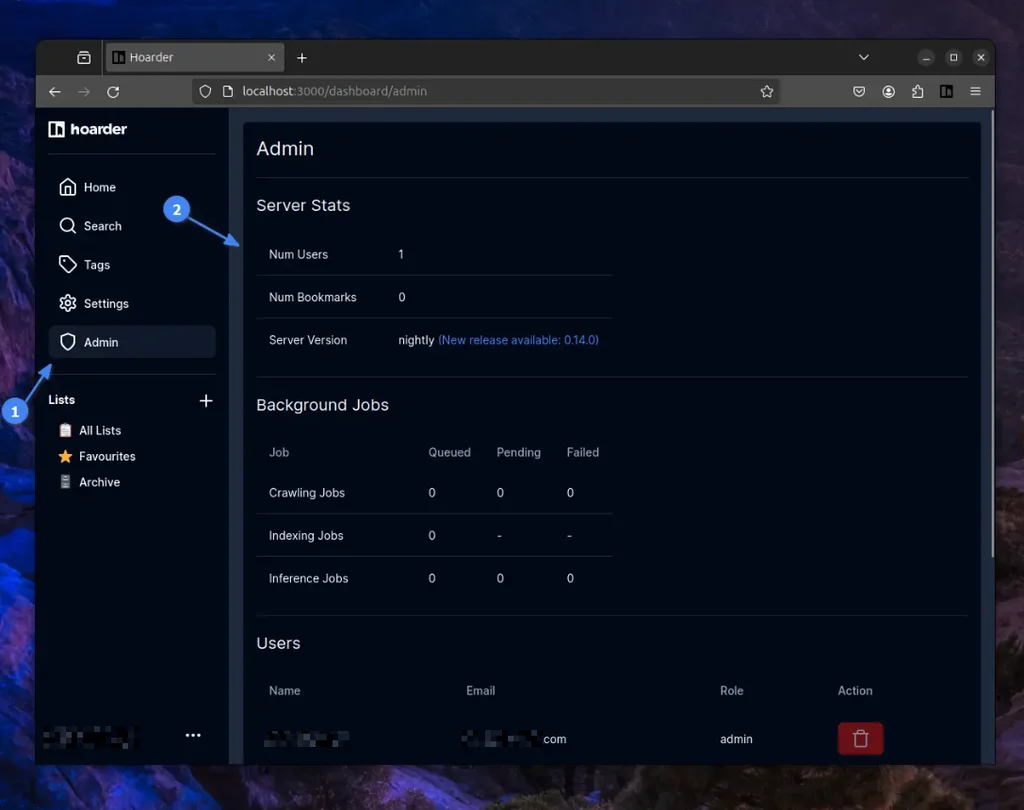
Administrative functions are available through the application’s administration interface.
Depending on your account and current version, you can inspect information such as:
- Users
- Stored bookmarks
- Server/application version
- Background processing
- Crawling
- Indexing
- AI inference jobs
This is particularly useful for self-hosted deployments because it lets you see whether background operations are working correctly.
Change Your Password and API Settings
Account settings can be accessed from the application’s Settings section.
From there, you can manage your account information and other available configuration options, including API-related settings where supported by your installed version.
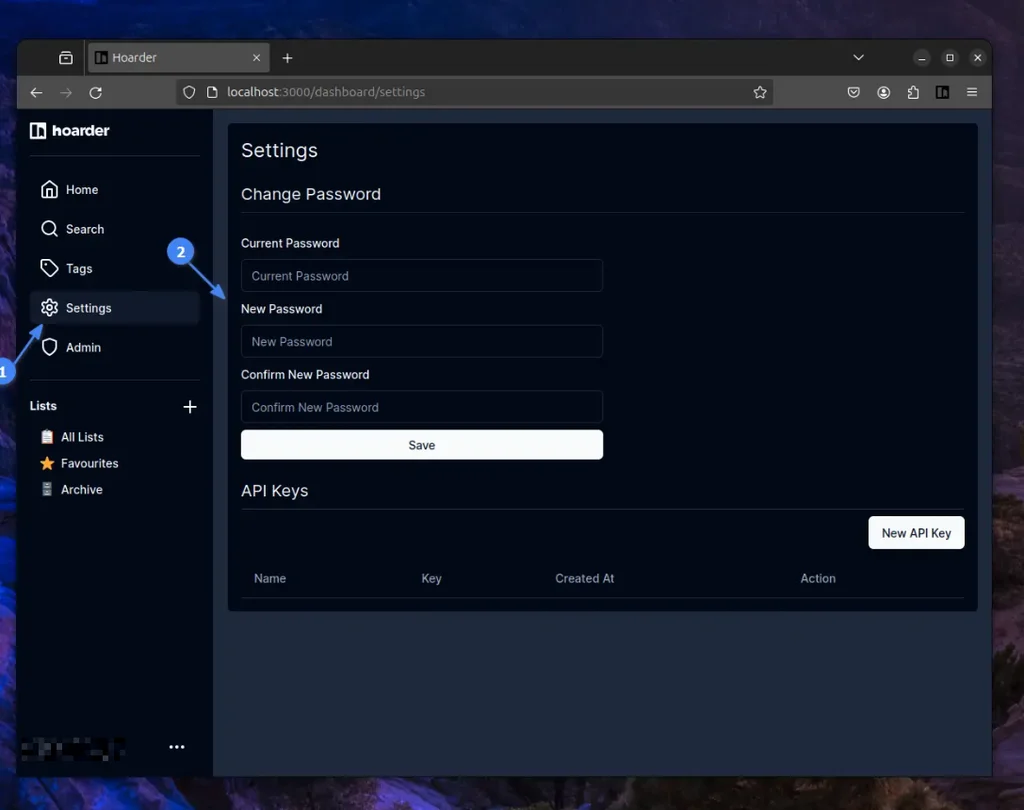
If you create an API key, treat it like a password.
Don’t publish it in a Git repository or include it in screenshots or support requests.
Stop Hoarder With Docker
If you need to temporarily stop the application, navigate back to your Hoarder directory:
cd ~/hoarder
Then run:
docker compose down
This stops and removes the containers defined by the Compose configuration.
Your persistent application data should remain in the configured Docker volumes, so stopping the containers doesn’t mean you have to start over.
To bring the application back:
docker compose up -d
Keep Your Self-Hosted Instance Updated
Because you’re running the application yourself, updates are your responsibility.
Before updating, it’s a good idea to:
- Back up your Hoarder data.
- Review the project’s release notes.
- Check whether environment variables have changed.
- Pull the latest container images.
- Restart the application.
- Verify that your bookmarks and search index are working correctly.
Don’t blindly replace configuration files or environment variables after an update. Self-hosted applications can change their requirements between releases.
Should You Self-Host Hoarder/Karakeep?
If you save a lot of online content, Hoarder/Karakeep is much more than a simple bookmark manager.
The combination of bookmarks, notes, images, lists, tags, full-text search, browser extensions, mobile access, and optional AI features makes it suitable as a personal knowledge archive.
Self-hosting also gives you more control over where your data lives.
The trade-off is that you’re responsible for maintaining the server, protecting your credentials, making backups, applying updates, and securing remote access.
For a local homelab, NAS, or private server, that trade-off can be worthwhile.
Final Thoughts
Hoarder/Karakeep is an interesting alternative to traditional bookmark services because it treats saved links as part of a larger personal knowledge base.
You can save an article, add a note, attach tags, put it into a list, search its contents later, and access the collection from your browser or mobile device.
Docker also makes the initial deployment relatively straightforward.
Whether you’re running Ubuntu, Debian, Fedora, Linux Mint, Arch, Windows, or macOS, a Docker-based installation gives you a consistent way to deploy the application as long as Docker is supported on your system.
If you’ve accumulated years of browser bookmarks and have no idea where half of them are anymore, a self-hosted bookmark manager like Hoarder/Karakeep may be worth a look.
Add Tech2Geek as a preferred source on Google to see more of our latest tech articles.
Support Tech2Geek ❤️
Did this guide help you? If Tech2Geek saves you time or helps you solve a problem,
consider buying me a coffee. ☕
Your support helps keep Tech2Geek independent and free.
Comments