
Losing precious files due to hard drive failure is a nightmare scenario for any computer user. Windows 11 offers a built-in solution to mitigate this risk: Storage Spaces. This powerful feature lets you combine multiple drives into a single, resilient virtual drive, protecting your data from unforeseen hardware issues and simplifying storage management. This comprehensive guide provides a step-by-step walkthrough of creating, managing, and optimizing Storage Spaces in Windows 11, empowering you to safeguard your valuable data with ease.
Creating a Storage Pool and Storage Space:
Before you begin, ensure you have at least two additional drives (internal, external, or a combination) available. These drives will be formatted during the process, so ensure they do not contain critical data.
1- Access Storage Spaces: Search for “Storage Spaces” in the Windows 11 search bar and select “Manage Storage Spaces.”

2- Create a New Pool: Click “Create a new pool and storage space.” Select the drives to include and click “Create pool.” This action will erase all data on the selected drives.

3- Configure Your Storage Space: Assign a descriptive name, a drive letter (e.g., G:, H:), and choose a file system. NTFS is the standard, but ReFS (Resilient File System) offers enhanced data integrity, especially beneficial with mirrored spaces.
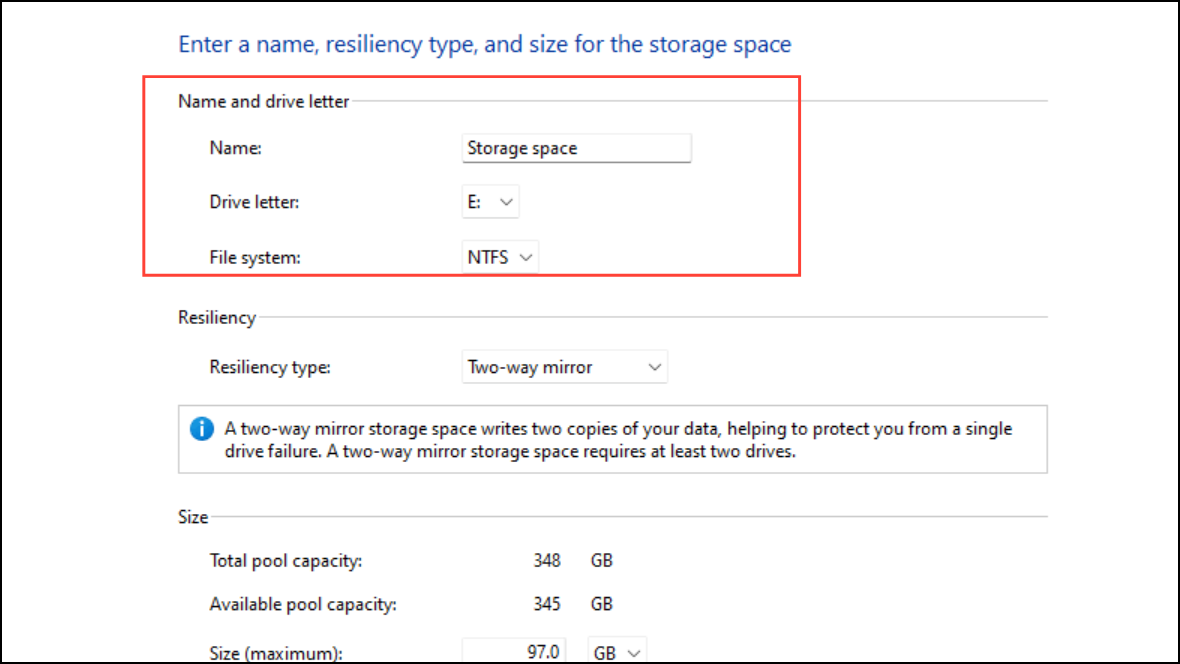
4- Select Resiliency Type: This crucial step determines your data protection level:
- Simple: No redundancy; suitable only for temporary or non-critical data.
- Two-way mirror: Two copies of your data; tolerates one drive failure. Ideal for general use.
- Three-way mirror: Three copies; tolerates two simultaneous drive failures (requires at least five drives).
- Parity: Uses parity information for data protection, balancing storage efficiency and fault tolerance (requires at least three drives for single-drive fault tolerance).

5- Set Maximum Size: Specify the maximum storage capacity. Windows will alert you when approaching the limit, allowing you to add more drives as needed.

6- Create Storage Space: Click “Create storage space.” Your new virtual drive will appear in File Explorer, ready for use.
Expanding Storage Capacity:
Adding more drives to your existing storage pool is a simple process:
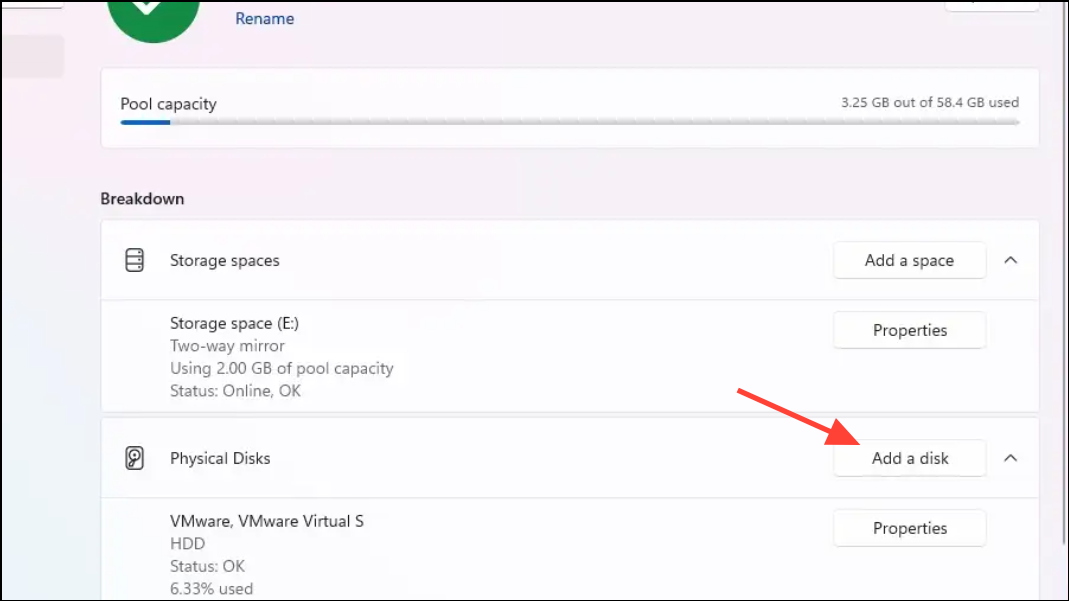
1- Connect New Drive(s): Connect the additional drive(s) to your computer.
2- Add Disk to Pool: Open Storage Spaces, select your pool, go to “Physical Disks,” and click “Add a disk.”
3- Optimize Disk Usage (Recommended): Check the box to optimize disk usage. This ensures even data distribution across all drives, maximizing storage efficiency and performance. Click “Add” to complete.
Optimizing Drive Usage:
Regular optimization ensures even data distribution and peak performance:
1- Access Storage Spaces: Access Storage Spaces (search or Settings > System > Storage > Advanced storage settings > Storage Spaces).
2- Select Pool & Optimize: Select your storage pool and click “Optimize.” This process can take time; plan accordingly as system performance may be temporarily impacted.

3- PowerShell Optimization (Advanced Users): Use PowerShell for advanced control: Get-StoragePool (to identify your pool’s FriendlyName),
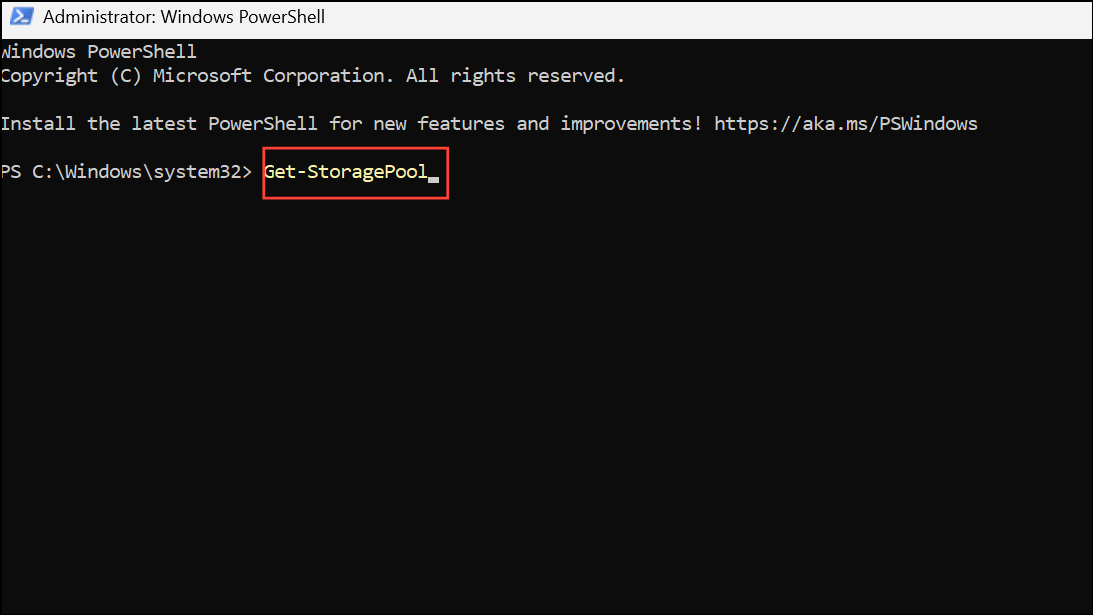
Then Optimize-StoragePool -FriendlyName "YourPoolName".

Removing a Drive from a Storage Pool:
Removing a drive is possible without data loss (provided sufficient free space exists):
1- Prepare for Removal: Open Storage Spaces, select “Change settings > Physical drives,” find the drive, and select “Prepare for removal.” This process can take several hours.

2- Remove Drive: Once the drive shows “Ready to remove,” click “Remove drive” and disconnect it.
3- Insufficient Space: If removal fails due to insufficient space, add a new drive to the pool before retrying.
Conclusion:
Windows 11 Storage Spaces provide a robust and user-friendly solution for data protection and storage management. By following these steps, you can create a resilient storage solution that safeguards your valuable data against hard drive failures, providing peace of mind and simplifying your storage needs. Take control of your data security today and implement Storage Spaces in Windows 11.
And if you'd like to go a step further in supporting us, you can treat us to a virtual coffee ☕️. Thank you for your support ❤️!

We do not support or promote any form of piracy, copyright infringement, or illegal use of software, video content, or digital resources.
Any mention of third-party sites, tools, or platforms is purely for informational purposes. It is the responsibility of each reader to comply with the laws in their country, as well as the terms of use of the services mentioned.
We strongly encourage the use of legal, open-source, or official solutions in a responsible manner.
Comments