
Windows 11’s powerful search function is designed to be your digital assistant, instantly finding files, apps, and information, all at your fingertips. A key feature is its ability to delve into cloud-based storage, connecting seamlessly with your Microsoft, work, or school accounts. However, this integrated search experience isn’t always a one-size-fits-all solution. Sometimes, you might want to limit the search to local files for privacy, security, or simply to streamline your results. This guide empowers you to master your Windows 11 search, allowing you to tailor its behavior to your specific needs and preferences.
Managing Cloud Content Search: Step-by-Step Guide
Windows 11 offers several methods to control whether your search results include cloud-based content. These methods range from simple settings adjustments to more advanced options for administrators and tech-savvy users.
1. Adjusting Cloud Content Search in Windows Settings
The easiest way to configure cloud content search is through the built-in Windows Settings app. This method is suitable for individual users who want to personalize their search experience.
Step 1: Accessing Settings: Begin by pressing the Win + I keys simultaneously on your keyboard. This shortcut swiftly opens the Windows Settings app.
Step 2: Navigating to Search Permissions: In the left-hand sidebar, select “Privacy & security”. Then, on the right, click on “Search permissions.”
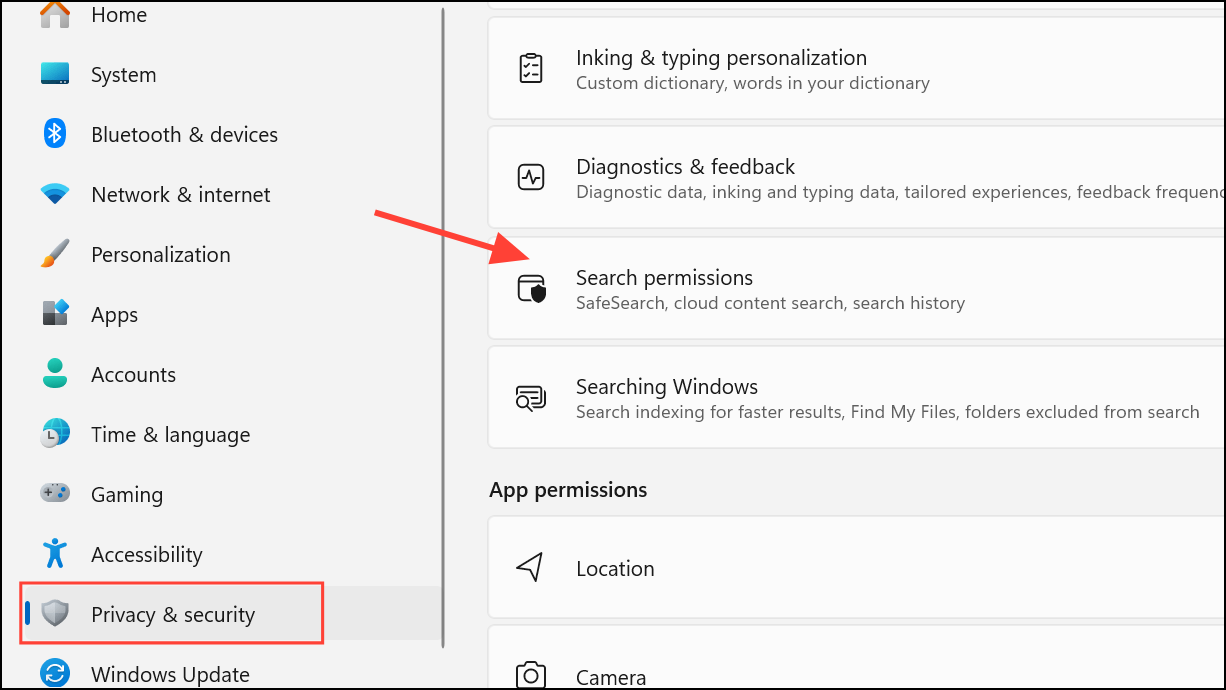
Step 3: Managing Cloud Content: Scroll to the “Cloud content search” section. Here, you’ll find toggles for your Microsoft account and your work or school account.
To Enable Cloud Search: Turn the switches “on” to allow Windows Search to display results from your connected cloud services, like OneDrive, Outlook, and SharePoint.
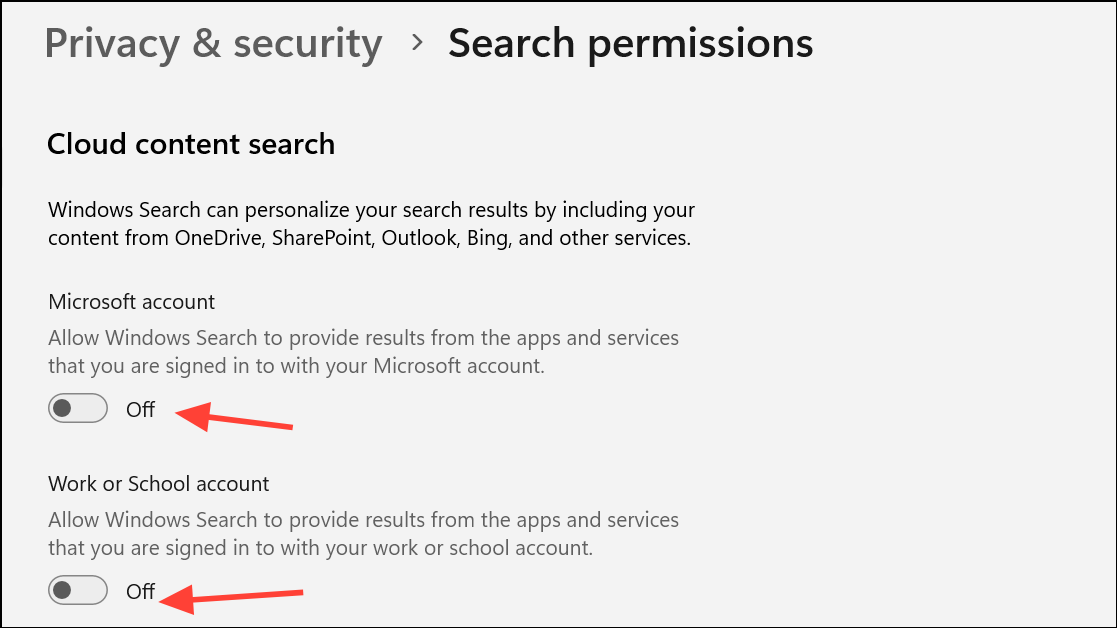
To Disable Cloud Search: Turn the switches “off” to restrict search results to local files and apps only.
Step 4: Applying Changes: Close the Settings window. Your changes will typically take effect immediately. However, you may need to sign out and back in or restart your computer if the search results don’t update as expected.
2. Controlling Cloud Content Search with Group Policy Editor (For Administrators)
IT administrators can use Group Policy to manage search settings across a network of devices. This method provides centralized control and ensures consistency for all users.
Step 1: Open the Run Dialog: Press Win + R to open the Run dialog box, then type gpedit.msc and press Enter. This will launch the Local Group Policy Editor.

Step 2: Navigate to Search Settings: In the left pane of the Group Policy Editor, navigate to: Computer Configuration > Administrative Templates > Windows Components > Search.

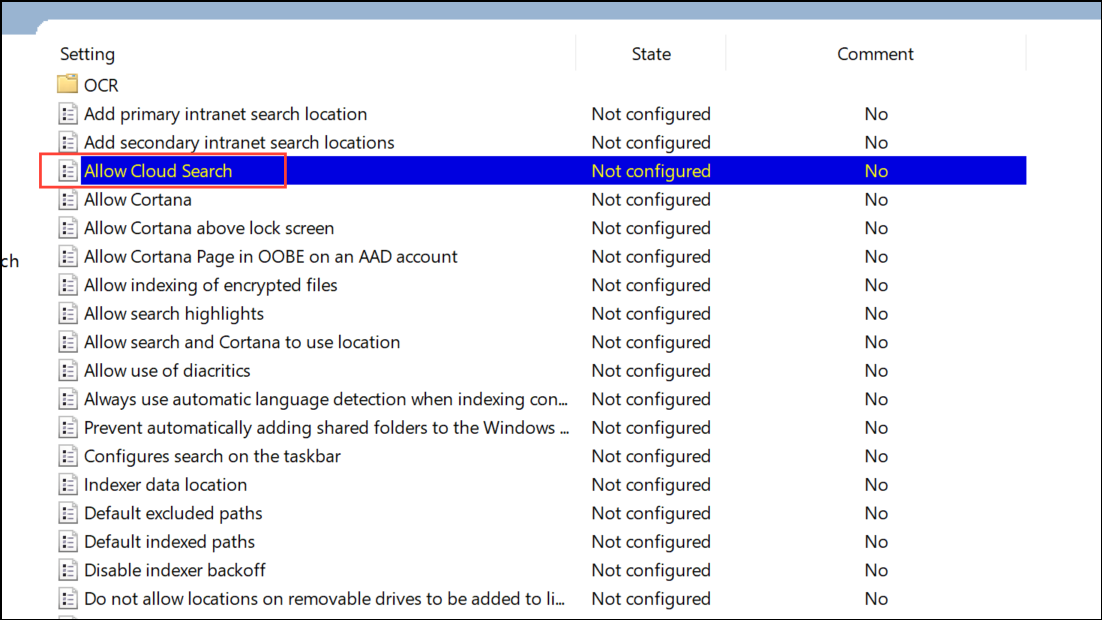
Step 3: Locate the Cloud Search Policy: Double-click on “Allow Cloud Search” in the right-hand pane. This policy governs whether cloud content appears in search results for all users on the device.
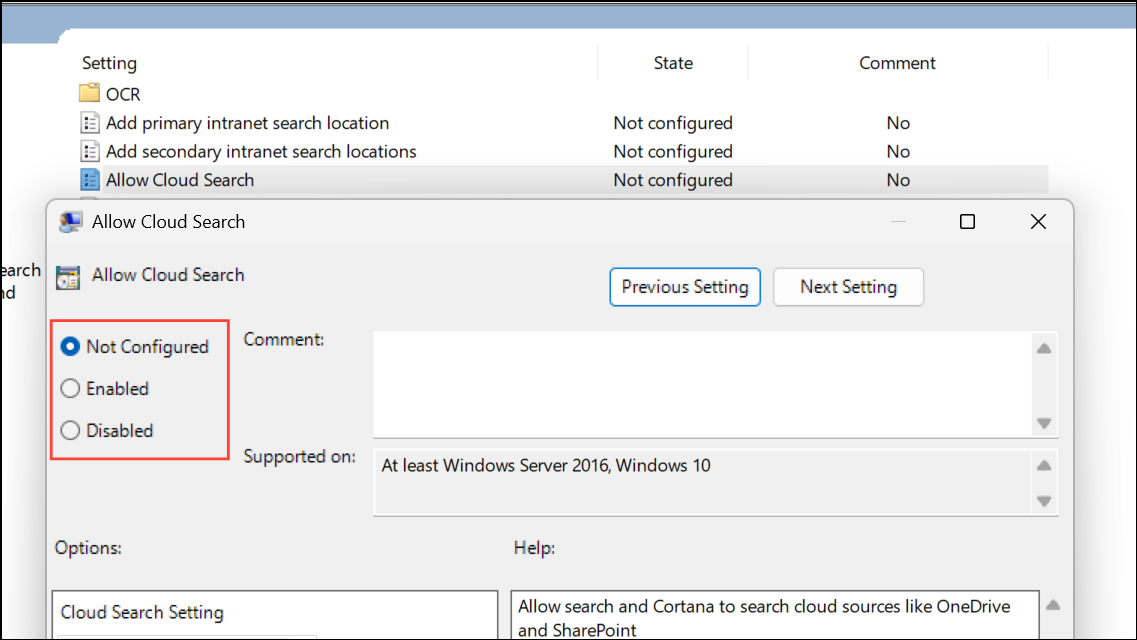
Step 4: Configure the Policy: Choose from the following options:
- Enabled (and selecting “Enable Cloud Search” from the dropdown): This forces cloud content search to be enabled for all users.
- Enabled (and selecting “Disable Cloud Search” from the dropdown): This forces cloud content search to be disabled for all users.
- Not Configured: This allows individual users to control the setting through their own Windows Settings.
Step 5: Apply and Close: Click “Apply” and then “OK.” Close the Group Policy Editor. A restart or sign-out may be necessary for the changes to take effect across all user accounts.
3. Advanced Control: Modifying Cloud Content Search in the Registry Editor
For advanced users and IT administrators who need more granular control, the Registry Editor allows direct modification of search settings. Important: Always back up your registry before making any changes to prevent system issues.
For the Current User (Microsoft Account or Work/School Account)
Step 1: Launch the Registry Editor: Press Win + R, type regedit, and press Enter to open the Registry Editor. Approve any User Account Control prompts.

Step 2: Navigate to the Search Settings Key: Navigate to the following key: HKEY_CURRENT_USER\Software\Microsoft\Windows\CurrentVersion\SearchSettings.

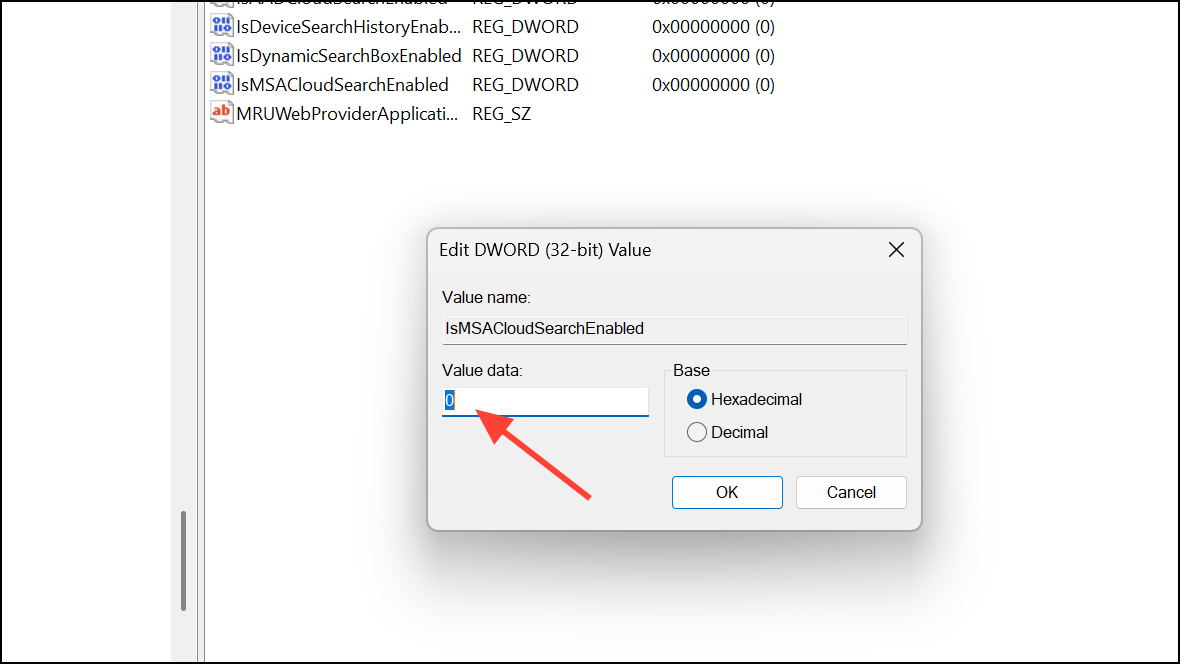
Step 3: Microsoft Account Cloud Search: To control cloud search for your Microsoft account, locate or create a DWORD value named IsMSACloudSearchEnabled. Set its value to:
1 to enable cloud search.
0 to disable cloud search.
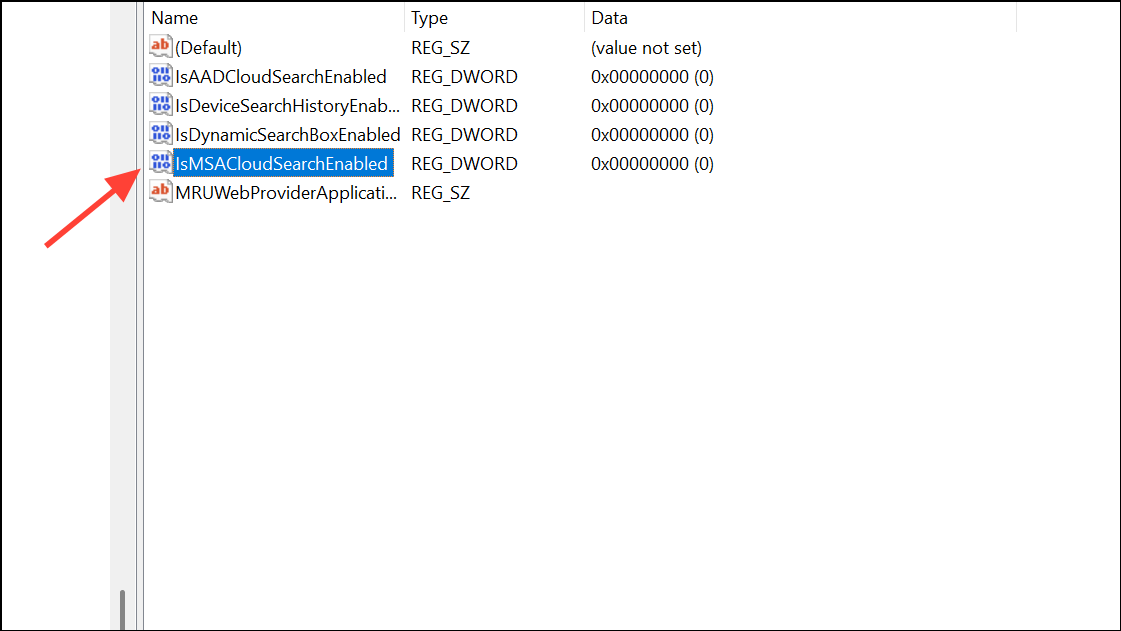
Step 4: Work/School Account Cloud Search: For work or school accounts, use the DWORD value IsAADCloudSearchEnabled within the same key. Set its value to:
1 to enable cloud search.
0 to disable cloud search.
Step 5: Restart Your Computer: Close the Registry Editor and restart your computer for the changes to take effect.
For All Users (Machine-Wide Setting)
Step 1: Navigate to the Search Policy Key: In the Registry Editor, navigate to: HKEY_LOCAL_MACHINE\SOFTWARE\Policies\Microsoft\Windows\Windows Search.
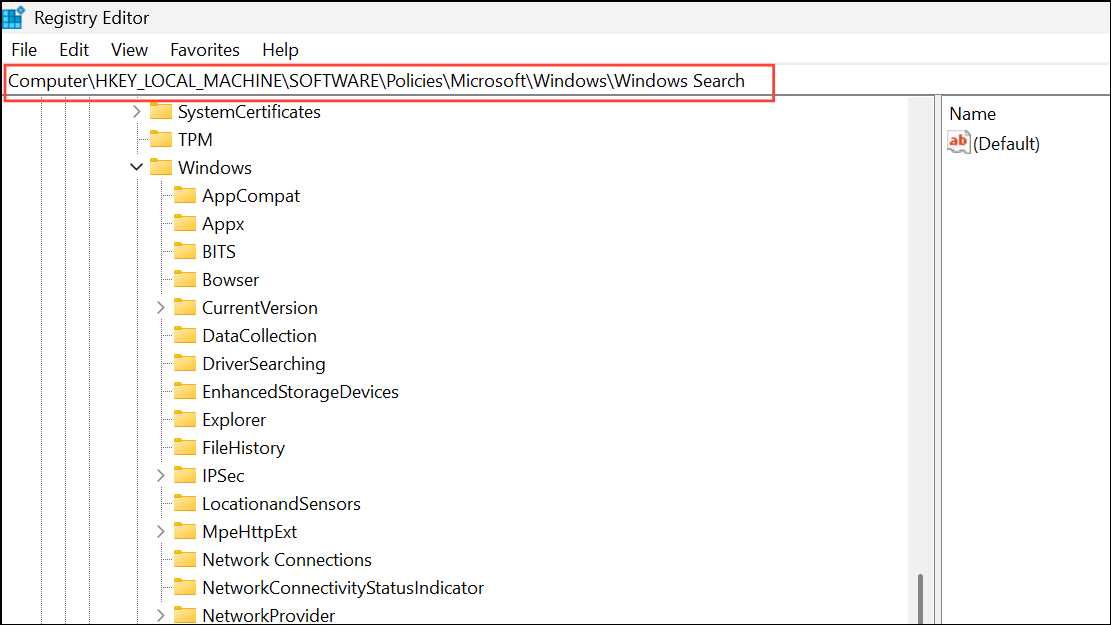
Step 2: Modify the Cloud Search Policy: Create or modify the DWORD value AllowCloudSearch:
Set to 1 to force cloud content search to be enabled for all users.
Set to 0 to force cloud content search to be disabled for all users.
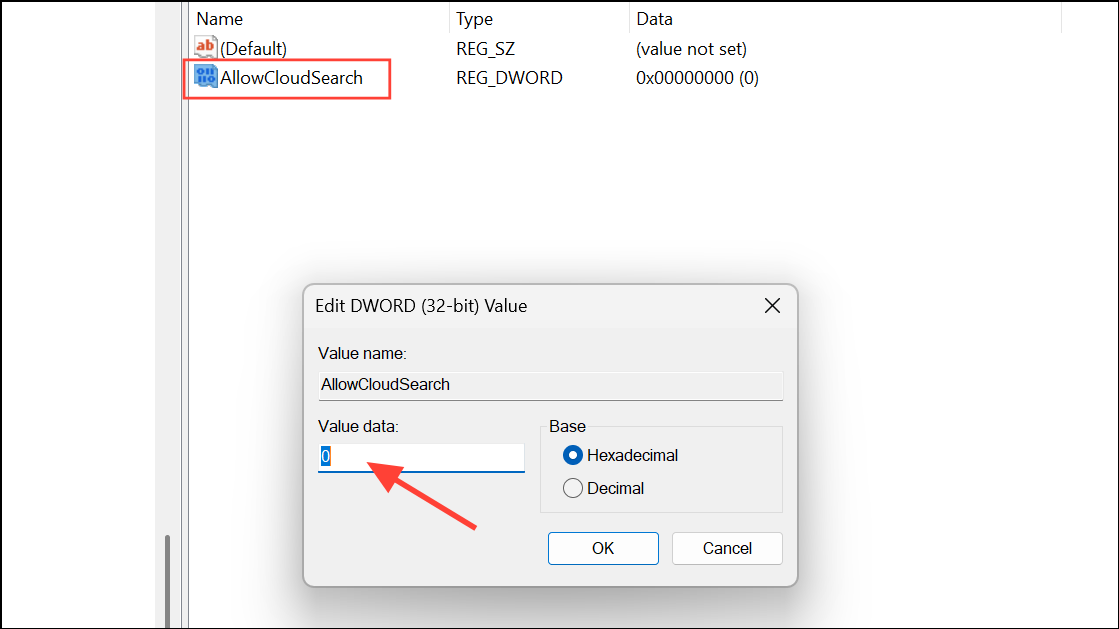
Delete the value or set it to “-” (empty) to allow users to control the setting individually through Windows Settings.
Incorrectly editing the registry can lead to system instability. Always back up the registry key you’re modifying before making any changes, allowing you to restore the settings if something goes wrong.
4. Managing Search Cloud Content from Apps (Windows 11 Copilot+ PCs and Newer Builds)
On newer Windows 11 builds, especially those designed for Copilot+ PCs, the control over which apps contribute cloud content to your search results has been expanded.
Step 1: Access Search Permissions: Open Settings (Win + I), then go to “Privacy & security” and select “Search permissions.”
Step 2: Control App-Specific Search: Under “Search Apps,” you’ll find toggles to enable or disable “deep content search of cloud content” for each individual app, such as OneDrive.
Step 3: Advanced Control with the Registry Editor: For more advanced management, you can use the Registry Editor to navigate to: HKEY_CURRENT_USER\Software\Microsoft\Windows\CurrentVersion\SearchSettings\FileSearchProviders. Within this key, each app contributing to search results will have its own subkey. Set the IsFileProviderEnabled DWORD value to:
1 to enable content search from that app.
0 to disable content search from that app.
The Benefits of Tailoring Your Cloud Content Search Settings
Understanding and customizing your Windows 11 cloud content search offers significant advantages, depending on your personal or professional needs.
Why Enable Cloud Content Search?
- Enhanced Productivity: Enabling cloud content search can boost your productivity by displaying cloud-stored files and emails alongside local search results. This streamlines access to your documents and information, minimizing the need to open multiple applications or browser windows. It’s especially useful for users who frequently work across different devices or collaborate using shared cloud documents.
- Seamless Access: Quickly find what you need, regardless of where it’s stored. Cloud search integrates your digital world, eliminating the need to remember which service holds a particular file or email.
Why Disable Cloud Content Search?
- Improved Privacy and Security: Disabling cloud content search can enhance your privacy and security, especially when using shared or public devices. It prevents cloud-stored documents from appearing in search results, protecting sensitive information.
- Reduced Search Clutter and Faster Local Searches: Disabling cloud search can declutter search results, showing only your local files and applications, which can improve search speeds. This is beneficial in environments with limited internet connectivity or stringent data compliance regulations.
Conclusion:
Windows 11’s search feature is a powerful tool, and mastering its cloud content search settings allows you to customize your experience. Whether you prioritize comprehensive access to information, improved privacy, or enhanced security, Windows 11 provides the flexibility to tailor your search results to perfectly match your needs. By understanding these methods, you can control what appears in your search results and optimize your workflow, ensuring a seamless and secure digital experience. Take control of your search today and unlock the full potential of your Windows 11 device.
And if you'd like to go a step further in supporting us, you can treat us to a virtual coffee ☕️. Thank you for your support ❤️!

We do not support or promote any form of piracy, copyright infringement, or illegal use of software, video content, or digital resources.
Any mention of third-party sites, tools, or platforms is purely for informational purposes. It is the responsibility of each reader to comply with the laws in their country, as well as the terms of use of the services mentioned.
We strongly encourage the use of legal, open-source, or official solutions in a responsible manner.
Comments