
Navigating lengthy documents in Microsoft Word can often feel like a never-ending scroll-a-thon. Imagine the efficiency boost if you could see multiple pages at once, easily compare layouts, and spot inconsistencies without constant scrolling. Fortunately, Microsoft Word on Windows 11 offers a range of powerful multi-page viewing options designed to streamline your workflow and enhance your productivity. Whether you’re reviewing a complex report, fine-tuning a book layout, or simply wanting a better overview of your document, this guide provides step-by-step instructions for mastering multi-page viewing in Word.
Unlocking Enhanced Productivity: Mastering Multi-Page Viewing Techniques in Word
Here are the different ways you can view multiple pages simultaneously in Microsoft Word, along with tips for maximizing their effectiveness:
Method 1: Utilize Print Layout and Zoom for a Multi-Page Grid
This method is the most common and intuitive way to view multiple pages in a grid-like arrangement.
Step 1: Confirm Print Layout View
First, ensure that you are in Print Layout view. This is typically the default view for editing and formatting documents. If needed, switch to it by selecting the View tab in the ribbon and clicking Print Layout in the Views group.

Step 2: Activate Multi-Page View
With the View tab active, locate the Zoom group. Click the Multiple Pages button. Word will automatically adjust the zoom level to display two or more pages side-by-side, depending on your window size and screen resolution. This provides a quick overview of your document’s flow.

Step 3: Customize the Number of Visible Pages
To tailor the number of visible pages to your liking, click the Zoom button in the Zoom group. In the Zoom dialog box:
- Select “Many pages“.
- Click the grid icon below “Many pages” to choose your preferred page arrangement (e.g., 2×2, 3×3). The preview area will dynamically update to show how your selection will look.
- Click OK to apply your preferred page arrangement.

Step 4: Fine-Tune Zoom Levels
If the pages appear too small or too large, use the zoom slider located at the bottom right corner of the Word window to adjust the zoom level. Lower zoom levels display more pages, while higher zoom levels magnify each page but reduce the overall number of pages visible.

Step 5: Return to Single-Page View
To return to the standard single-page view, simply select One Page in the Zoom group, or manually reset the zoom level to 100% using the zoom slider.
Method 2: Employ Side-to-Side Mode for Book-Like Navigation
This mode switches the document to a horizontal scrolling orientation, mimicking the experience of reading a book.
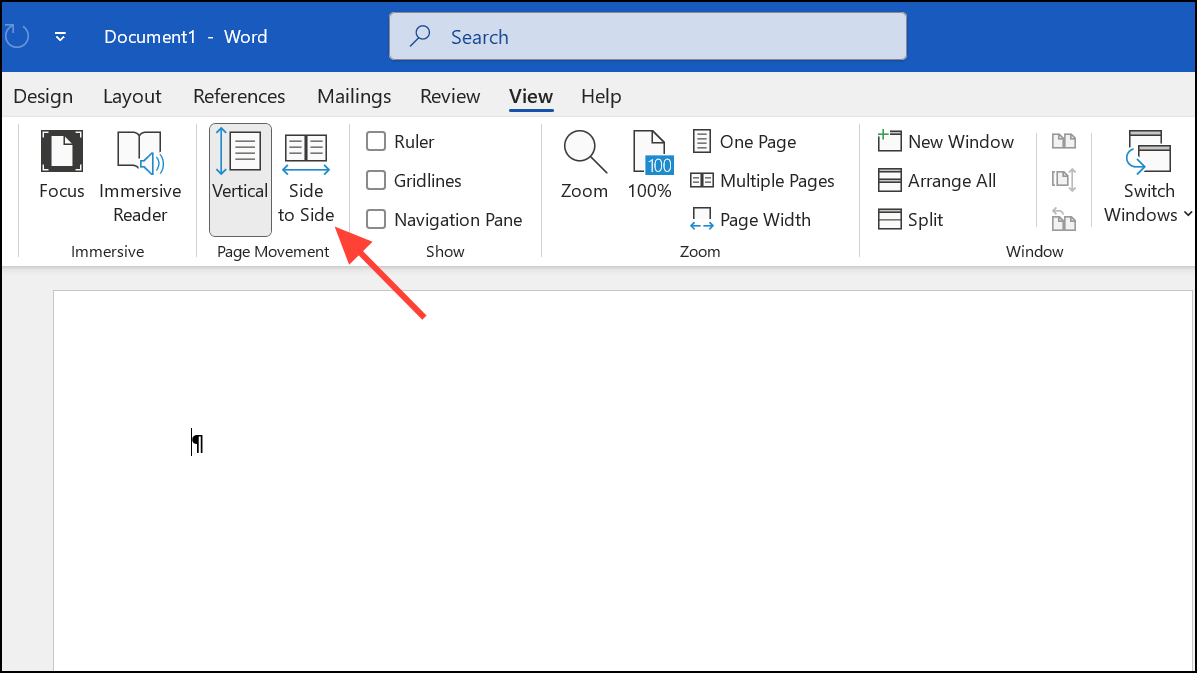
Step 1: Activate Side to Side Mode
On the View tab, navigate to the Page Movement section and select Side to Side. This immediately switches the document’s scrolling direction to horizontal, displaying two pages at a time, side by side.
Step 2: Navigate Using Mouse Wheel or Swipe Gestures
Use your mouse wheel, the horizontal scroll bar at the bottom, or swipe gestures (if you have a touchscreen device) to “flip” through the pages of your document in a book-like manner. This is particularly useful for reviewing page layouts and comparing adjacent pages.
Step 3: Utilize Thumbnails for Quick Navigation
For rapid navigation within Side to Side mode, select Thumbnails in the Show group (which is also within the View tab). This opens a panel displaying thumbnail previews of each page in your document. Simply click on any thumbnail to jump directly to that specific page.

Step 4: Exit Side to Side Mode
To exit Side to Side mode and restore standard zoom controls and vertical scrolling, select Vertical in the Page Movement section of the View tab.
Method 3: Split Window for Simultaneous Viewing of Different Sections
This powerful feature allows you to divide your Word window horizontally, enabling you to view and edit two different sections of the same document simultaneously.
Step 1: Split the Window
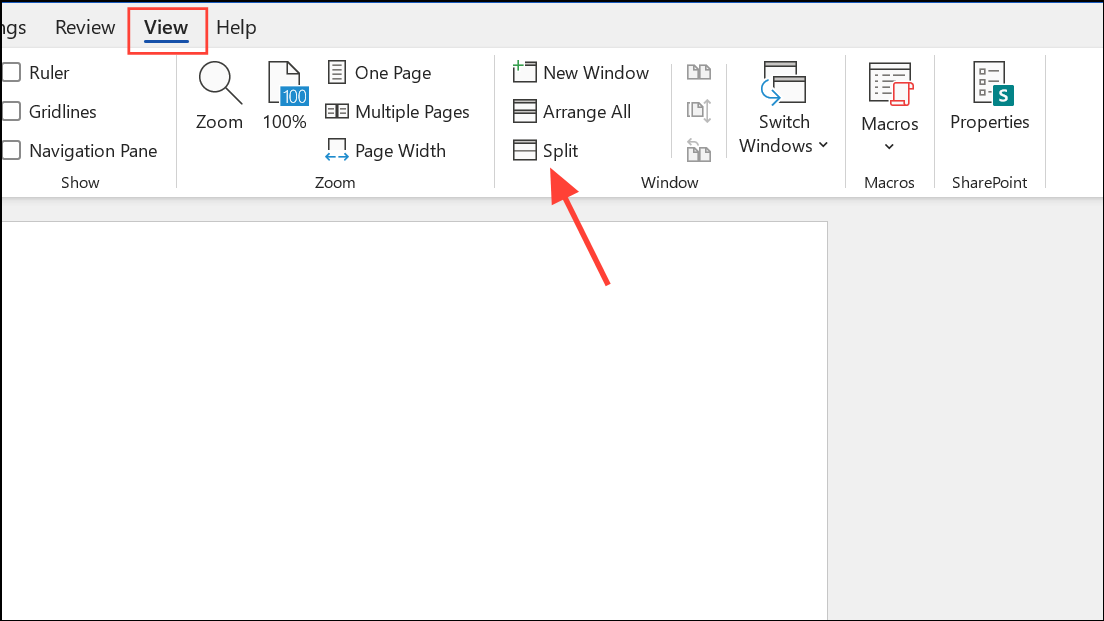
Open your document and navigate to the View tab.
Step 2: Click the Split Button
Click the Split button in the Window group. This will insert a horizontal divider line across your Word window, effectively creating two independent panes.
Step 3: Adjust and Scroll Panes Independently
Adjust the position of the divider by dragging it up or down. Then, scroll each pane independently to focus on the specific sections of the document you need to view or edit. This is especially helpful for cross-referencing information or editing content in distant sections of a long document.
Step 4: Remove the Split
To remove the split and return to a single-pane view, simply click the Remove Split button in the Window group of the View tab.

Method 4: Open the Same Document in Multiple Windows for Comparison
This method allows you to open separate instances of the same document, allowing for easy comparison or referencing.
Step 1: Open a New Window
With your document open, select the View tab and click the New Window button in the Window group. This will open a second, independent window displaying the same document.

Step 2: Arrange Windows Side by Side
Arrange the windows side-by-side for easy comparison by clicking the View Side by Side button (also located in the Window group of the View tab). This will automatically resize and position the two document windows to share the screen equally.
Step 3: Activate Synchronous Scrolling (Optional)
For even easier comparison, activate Synchronous Scrolling (also found in the Window group of the View tab). When enabled, scrolling in one window will automatically scroll the other window in tandem, making direct comparisons seamless.

Step 4: Close the Extra Window
When you’re finished comparing or referencing, simply close one of the document windows. Changes made in either window are automatically saved, as both windows are editing the same underlying file.
Tips for Maximizing Multi-Page Viewing Efficiency
- Use a High-Resolution Monitor: A high-resolution monitor allows you to display more pages simultaneously without excessive zoom-out, maintaining readability.
- Maximize the Word Window: Maximize the Word window to fill your screen, providing the largest possible viewing area for multiple pages.
- Keyboard Shortcuts: Use keyboard shortcuts like Alt + V, then M to quickly activate Multi-Page view.
- Consider Read Mode: Switch to Read Mode (from the View tab) for a distraction-free reading experience, although editing and multi-page controls are limited in this mode.
- Automate with Macros: If you find yourself frequently switching between different viewing configurations, consider recording a macro using the Macros option in the View tab to automate the process.
- Save Frequently: Regularly save your work when working with multiple windows or split views to avoid any accidental data loss due to crashes or unexpected errors.
Conclusion:
Mastering multi-page viewing techniques in Microsoft Word can significantly boost your productivity by enabling you to spot layout issues, compare content, and navigate large documents more efficiently. Experiment with these methods to discover the combination that best suits your individual workflow and document review needs. With these powerful tools at your fingertips, you’ll be able to conquer even the most complex documents with ease!
And if you'd like to go a step further in supporting us, you can treat us to a virtual coffee ☕️. Thank you for your support ❤️!

We do not support or promote any form of piracy, copyright infringement, or illegal use of software, video content, or digital resources.
Any mention of third-party sites, tools, or platforms is purely for informational purposes. It is the responsibility of each reader to comply with the laws in their country, as well as the terms of use of the services mentioned.
We strongly encourage the use of legal, open-source, or official solutions in a responsible manner.
Comments