
In today’s digital age, efficient storage management is crucial for maintaining the performance of your devices. Windows 11, while a powerful operating system, can quickly accumulate unnecessary files that take up precious storage, resulting in slower performance and limited ability to install new applications or updates. Fortunately, Windows 11 comes equipped with various features that help you reclaim valuable gigabytes without the need for extra hardware or third-party software. This guide explores key settings and functionalities to streamline your storage management, allowing for a more efficient computing experience.
Enable and Configure Storage Sense for Automatic Cleanup
One of the standout features of Windows 11 is Storage Sense. This built-in tool automatically manages your storage by deleting temporary files, clearing the Recycle Bin, and removing outdated downloads per your preferences. By turning on Storage Sense, you delegate routine cleanup tasks to your system, minimizing manual effort.
Steps to Activate Storage Sense
1- Open Settings: Press Win + I to launch the Settings app.
2- Navigate to Storage: Click on the System category, followed by Storage.
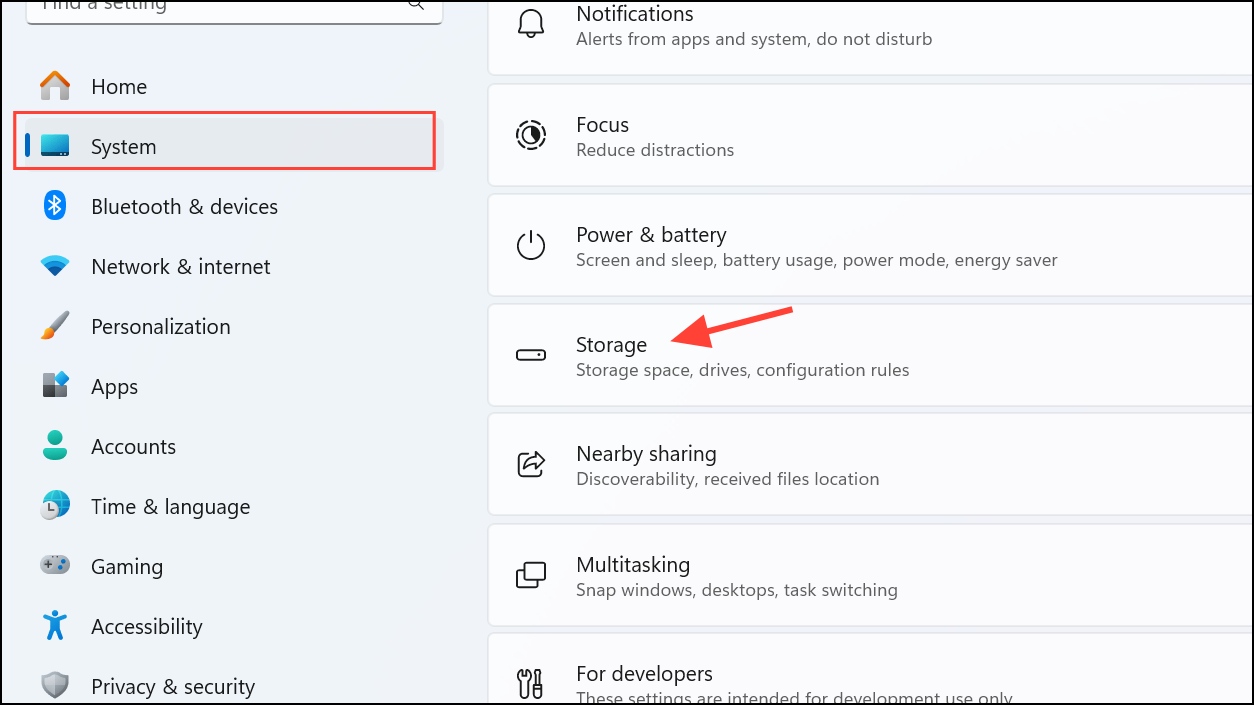
3- Turn On Storage Sense: Toggle the switch to activate the feature.
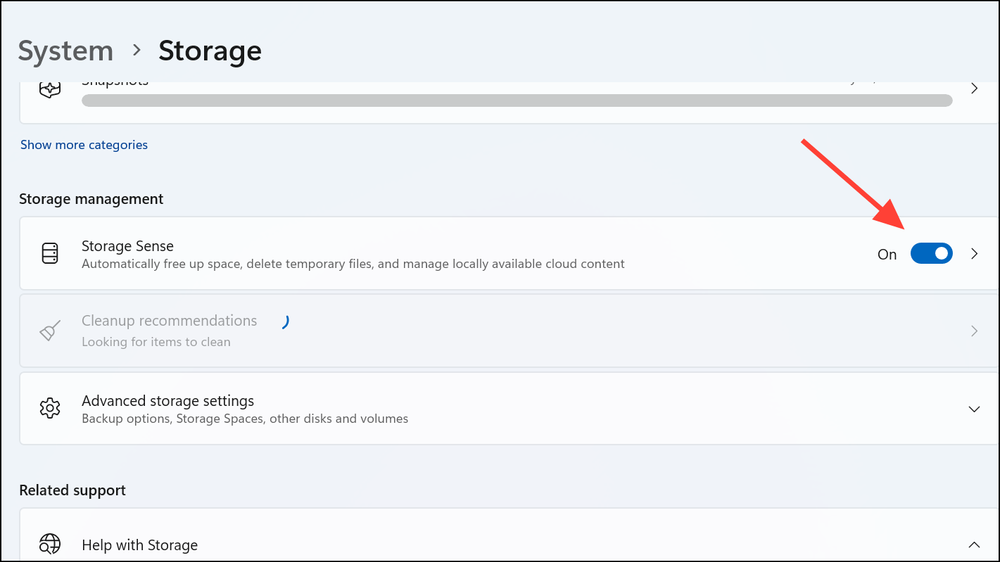
4- Customize Settings: Click on Storage Sense to access options that allow you to set the frequency of cleanups (daily, weekly, or monthly), manage downloads folder deletions, and establish retention periods for items in your Recycle Bin.

By refining these settings, Storage Sense efficiently removes unwanted files without risking crucial data.
Change Default Save Locations to Free Up Space on Your System Drive
The system drive (often C:) is the default destination for newly created files, which can lead to quick storage depletion. To alleviate pressure on your system drive, consider redirecting these folders to alternative drives with ample space.
Steps to Change Save Locations
1- Open File Explorer: Use Win + E to launch File Explorer.
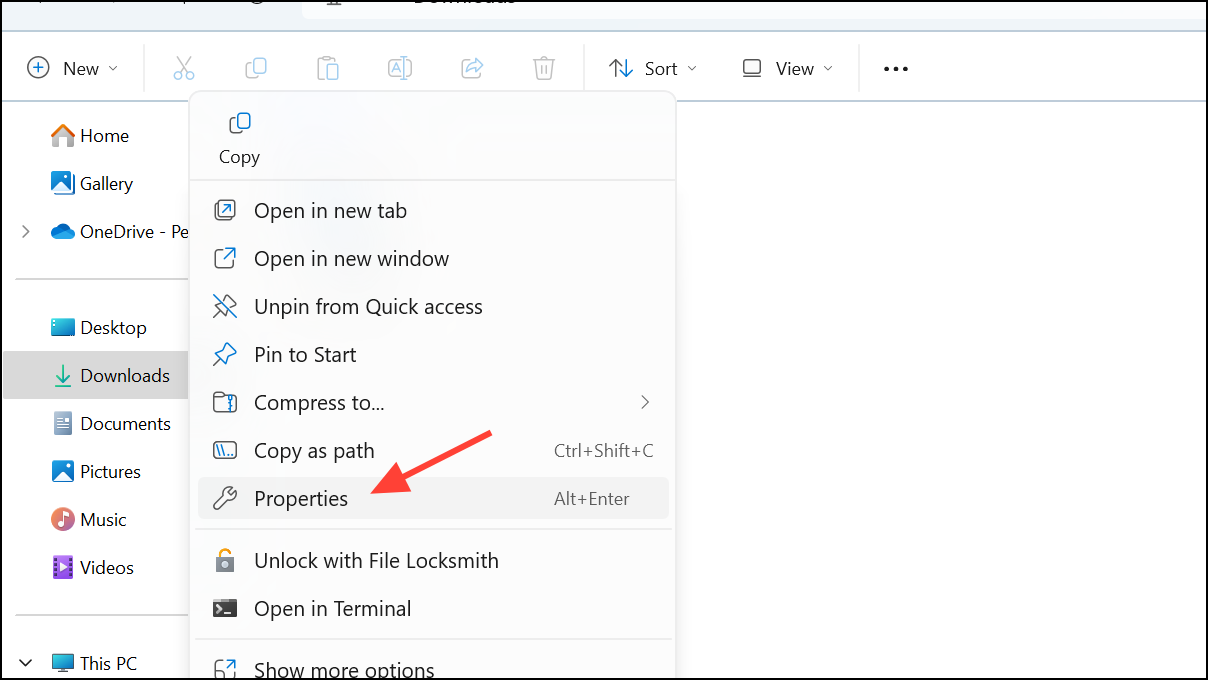
2- Access Folder Properties: Right-click folders like Downloads, Documents, or Pictures, then select Properties.
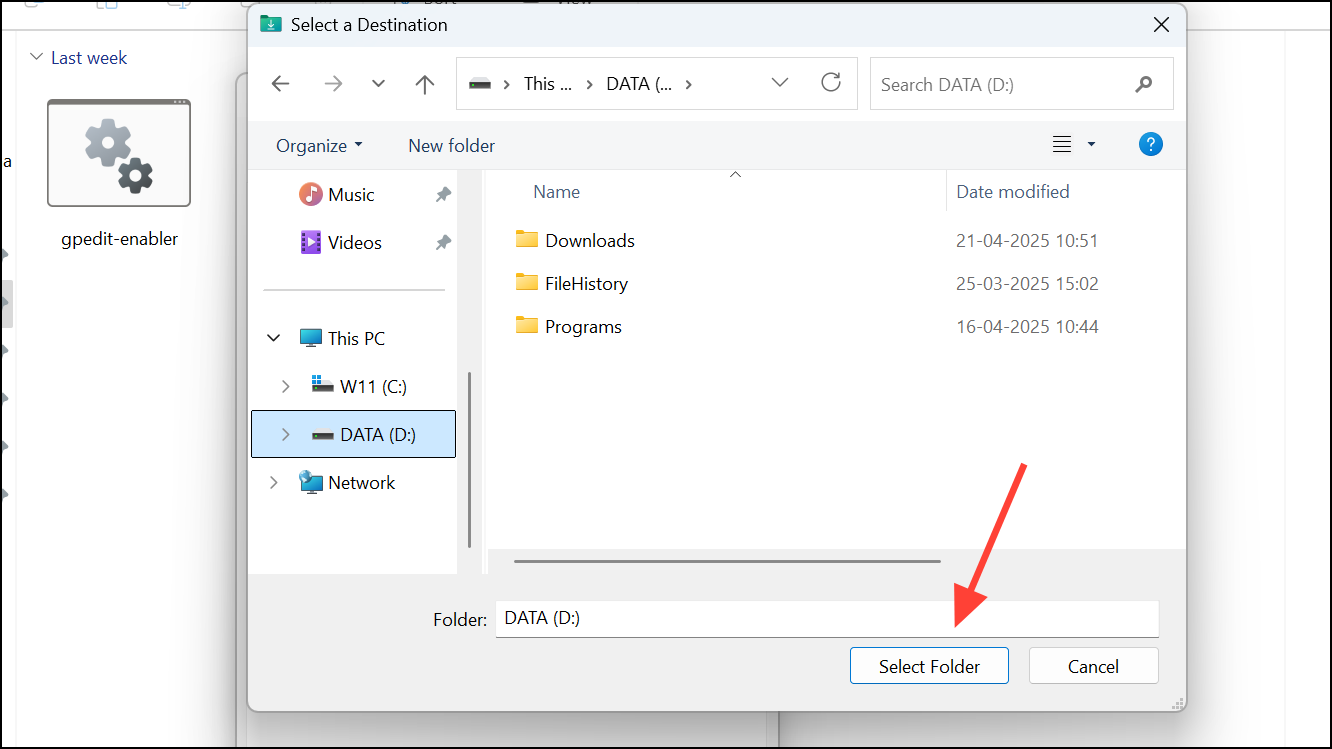
3- Move Your Folder: Access the Location tab, click on Move, and select a new folder on a different drive with available space.

4- Confirm by clicking Select Folder and applying changes. You can choose to move existing files automatically.
This adjustment ensures your system drive remains optimized and enhances overall storage management.
Disable Hibernation to Free Up Valuable Disk Space
When hibernation is enabled, Windows saves your session as a file named hiberfil.sys, potentially consuming several gigabytes of storage. If hibernation isn’t essential for you, disabling it can free up significant space.
Steps to Disable Hibernation
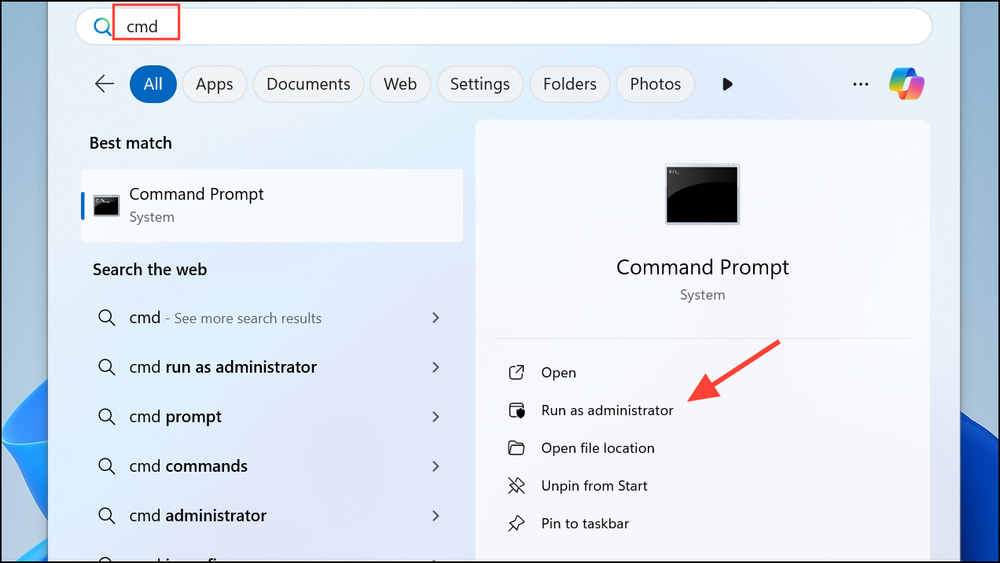
1- Open Command Prompt: Search for “Command Prompt” in the Start menu, right-click it, and select Run as administrator.
2- Execute Command: In the command window, type the command powercfg -h off and press Enter. This action disables hibernation and deletes the hibernation file immediately.
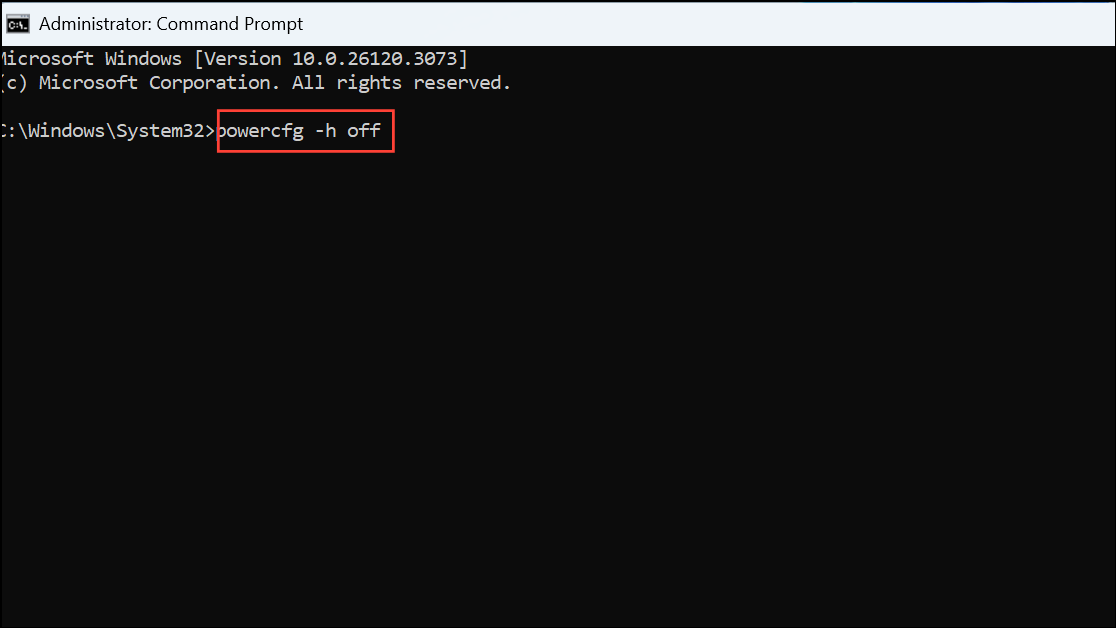
To reactivate hibernation in the future, follow the same steps and enter powercfg -h on.
Reduce Disk Space Used by System Restore
While System Restore is a valuable feature for recovery, it can reserve a significant portion of your disk space—up to 10% by default. Lowering this allocation can free up storage while still protecting your system.
Steps to Adjust System Restore Settings
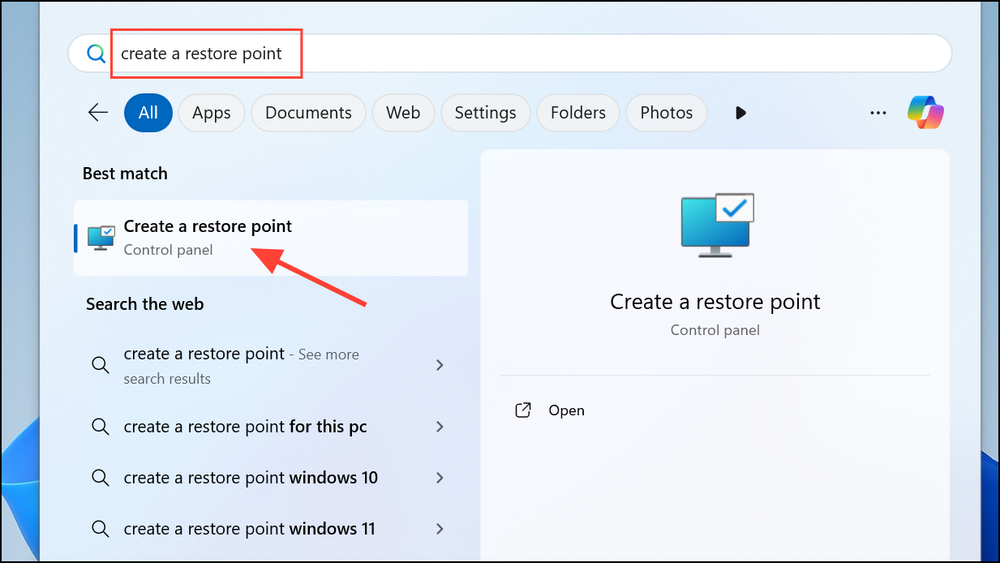
1- Create Restore Point: Type Create a Restore Point in the Windows search bar and access the related control panel.
2- Select Your Drive: Under the System Protection tab, choose your primary drive (C:) and click Configure.
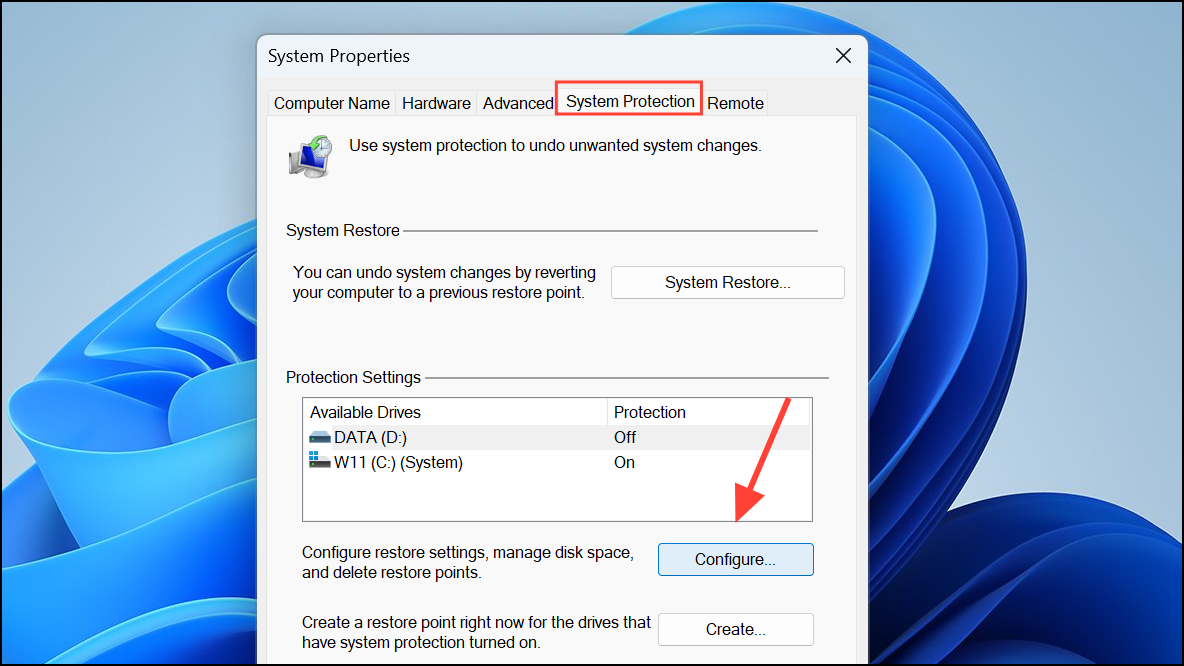
3- Modify Usage Allocation: Adjust the Max Usage slider to a lower percentage (1-2%), then hit Apply and OK.
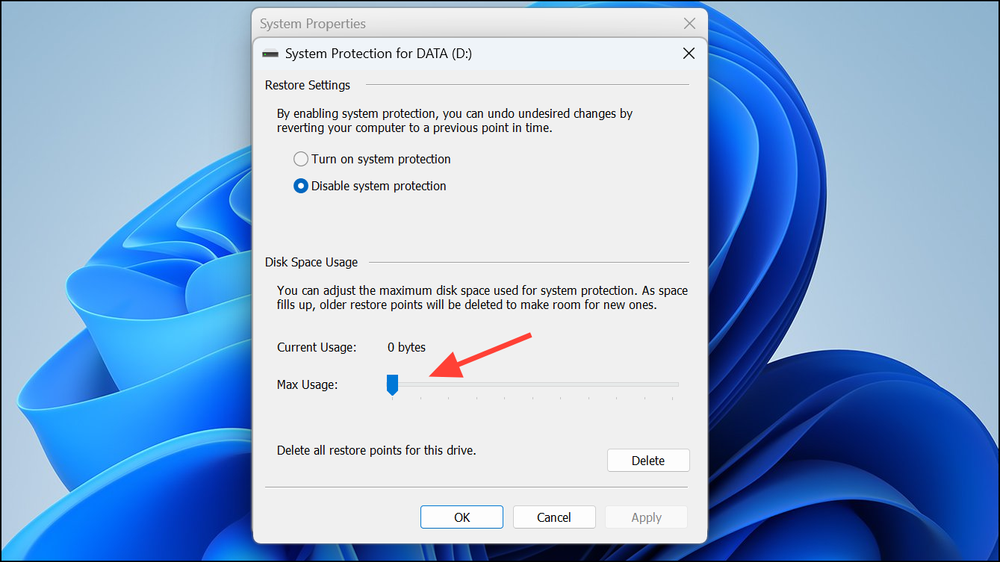
This adjustment reduces the space reserved for restore points, allowing more room for your files.
Use Compact OS to Compress System Files
For those with limited storage capacity, the Compact OS feature compresses Windows system files, often yielding a saving of 2-3 GB.
Steps to Enable Compact OS
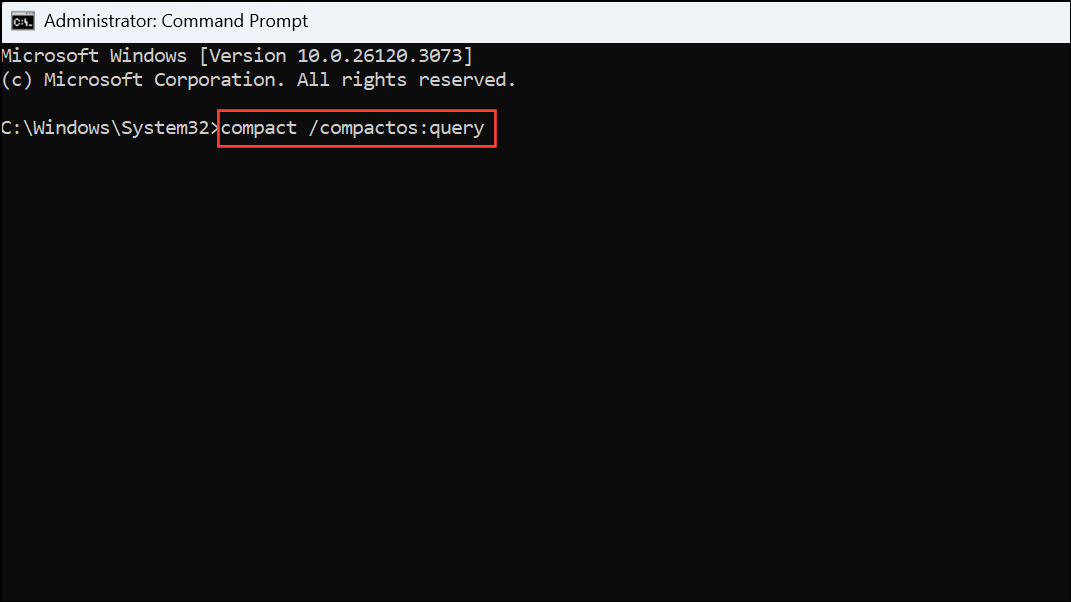
1- Open Command Prompt: Run Command Prompt as an administrator.
2- Check Status: Type compact /compactos:query to verify current settings.
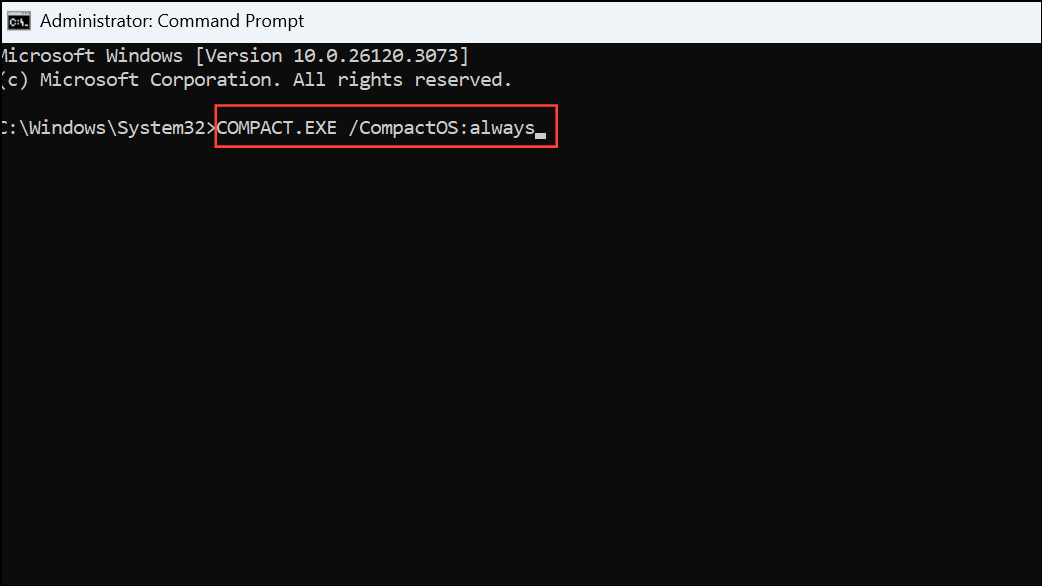
3- Enable Compression: Input the command COMPACT.EXE /CompactOS:always to enable file compression.
4- Disable Compression: If necessary, use COMPACT.EXE /CompactOS:never later to revert changes.
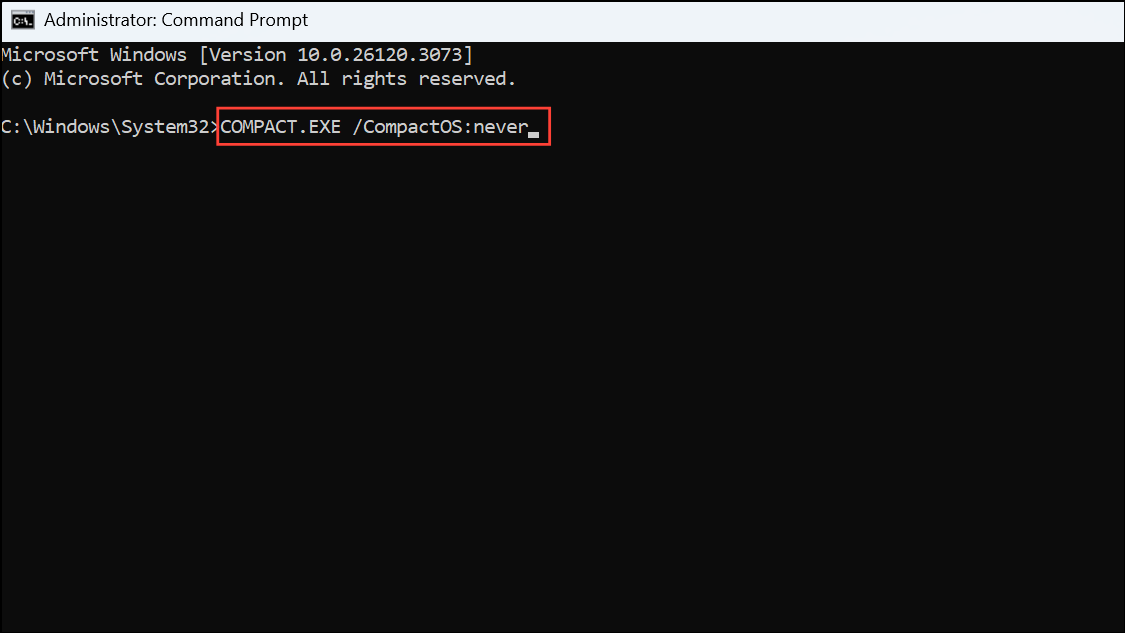
Compact OS does not compromise system performance while reclaiming valuable disk space.
Clear Temporary Files from Apps and System
Frequent usage of applications leads to the accumulation of temporary files and caches, contributing to storage clutter. Regularly clearing these files is essential for maintaining ample free space.
Steps to Clear Temporary Files
1- Open Settings: Navigate to System > Storage.
2- Select Temporary Files: Click on Temporary Files to review categories like app caches and thumbnails.
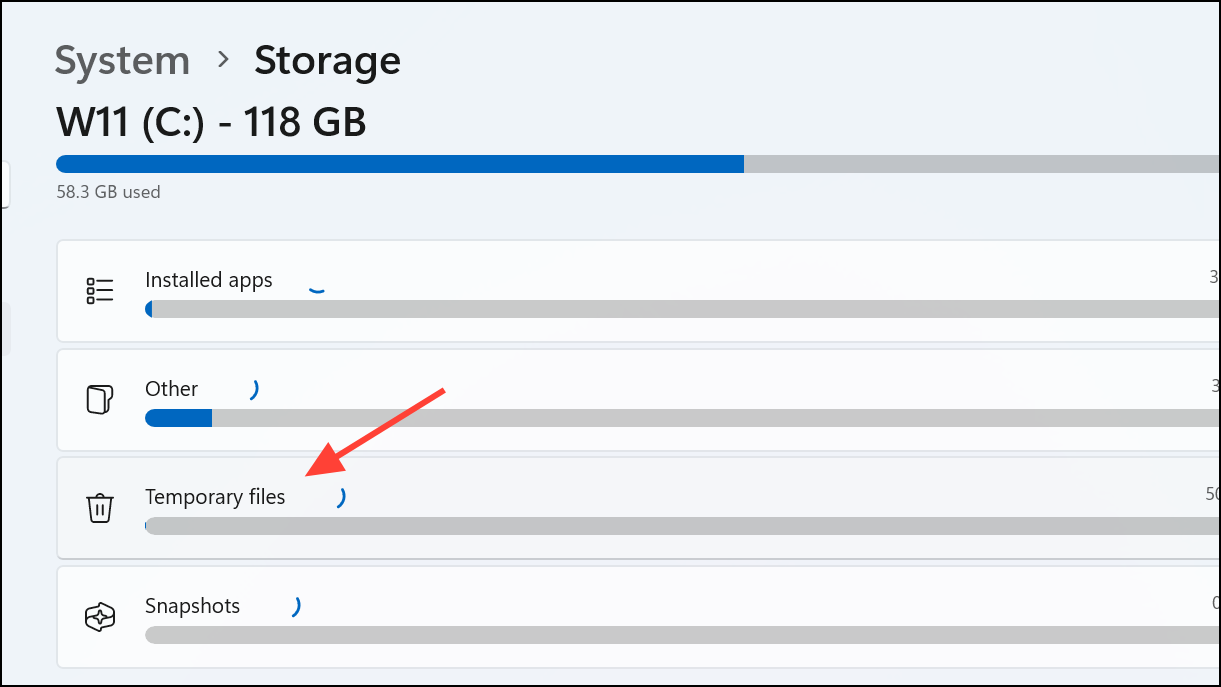
3- Remove Files: Choose the types of temporary files you wish to delete and click Remove files.

Additionally, for browsers like Chrome or Edge, you can clear cache and temporary files directly through their respective settings.
Uninstall Unused Applications and Windows Features
Infrequently used applications and Windows features occupy precious disk space and may hinder system performance. Cleaning up your software is a vital step in optimizing storage.
Steps to Uninstall Unnecessary Software
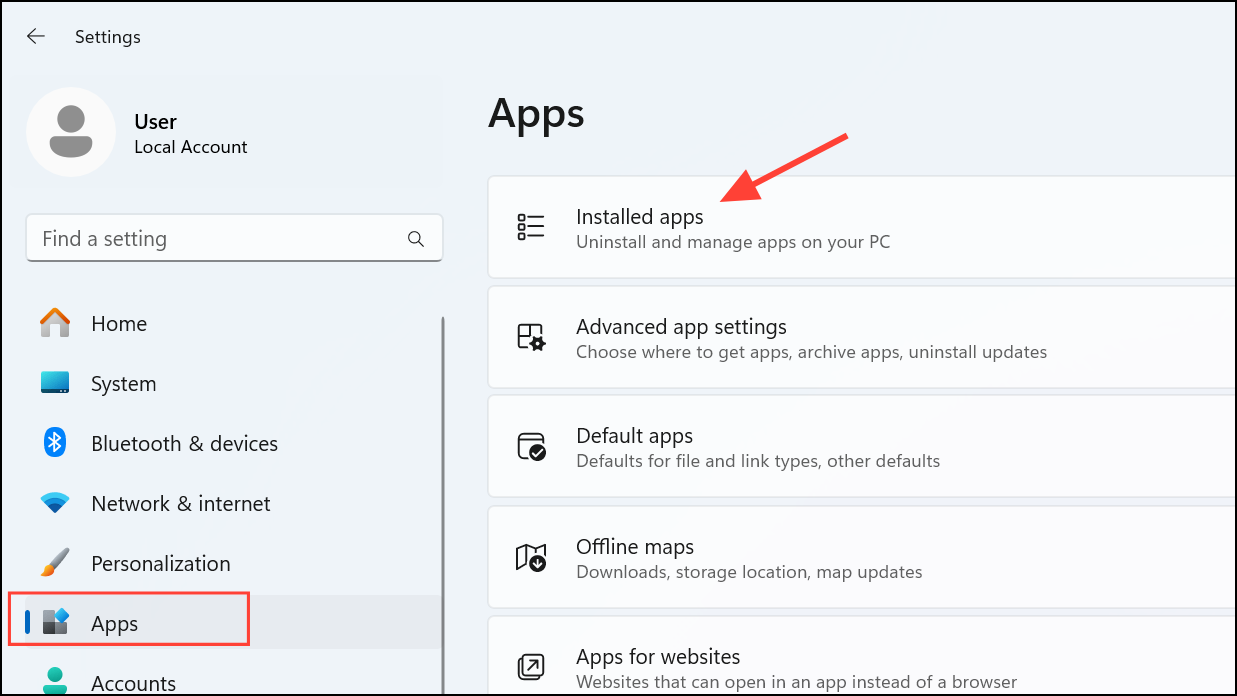
1- Access Installed Apps: Go to Settings > Apps > Installed Apps.
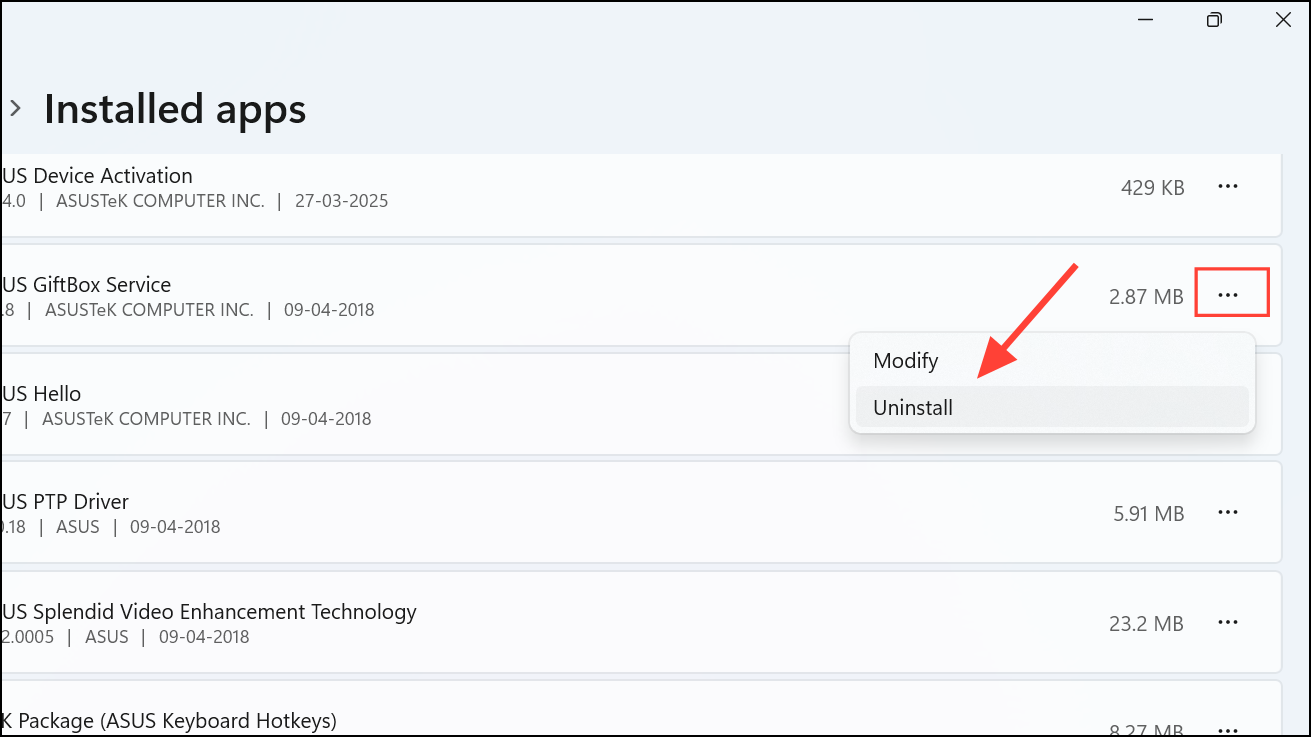
2- Review and Uninstall: Find apps you no longer need, click the three-dot menu next to them, and select Uninstall.
3- Remove Optional Features: Navigate to Settings > Apps > Optional Features, select any unneeded features, and uninstall them.
Conducting regular audits of your installed software can prevent unnecessary storage consumption and improve system performance.
Conclusion
By implementing these practical strategies, you can reclaim valuable storage on your Windows 11 device, ultimately leading to improved system performance and longevity. From leveraging built-in features like Storage Sense to redirecting save locations and managing temporary files, these techniques empower you to maintain a clean and efficient computing environment. Regularly reviewing and managing your files and applications is a proactive approach to ensuring your digital workspace remains clutter-free and functional.
Make the most of your system’s capabilities by harnessing these tools and techniques to stay organized and efficient. Your Windows 11 experience will thank you!
And if you'd like to go a step further in supporting us, you can treat us to a virtual coffee ☕️. Thank you for your support ❤️!

We do not support or promote any form of piracy, copyright infringement, or illegal use of software, video content, or digital resources.
Any mention of third-party sites, tools, or platforms is purely for informational purposes. It is the responsibility of each reader to comply with the laws in their country, as well as the terms of use of the services mentioned.
We strongly encourage the use of legal, open-source, or official solutions in a responsible manner.
Comments