
Introduction
The CRITICAL_PROCESS_DIED error is a frustrating issue that manifests as a Blue Screen of Death (BSOD) on Windows 11 systems, particularly following the April 2025 cumulative update. This error signifies that a crucial system process has unexpectedly stopped, leading to instability and potential boot failures. Fortunately, there are several methods to troubleshoot and resolve this problem, ensuring your system returns to normal operation. This guide will provide you with a comprehensive approach to diagnosing and fixing this critical issue.
Install the Latest Windows Updates and Patches
Step 1: Connect your PC to the internet and open the Settings app by pressing Windows + I.
Step 2: Navigate to Windows Update and click on Check for updates. Installing the latest updates often includes fixes for issues like the CRITICAL_PROCESS_DIED error that may have arisen due to the April 2025 update.
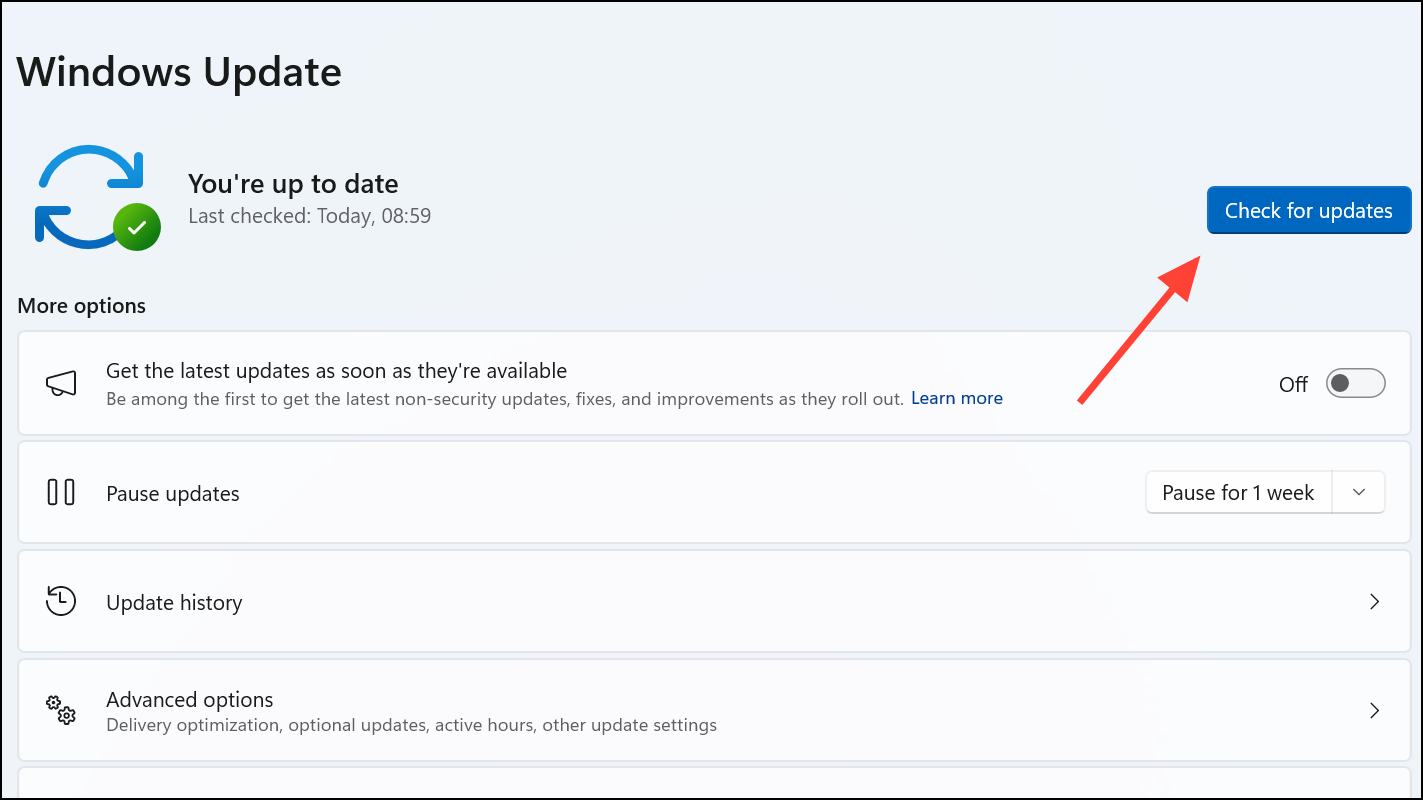
Step 3: Once updates have been downloaded and installed, reboot your PC to apply the changes and determine if the error persists.
Tip: Microsoft has issued server-side fixes for BSOD issues arising from the April 8, 2025 update, particularly for devices on preview or release builds. Keeping your system updated is essential to receiving these crucial fixes.
Uninstall Problematic Updates via Recovery Mode
If your PC fails to boot normally due to the BSOD, you can use the Windows Recovery Environment (WinRE) to remove the faulty update.
Step 1: Power on your PC and repeatedly interrupt the boot process three times in a row to force Windows into recovery mode.
Step 2: In the recovery menu, choose Troubleshoot, then Advanced options, and finally select Uninstall Updates.
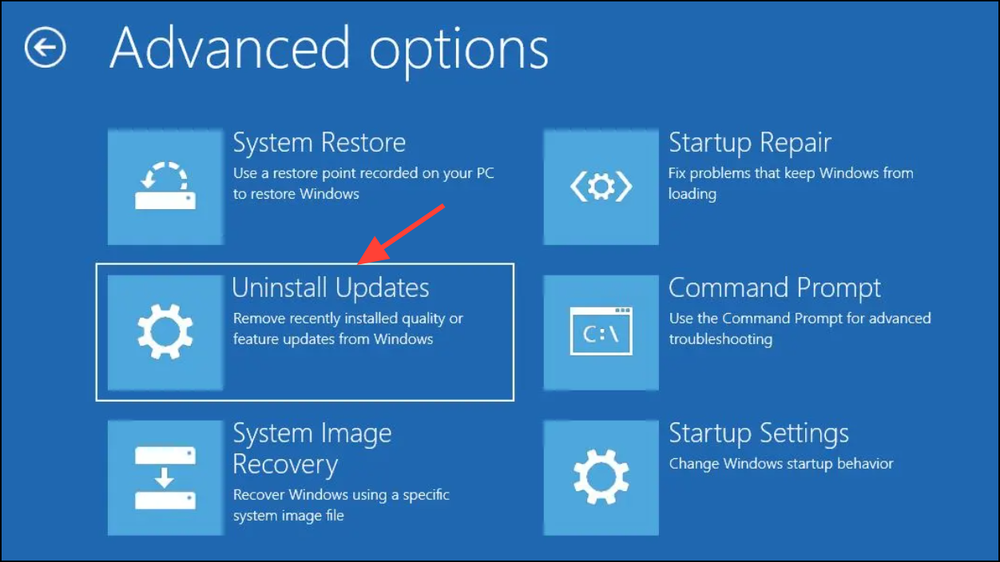
Step 3: Select Uninstall latest quality update to remove the most recent update that may be causing the issue.
Step 4: After uninstallation, restart your PC and check for normal boot without the CRITICAL_PROCESS_DIED error.
Removing the problematic update can restore your system’s stability, especially if the update introduced compatibility issues or corrupted files.
Perform a Clean Installation of Windows 11
When recovery options fail, a clean installation can reset your system, removing any corrupted files or conflicting drivers.
Step 1: Create a Windows 11 installation USB drive using the Microsoft Media Creation Tool. Be sure to back up all important data before proceeding.
Step 2: Boot your PC from the USB drive by adjusting the boot order in your BIOS or UEFI settings.
Step 3: Follow the on-screen prompts for a clean installation, selecting the option to delete existing partitions if necessary to eradicate corrupted system files.
Step 4: After installation, temporarily disable automatic Windows updates to prevent the immediate reinstallation of any problematic updates until a stable fix is confirmed.
A clean installation effectively eliminates software conflicts and corrupted files, providing a stable environment for your system.
Use System File Checker and DISM to Repair Corrupted Files
Corrupted system files are a common culprit behind critical process failures. The System File Checker (SFC) and Deployment Image Servicing and Management (DISM) tools can help repair these issues.
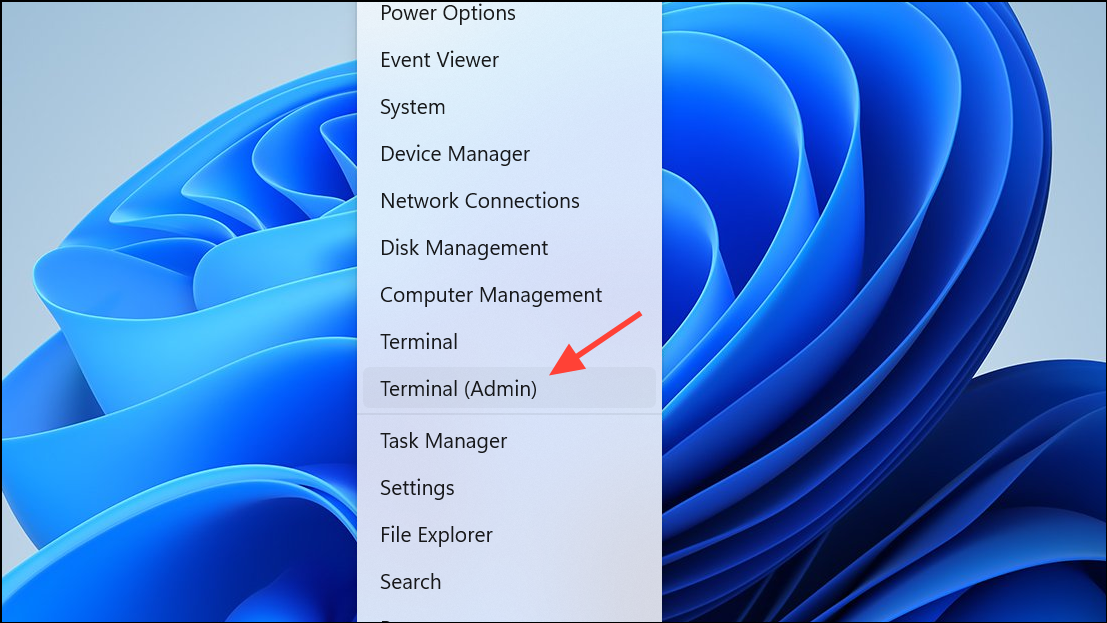
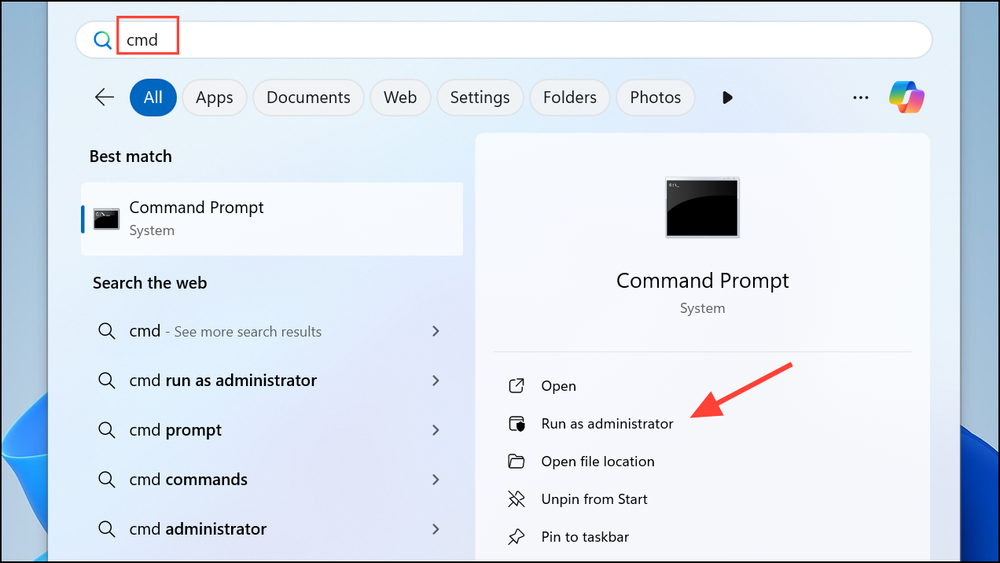
Step 1: Open Command Prompt as an administrator by right-clicking the Start button and selecting Windows Terminal (Admin) or Command Prompt (Admin).
Step 2: Run the following DISM command to check the system’s health:
1DISM /Online /Cleanup-Image /CheckHealth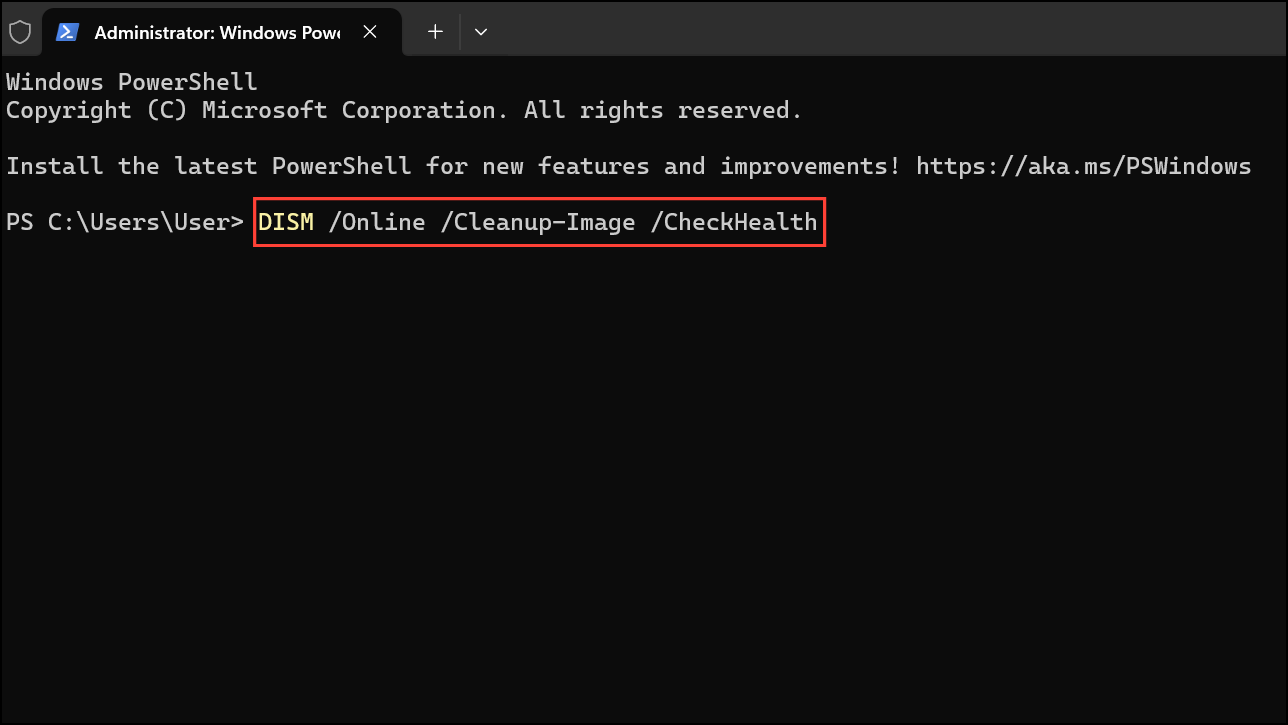
Step 3: If any issues are identified, execute the following command to restore health:
1DISM /Online /Cleanup-Image /RestoreHealth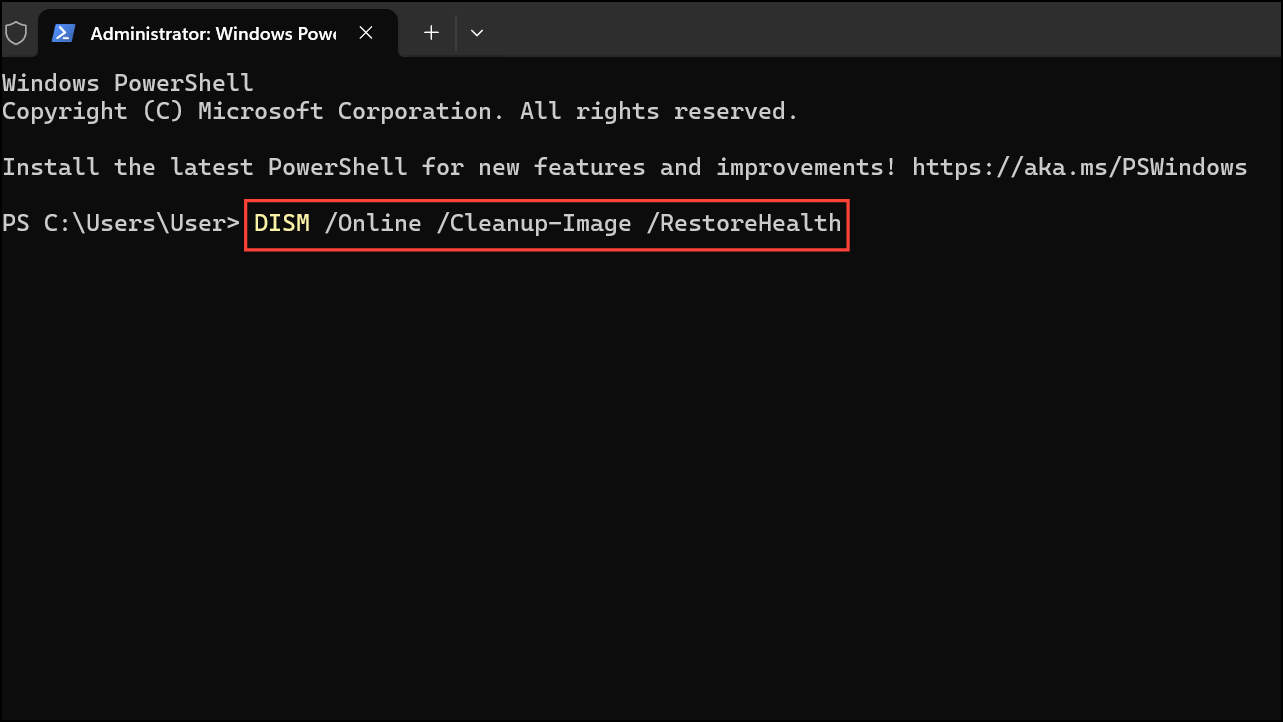
Step 4: Once DISM completes, run the System File Checker with the command:
1SFC /SCANNOW
Step 5: Repeat the SFC command until no more errors are reported.
These commands help repair corrupted or missing system files that may have triggered the CRITICAL_PROCESS_DIED error, enhancing overall system stability.
Boot into Safe Mode and Perform a Clean Boot
Booting into Safe Mode limits Windows to essential drivers and services, allowing for the identification of problematic software or drivers that may cause the error.
Step 1: Access the recovery environment by interrupting the startup process three times or by selecting Restart while holding the Shift key at the login screen.
Step 2: Navigate to Troubleshoot > Advanced options > Startup Settings and click Restart.
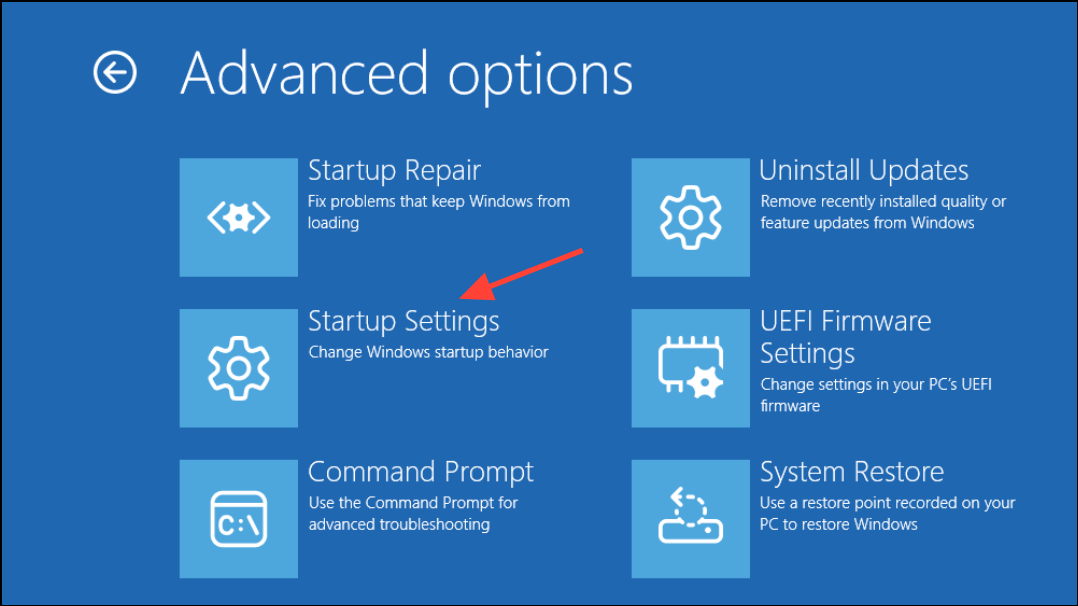
Step 3: After rebooting, press 4 or F4 to enter Safe Mode.
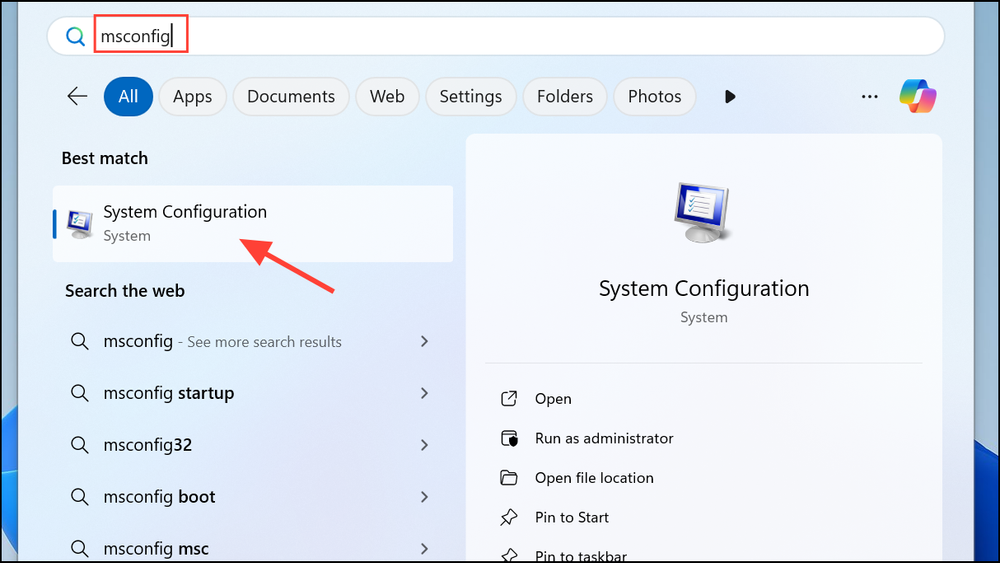
Step 4: In Safe Mode, open System Configuration by typing msconfig in the Start menu and pressing Enter.
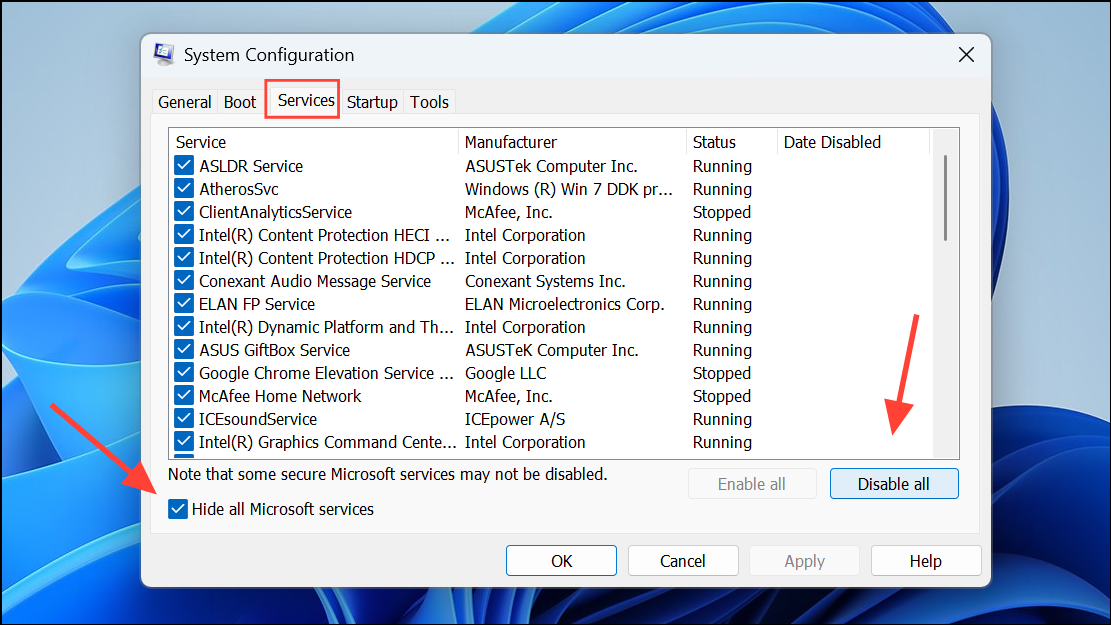
Step 5: Under the Services tab, check Hide all Microsoft services, then click Disable all. Proceed to the Startup tab and open Task Manager to disable all startup items.
Step 6: Restart your PC normally. A clean boot can help determine if a background program is causing the BSOD.
Check and Roll Back Device Drivers
Incompatibilities or issues with device drivers can abruptly halt essential processes. Rolling back or updating drivers may resolve these conflicts.
Step 1: Access Device Manager by right-clicking the Start button and selecting it from the menu.
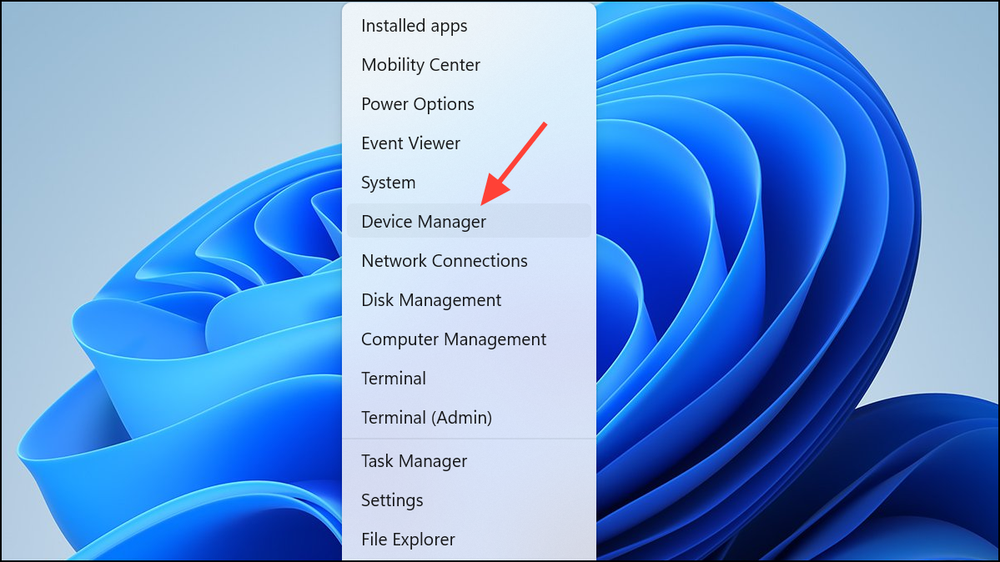
Step 2: Expand the categories and look for devices marked with a yellow warning icon, indicating driver problems.
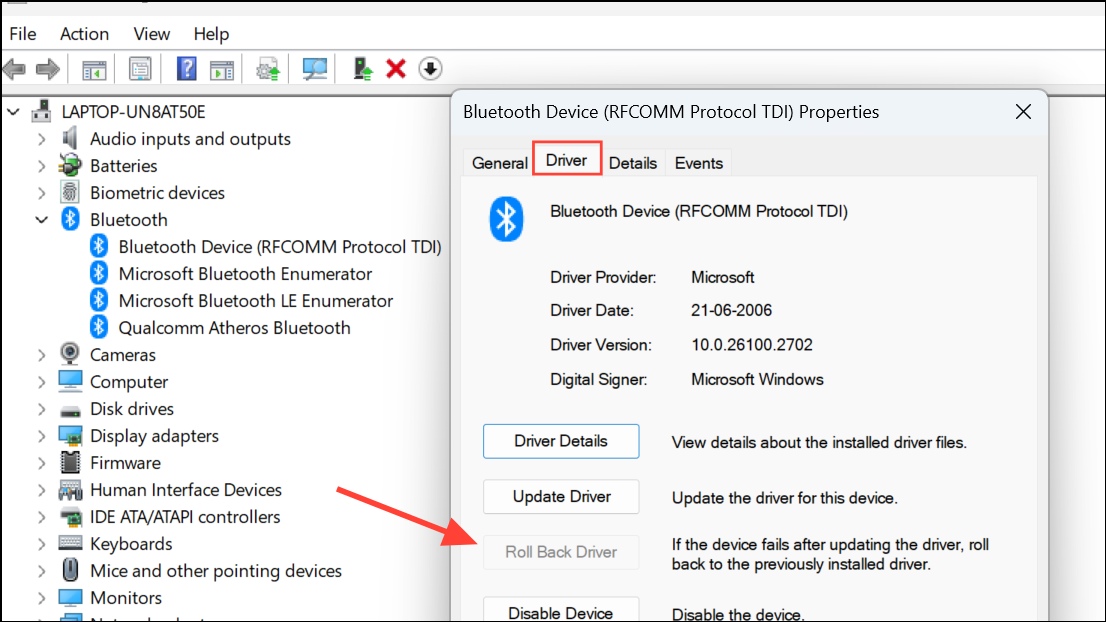
Step 3: Right-click the problematic device and select Properties. In the Driver tab, click Roll Back Driver if the option is available to revert to a previous version.
Step 4: If rollback isn’t an option, visit the device manufacturer’s website to download and install the latest compatible driver.
Managing drivers effectively can prevent CRITICAL_PROCESS_DIED errors by ensuring hardware operates smoothly without disrupting system processes.
Run Disk Check to Repair Hard Drive Errors
Hard drive issues can lead to unexpected termination of system processes. Running a disk check can identify and repair file system errors.
Step 1: Open Command Prompt as an administrator.
Step 2: Enter the following command to check and fix hard drive errors:
1chkdsk /f /r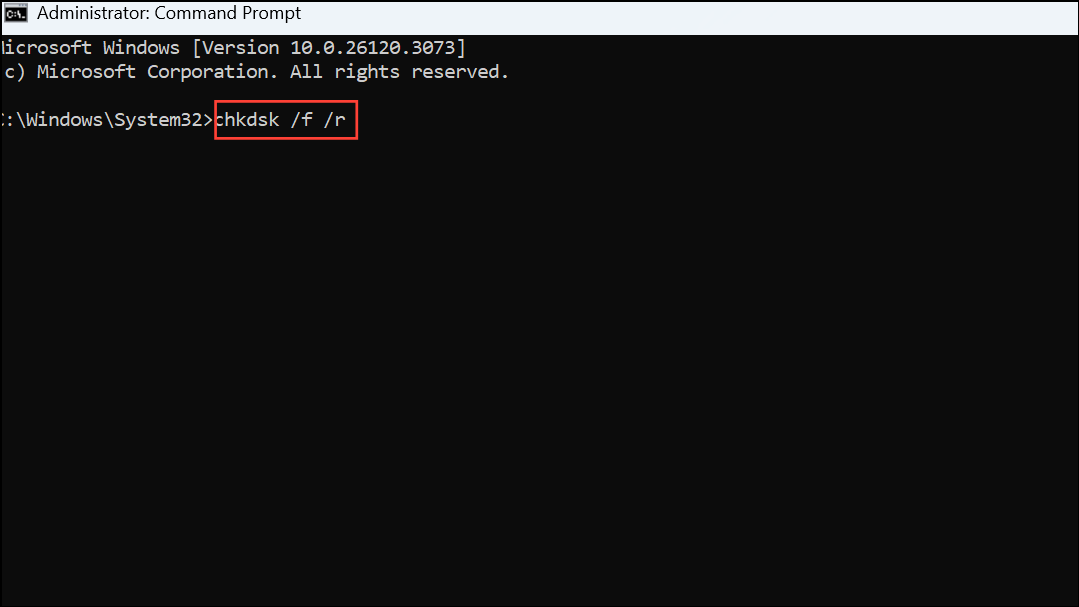
Step 3: If prompted to schedule the scan for the next restart, type Y and press Enter.
Step 4: Restart your PC to allow the disk check to scan and repair any issues.
Repairing disk errors helps prevent critical system processes from failing due to corrupted files or bad sectors, contributing to a more stable computing experience.
Conclusion
Dealing with the CRITICAL_PROCESS_DIED error following the April 2025 update on Windows 11 can be daunting, but with these detailed steps, you can effectively troubleshoot and resolve the issue. From updating your system to repairing corrupted files and rolling back drivers, each method plays a crucial role in restoring stability to your Windows environment. Regular maintenance and awareness of updates can further enhance your system’s performance and reliability, ensuring you enjoy a seamless computing experience.
And if you'd like to go a step further in supporting us, you can treat us to a virtual coffee ☕️. Thank you for your support ❤️!

We do not support or promote any form of piracy, copyright infringement, or illegal use of software, video content, or digital resources.
Any mention of third-party sites, tools, or platforms is purely for informational purposes. It is the responsibility of each reader to comply with the laws in their country, as well as the terms of use of the services mentioned.
We strongly encourage the use of legal, open-source, or official solutions in a responsible manner.
Comments