
WiFi network not showing up can refer to two scenarios – either the WiFi doesn’t work at all, or your device can’t find one specific network.
In the first case, you should troubleshoot the network adapter to ensure it’s loaded properly and not disabled.
The second case mainly happens due to compatibility issues related to the WiFi generation, channels, and security mode.
To fix this problem, try to manually add the network first. If that fails, you can try the rest of the fixes as they’re helpful for both scenarios.
Join the Network Manually
New technologies like WiFi 6 and WPA3 are backward compatible to an extent. But many older devices struggle to connect to networks that use these techs.
Similarly, some networks don’t broadcast their SSID as a form of security by obscurity.
Manual setup sometimes helps in the first case, while it is the expected way to connect in the latter. To do this,
1- Press Win + I to open Windows Settings.
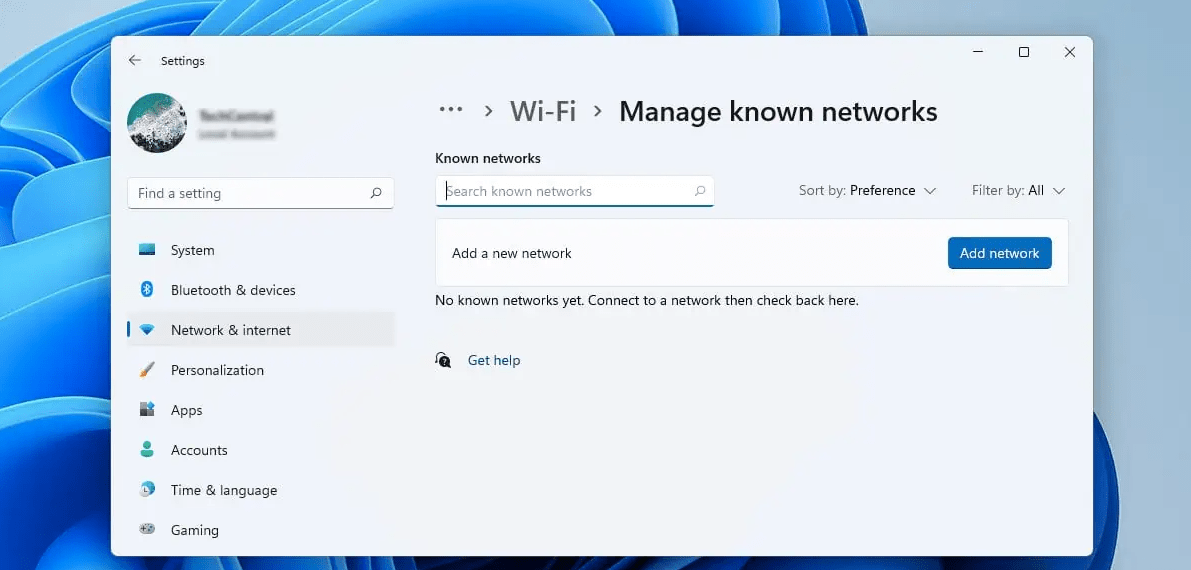
2- In the Network & internet > Wi-Fi tab, click on Manage known networks.
3- Use the Add a new network option.
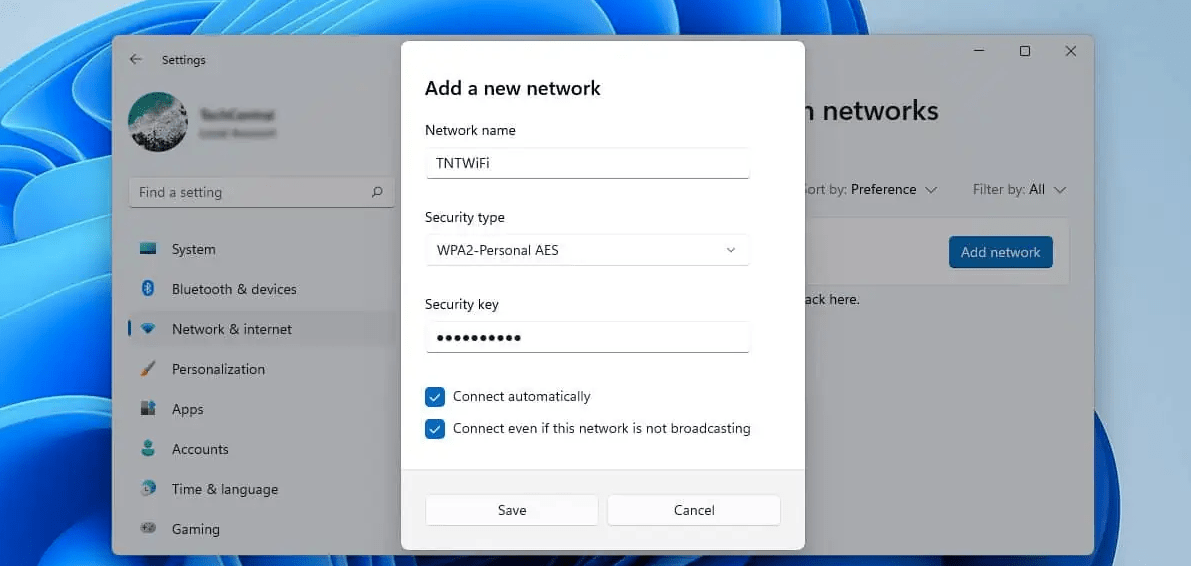
4- Enter the SSID (name) of the network. Then, select the security mode (mostly WPA2) and enter the security key (password).
If your device uses an old network adapter, this method may not help as it could simply be incompatible with your router and WiFi. For instance, if the router is only broadcasting 5 GHz WiFi, old adapters designed for 2.4 GHz WiFi won’t detect the network.
But before upgrading the adapter, you should at least try the fixes from this guide. They cover a lot of other potential causes.
Quick Networking Fixes
Depending on your circumstances, only some of these fixes may be relevant to you. Some people may be struggling to connect to a public network.
Or, others might not have a WiFi switch on their device. So, just try the ones applicable to you:
- Check for a physical WiFi switch on your device. This is often obscure and many users unknowingly turn it off.
- Ensure you haven’t used any Fn key combos to disable the wireless adapter.
- Run the Network and Internet troubleshooter and try the suggested solution.
- Restart the router.
- Use any or all of these methods to reset the network adapter and reload the drivers:
- Toggle Airplane mode on/off.
- Restart your PC.
- Disable, then enable the WiFi adapter from the Device Manager.
- On a lot of laptops, you can remove the battery and hold the power button for 60 seconds. This will reset the WiFi and Bluetooth adapters.
There are a few more helpful quick fixes, but these ones are destructive. You’ll have to reconfigure the settings after resetting (router setup, joining WiFi networks, etc.). If that’s a problem, feel free to come back to these after trying everything else:
- You could reset your router.
- You could reset your networking settings from the command line. Or, you could use Windows’ Network reset option.
Troubleshoot Wireless Drivers
Tying into our earlier point, updating to the latest drivers can make older devices compatible with new WiFi technologies like WiFi 6. Or, if the latest driver is buggy, reverting to a previous stable version can help.
To account for the max possible scenarios, I recommend the following troubleshooting process:
1- Press Win + R, type devmgmt.msc, and press Enter.
2- Expand Network adapters and double-click the wireless adapter.
3- Go to the Driver tab.
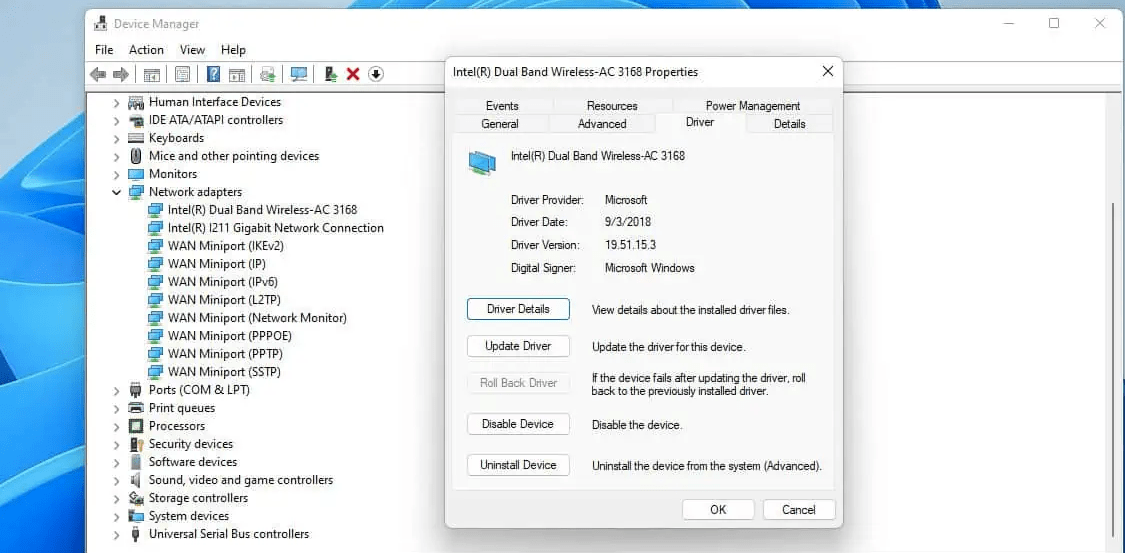
4- If your WiFi problems started after a recent update, use the Roll Back Driver option.
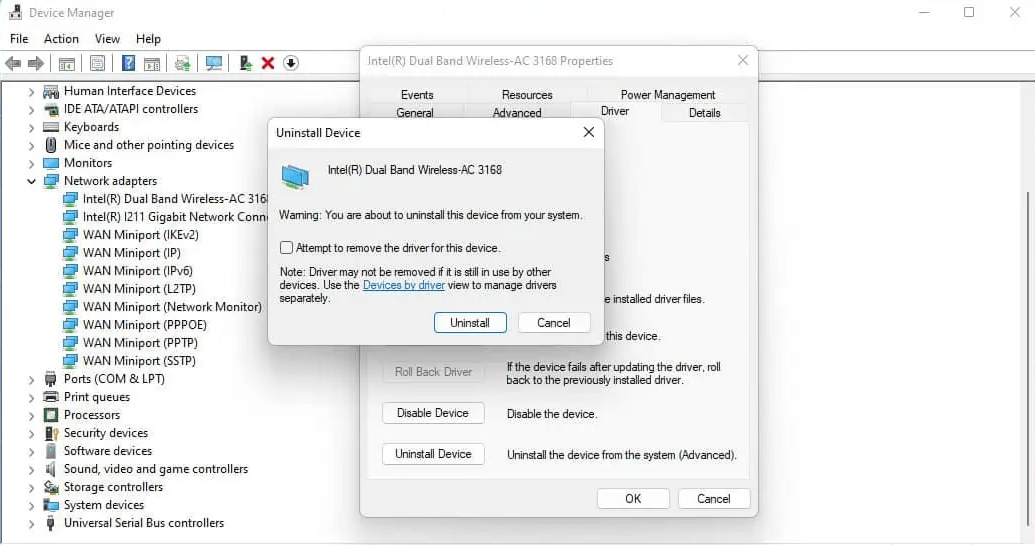
5- Otherwise, click on the Uninstall Device option.
6- Enable the remove device drivers option and click on Uninstall.
7- Select Action > Scan for hardware changes.
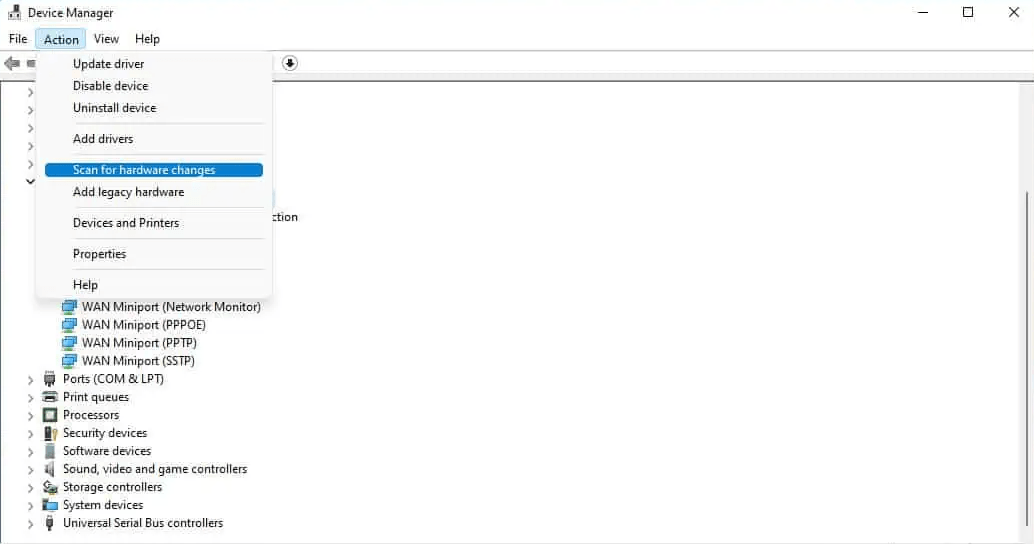
The wireless adapter should reappear now (possibly with a different name). It’ll use the basic wireless driver from Microsoft until you update.
The basic driver may work, but it’s not safe to keep using an outdated driver. So, download and install the latest stable wireless driver from your adapter manufacturer’s site.
Change WiFi Channel
The 2.4 GHz band typically only has 11 channels. If your router is on an overcrowded channel, that can interfere with the WiFi signal and affect the speed.
In rare cases, it can even prevent the network from being detected by some devices. To ensure this isn’t the problem,
- Login to your router’s dashboard. Use an Ethernet connection or another device connected to the network for this.
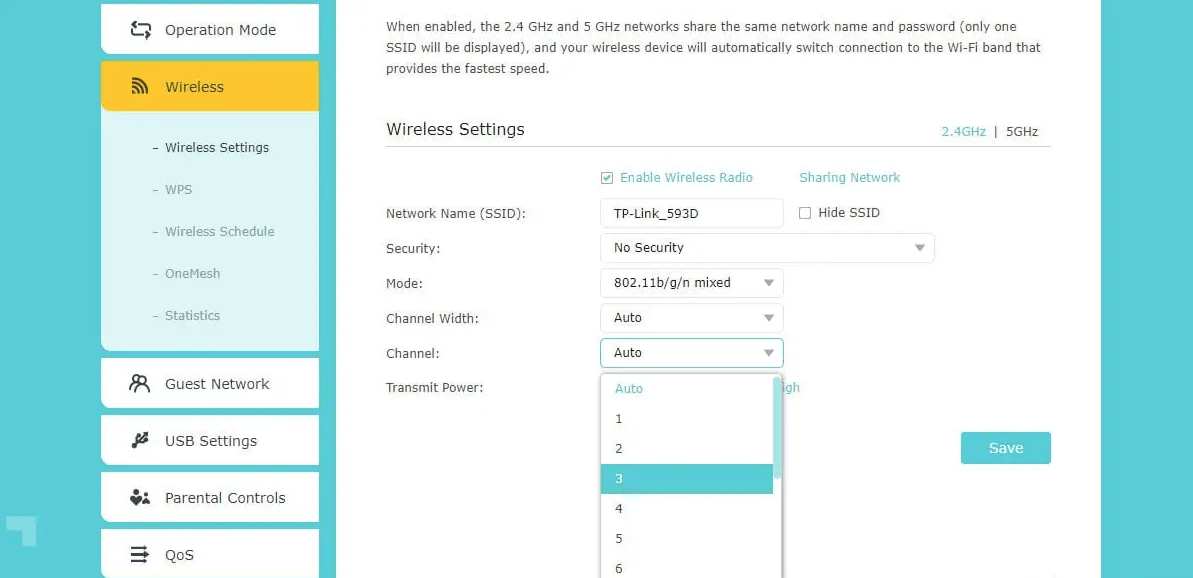
- Go to Wireless, WLAN, or a similar tab.
- Set the channel to Auto and apply the changes. If it was already set to Auto, manually set a new channel.
Enable Wireless Services
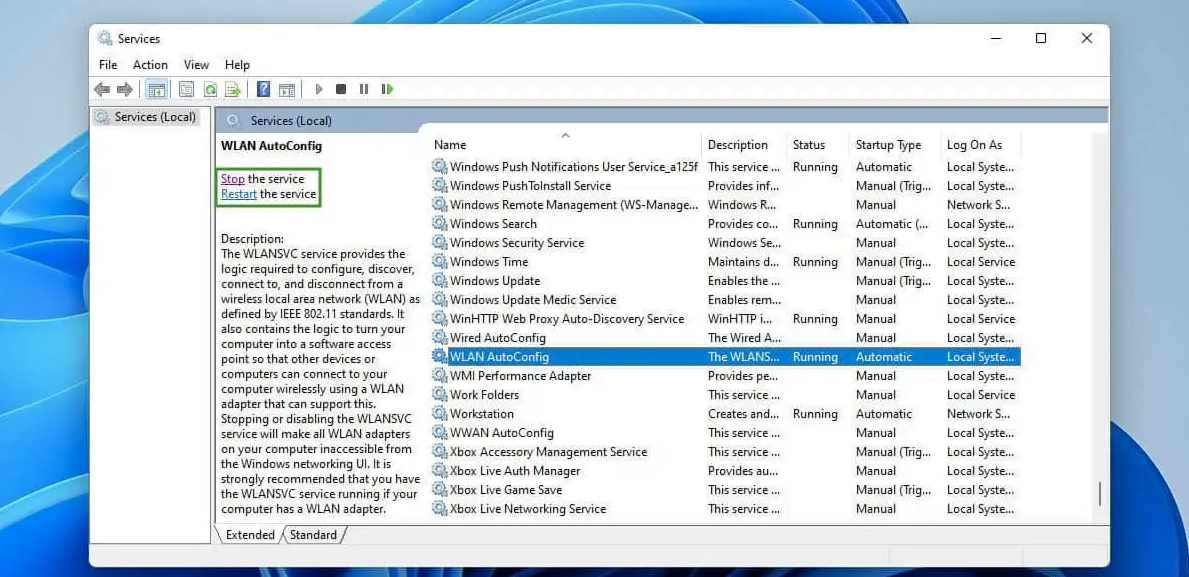
If the WLAN AutoConfig service isn’t running, your device won’t be able to find or connect to WiFi networks. In some cases, the same applies to the Windows Event Log service.
Ensure these services are enabled and running like so:
1- Press Win + R, type services.msc, and press Enter.
2- Scroll down to the WLAN AutoConfig service. Start or restart the service.
3- If it’s disabled, double-click it. Change the Startup type to Automatic and press Ok.
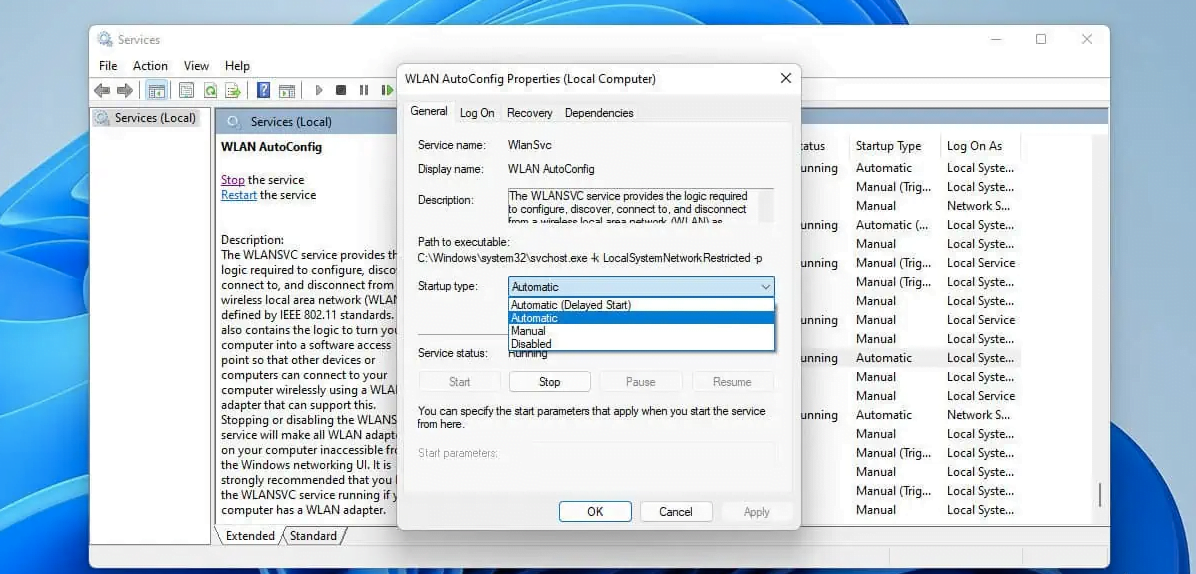
4- Repeat Steps 2 and 3 for the Windows Event Log service.
Replace Your Wireless Adapter
At this point, if the WiFi still doesn’t work, you’re likely dealing with a faulty wireless adapter.
If you can borrow a USB wireless adapter from someone, you’ll be able to easily verify this. A PCIe WiFi card will work too; it’ll just be a bit harder to install and remove.
I’ve seen some very niche cases where the adapter’s antenna was disconnected or stopped working. This can prevent your device from detecting any networks as they could all be out of range.
- You could move the PC and router closer to get in range of the WiFi signal.
- If that’s not an option, you can also try to boost the signal through walls.
- Besides that, the only option is to properly install a working antenna or replace the adapter.
"Because of the Google update, I, like many other blogs, lost a lot of traffic."
Join the Newsletter
Please, subscribe to get our latest content by email.