
Desktop WiFi cards mostly come in one of two forms – USB or PCIe. USB WiFi adapters are extremely straightforward; simply plug them into a USB port and you’re good.
PCIe wireless adapters go into the PCIe slots on your motherboard (typically the PCIe x1 slot at the bottom). Installing these takes a bit more effort.
After physically installing the WiFi card, you’ll need to install the drivers before you can start using it. I’ll guide you through this entire process in this article.
Picking a WiFi Card
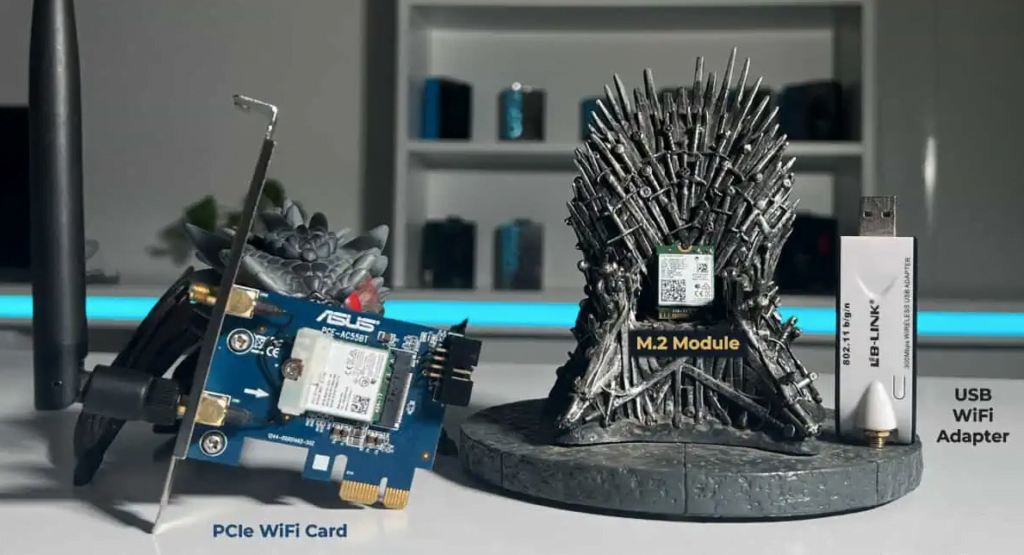
This section is for those who haven’t purchased a WiFi card yet. You’ll find three total types of wireless adapters in the market – USB, PCIe, and M.2.
USB wireless adapters are the most common these days. They’re portable, easy to use, and work on all desktops and laptops.
M.2 modules are mostly purchased for use on laptops. These have keying notches in the E and A positions.
PCIe cards are just M.2 modules installed on a PCIe adapter. This is done to make them compatible with most desktop motherboards.
When picking a WiFi card, you must think about compatibility and performance. The key things to keep in mind are:
- USB adapters are compatible with pretty much all PCs. They’re also super-affordable but the lower-end ones tend to be unreliable.
- M.2 modules are intended for laptops. Before purchasing them for a desktop, ensure your motherboard has a compatible M.2 slot. Otherwise, you’ll need an M.2 adapter.
- For PCIe adapters, ensure you have at least one PCIe slot free and not physically blocked by the GPU.
- Performance mostly depends on the adapter’s price range and quality rather than the adapter type (performance refers to max supported connection speed, connection range, quality, and stability).
- I recommend going for a product at least mid-range with good reviews. And if you want the best wireless performance on desktops, high-end PCIe cards are the way to go.
Installing PCIe WiFi Card on Desktops
Note: Periodically touch an unpainted metal surface to discharge static electricity. This will minimize any chances of damage from ESD.
Prepare the PCIe Slot
- Turn off the PC and disconnect the power cable.
- Remove the side panel. Depending on the case, you may be able to swing the door open, unscrew the panel, or slide it off.
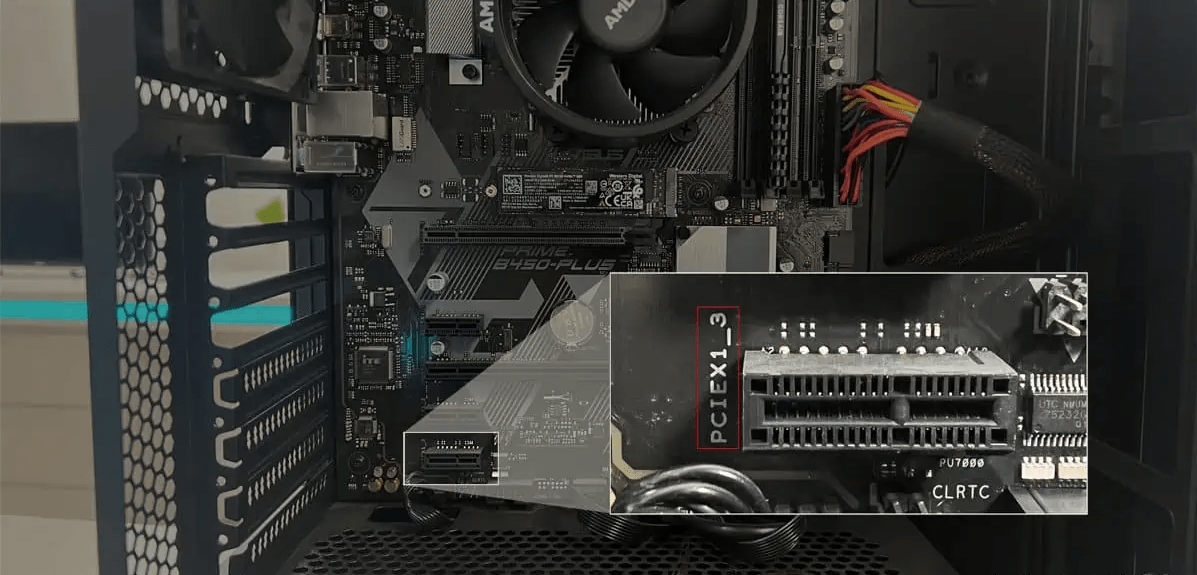
- Locate the PCIe x1 slot. You can use other free PCIe slots if you want but most people need those for other expansion cards like GPUs.
If there’s another card already installed, you’ll have to remove it first.
1- Unlock the PCIe slot’s latch (if present).
2- Remove the screw holding the card in place.
3- If there’s an extension cord connecting the card to the motherboard, unplug it.
4- Gently pull the card straight out of the PCIe slot.
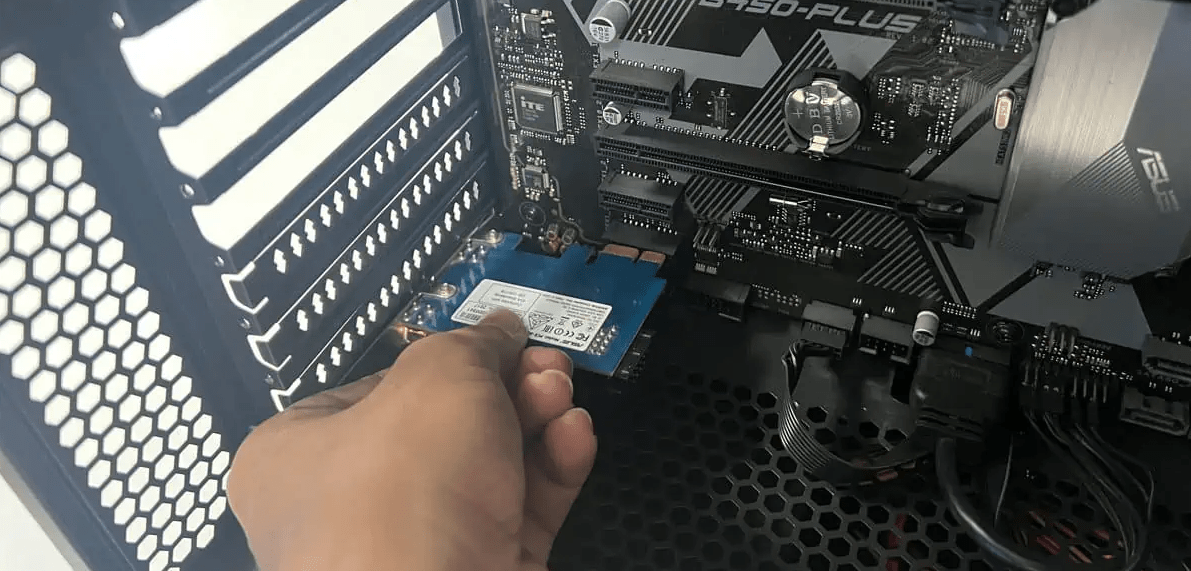
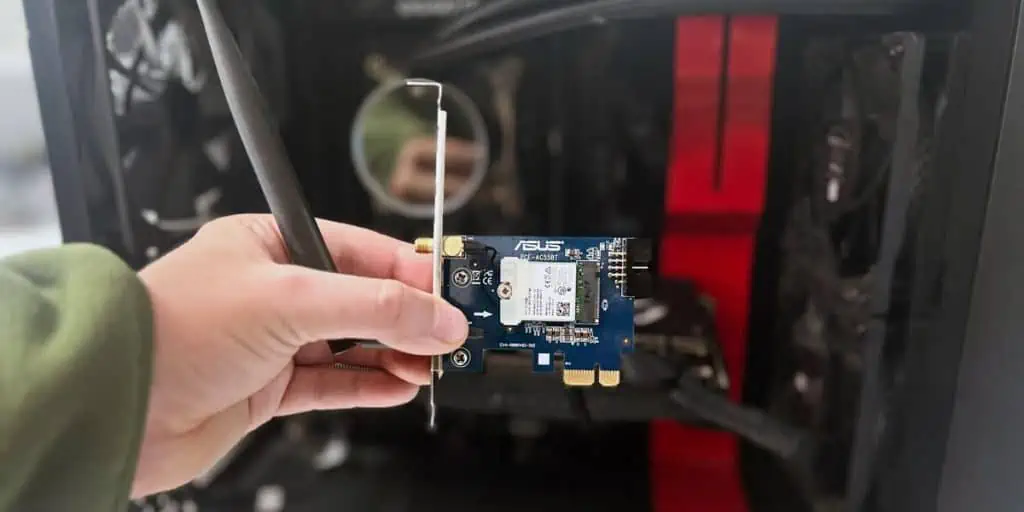
Install the WiFi Card
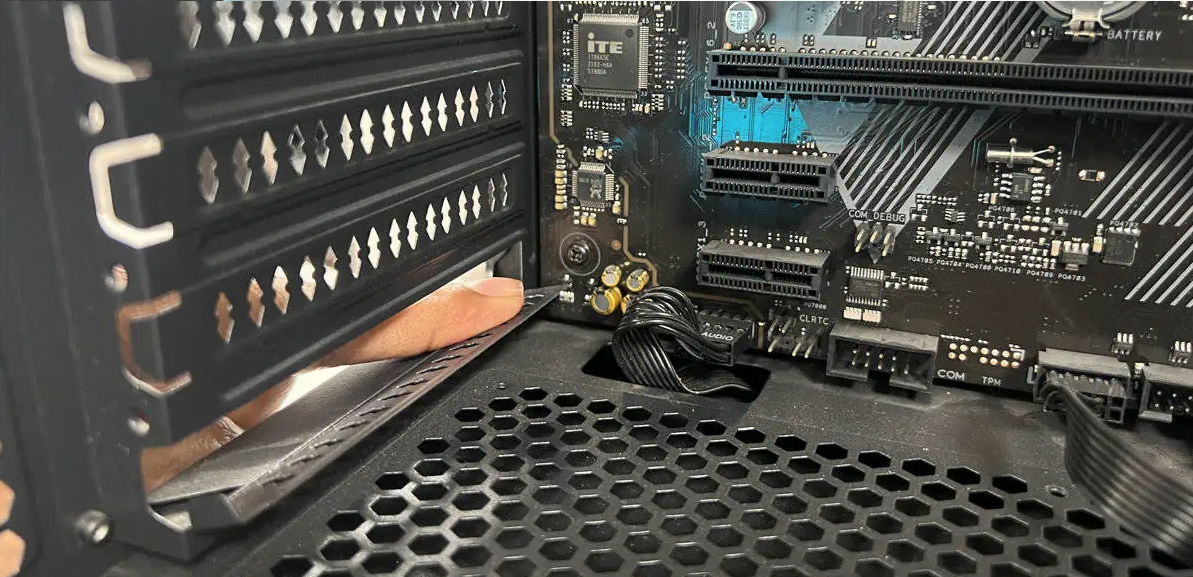
1- If there’s a metal bracket adjacent to the PCIe slot you’re about to use, remove it. Some covers can unscrewed, while others need to be permanently popped off with a bit of force.
2- Align the WiFi card so that the PCIe connector aligns with the PCIe slot and the antenna connectors pop out of the case.
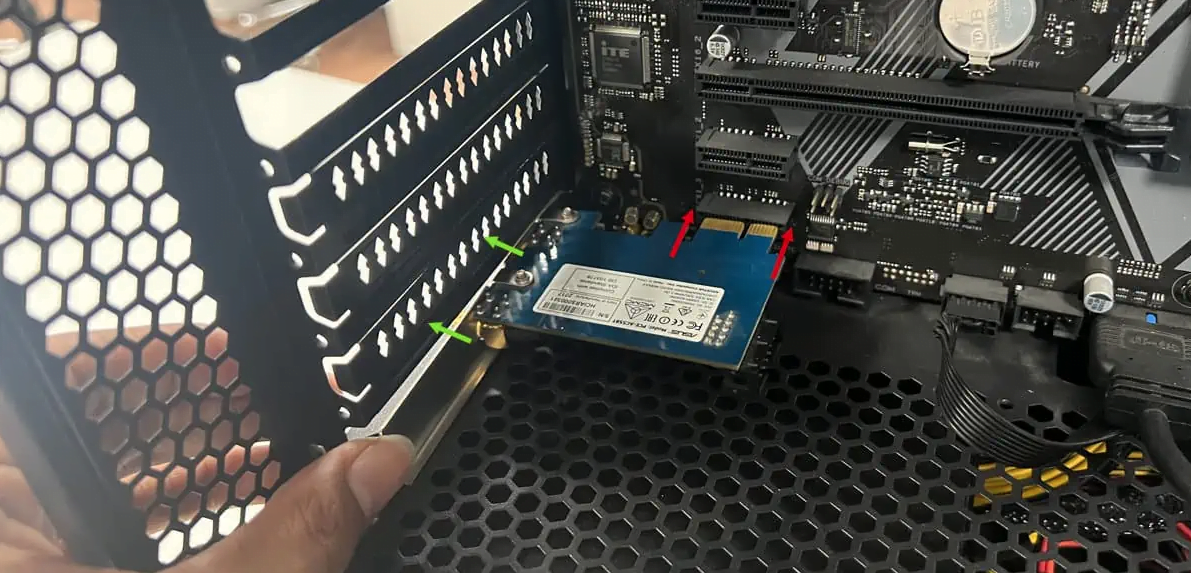
3- Gently push the card straight into the slot. If the slot has a latch, it should automatically lock when the card is all the way in.
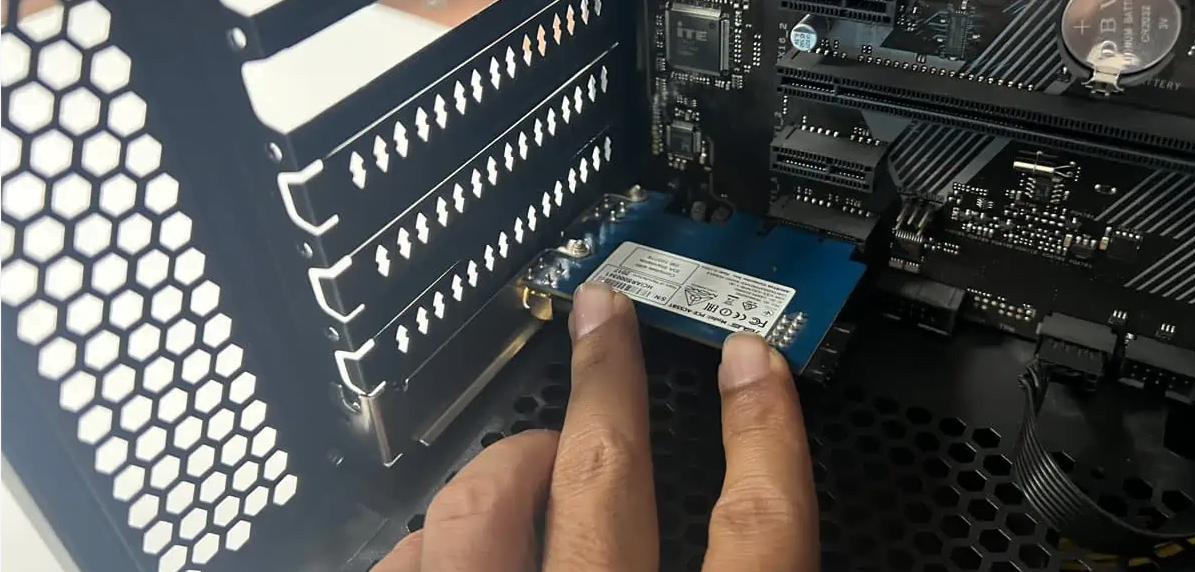
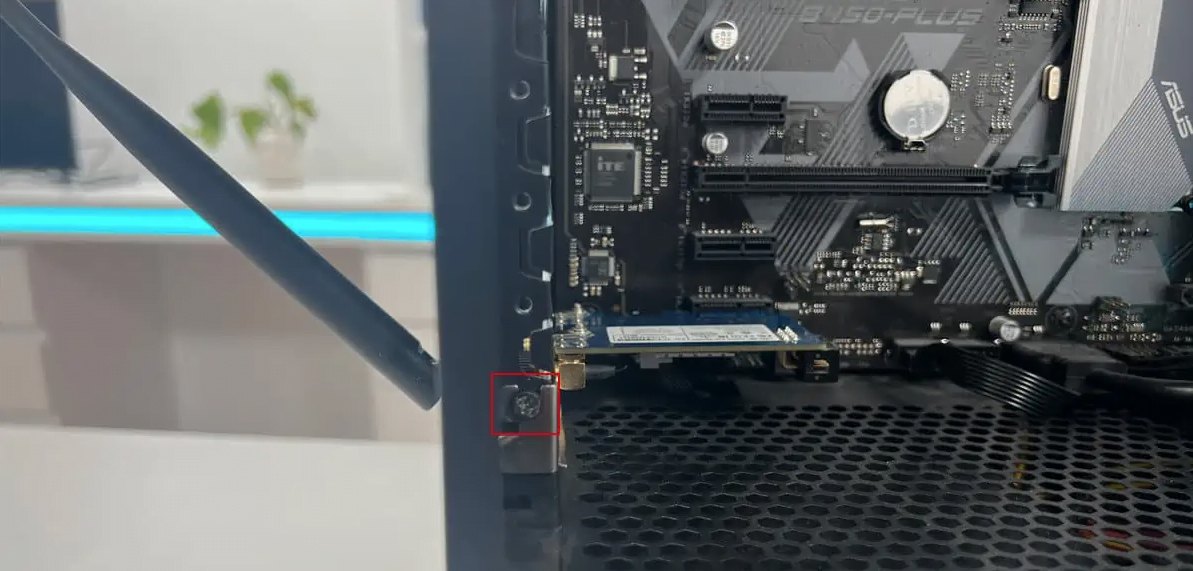
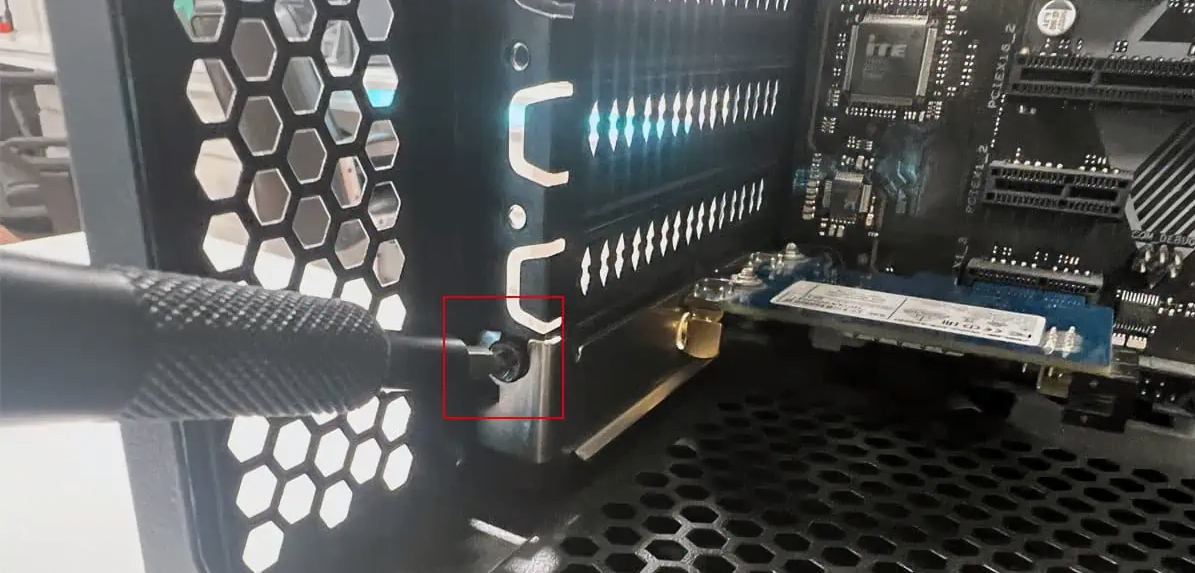
4- Install the screw to properly hold the card in place.
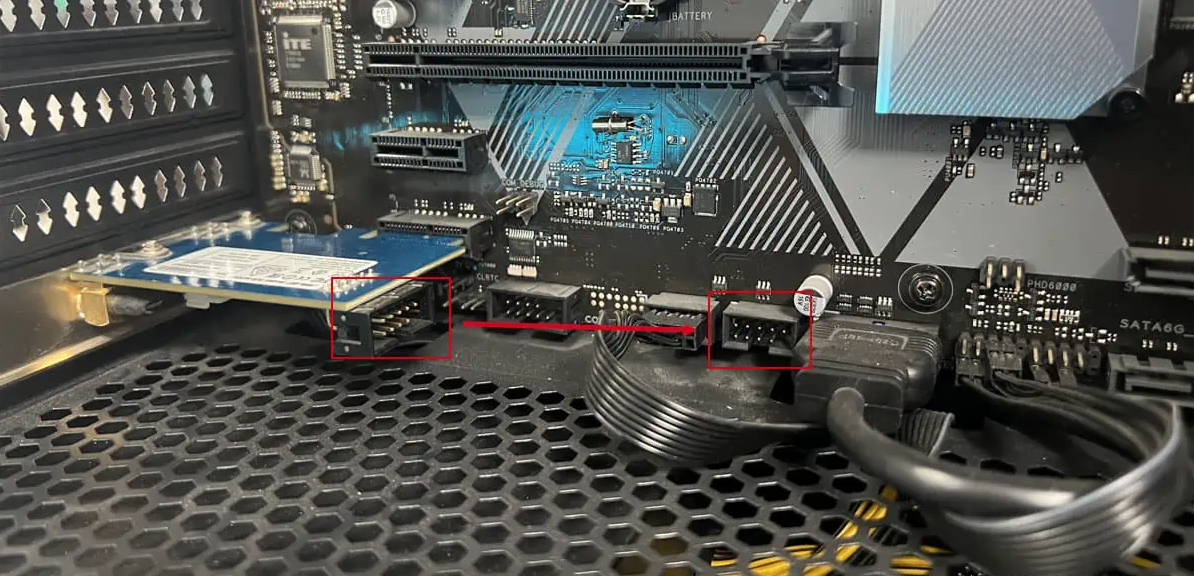
5- If the card also has an extension cord for the Bluetooth module, connect one end to the card. Then, connect the other end to the USB header on the motherboard.
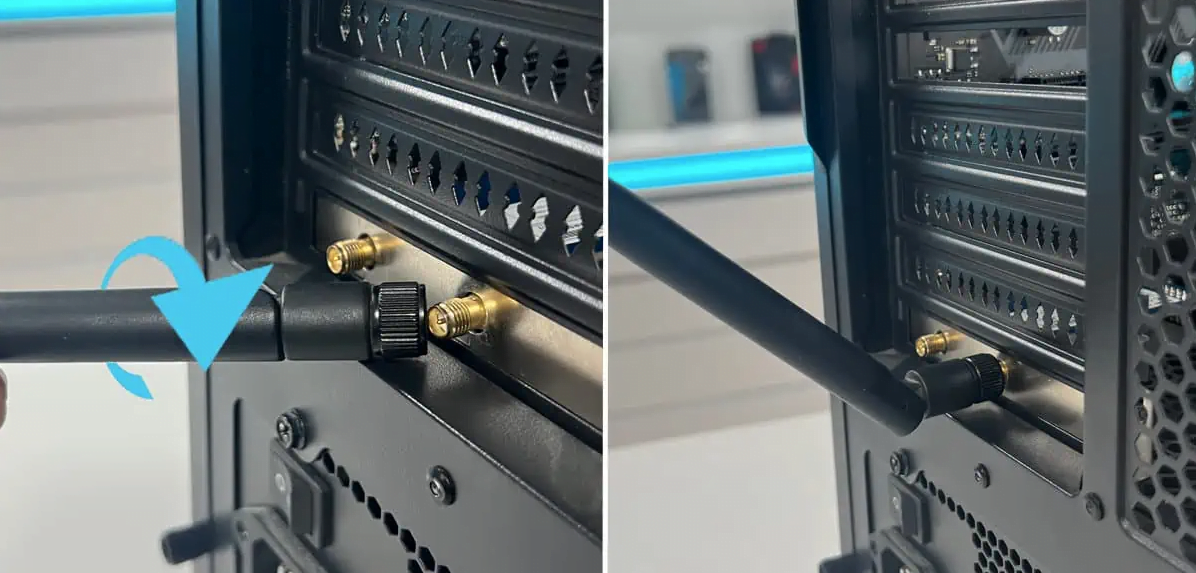
6- Finally, align the antennas to the connectors and turn them in a clockwise direction to connect them.
Install WiFi Driver
If you have an existing internet connection (like Ethernet), Windows may detect the new WiFi card and automatically install drivers for it.
Otherwise, you’ll need to manually install the drivers. To do this,
1- Download the driver files from the official source.
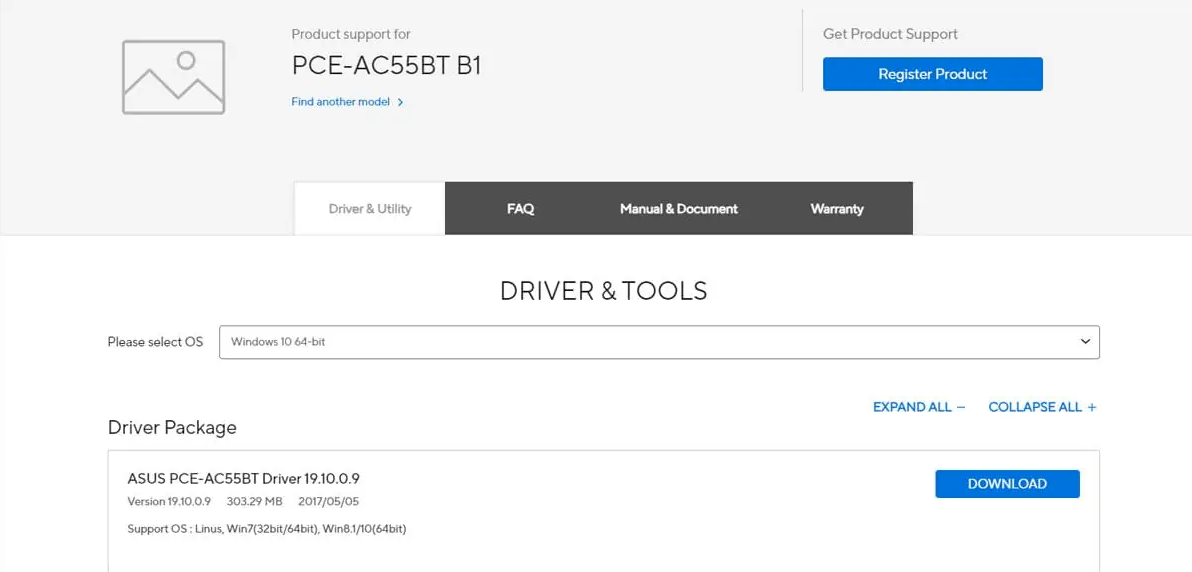
2- Then, launch the setup wizard.
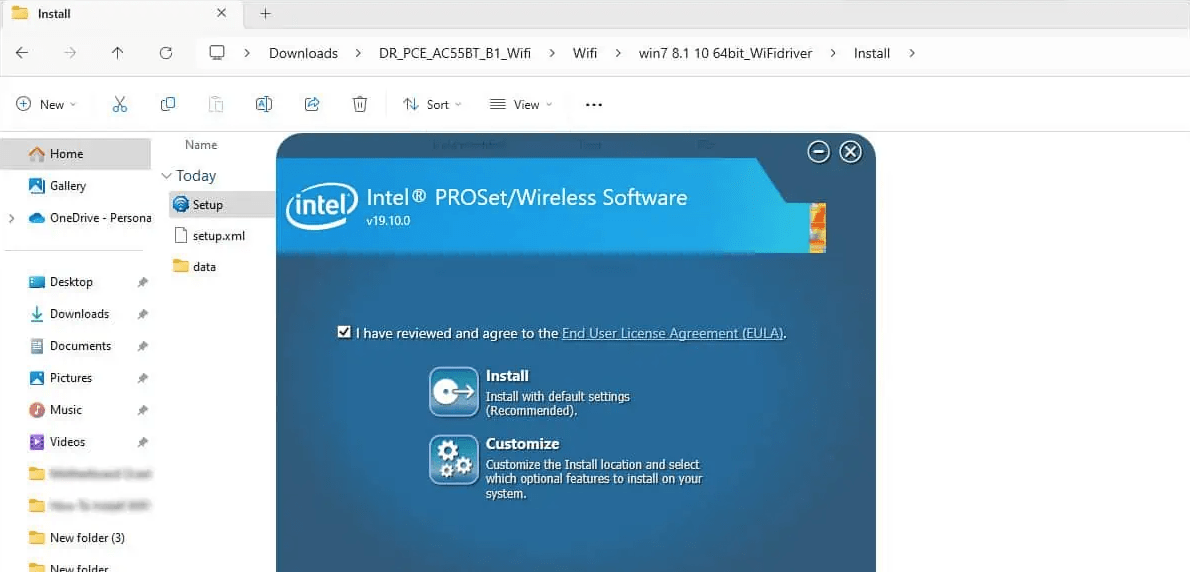
3- If required, use another device with internet access for this. Or, share your phone’s connection through tethering. Once you install the drivers, your WiFi card should be functional.
Installing a M.2 WiFi Card on Desktops

If your board has an M.2 slot with E and A keying notches, all you need to do is slide the module into the slot. Remember to do this while the system is powered off.
But most desktop motherboards don’t have such a slot. Instead, they have M.2 slots with M and B keying notches (for SSDs). In such cases, you’ll need an appropriate M.2 adapter.
Finally, it’s also possible to replace the module on motherboards with built-in WiFi support. To do this,
- Locate the WiFi module on the I/O panel. It should be vertically mounted.
- Flip the motherboard around. You’ll find the screws holding the module in place directly on the opposite side.
- Once you remove these screws, the module should pop out easily.
- Connect the new module to the same M.2 slot. Then, turn the board around and properly screw it in place.
Note: After physically installing the module, install the appropriate drivers with steps from the Install WiFi Driver section.
Installing a USB WiFi Adapter

Using a USB WiFi card is as simple as it gets. Connect it to a USB port. Then, follow the steps from the Install WiFi Driver section above. Once that’s done, your PC should have WiFi.
How to Replace a Laptop’s WiFi Card
Some laptops have WiFi cards directly soldered to the motherboard. In such cases, you’re out of luck.
But if the WiFi module is a removable one, you can follow these steps to replace it:
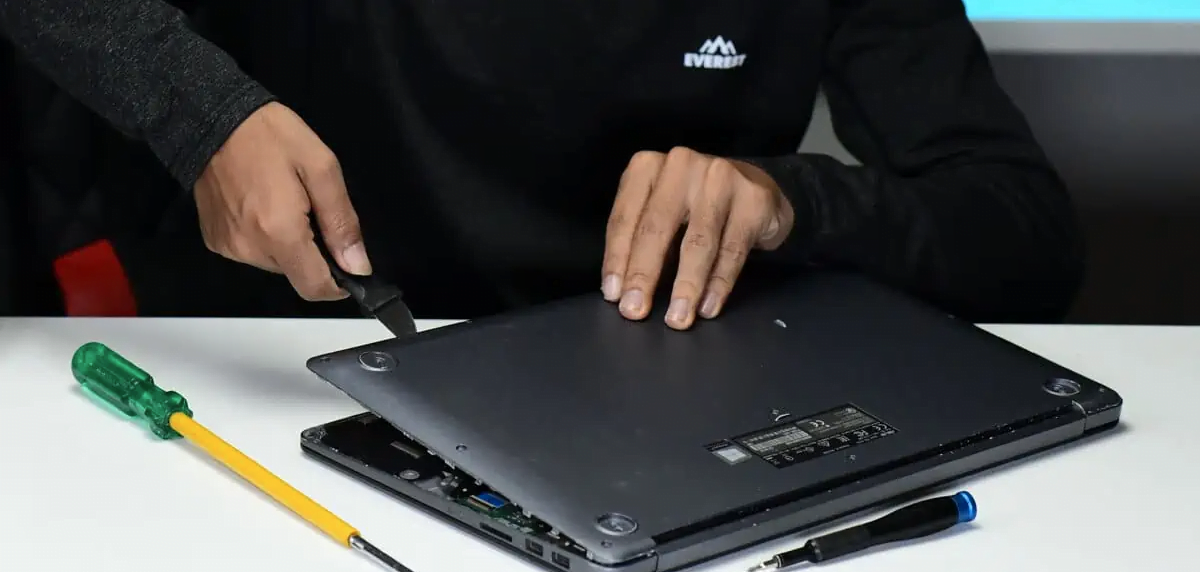
1- Check your owner’s manual for the steps to remove the back cover (as it differs from laptop to laptop). But generally, you remove the screws and the battery (if required). Then, you pry open the back cover.
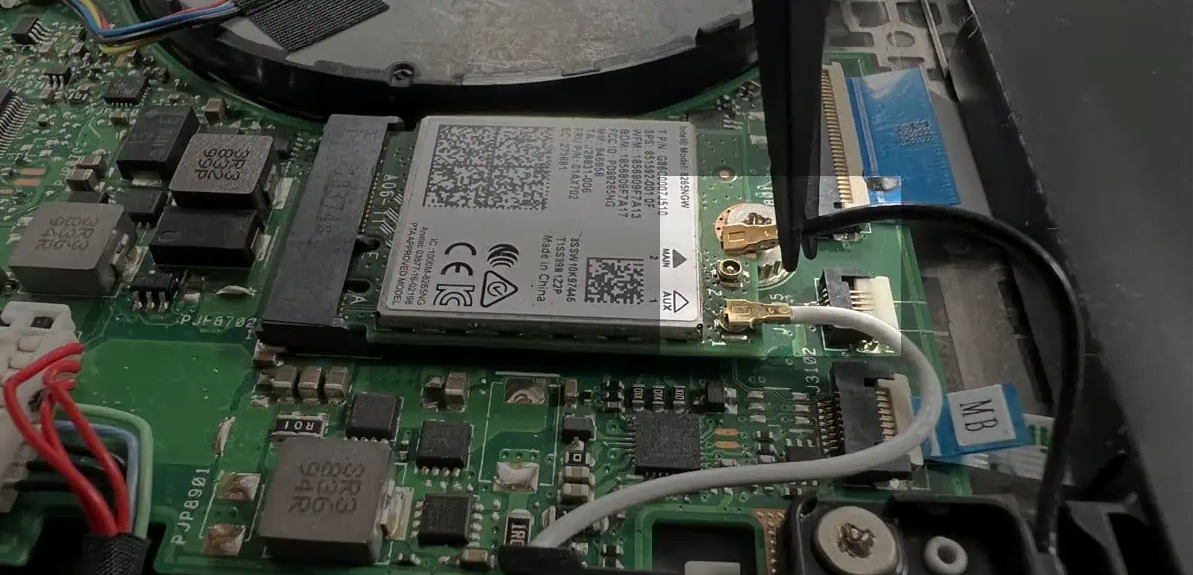
2- Locate the old WiFi card on the laptop’s motherboard.
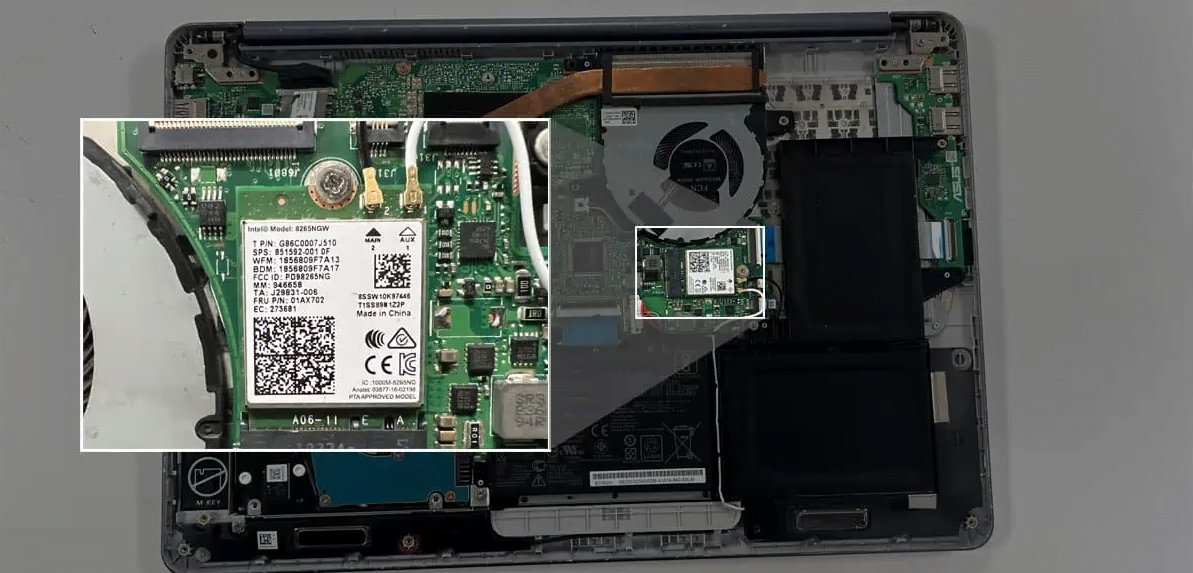
3- Note which colored antenna wire is attached to which points on the WiFi card. They should be numbered or color-coded.
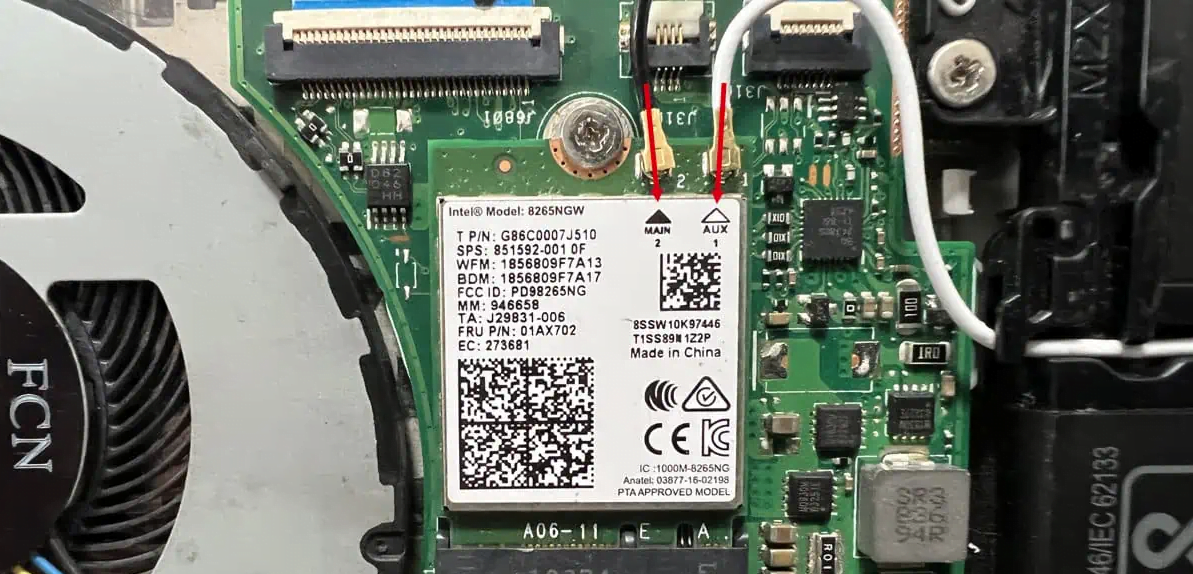
4- Use a tweezer or your fingers to gently detach the wires. They should come off with very little effort.
5- Remove the screw holding the card in place.
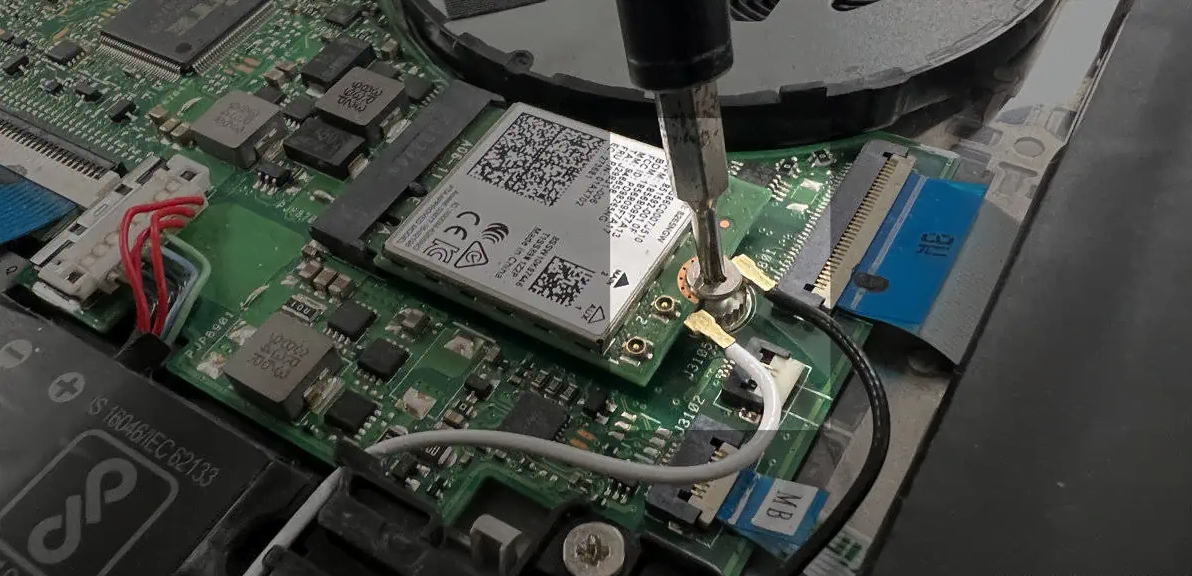
6- Now, pull the card out of the M.2 slot.
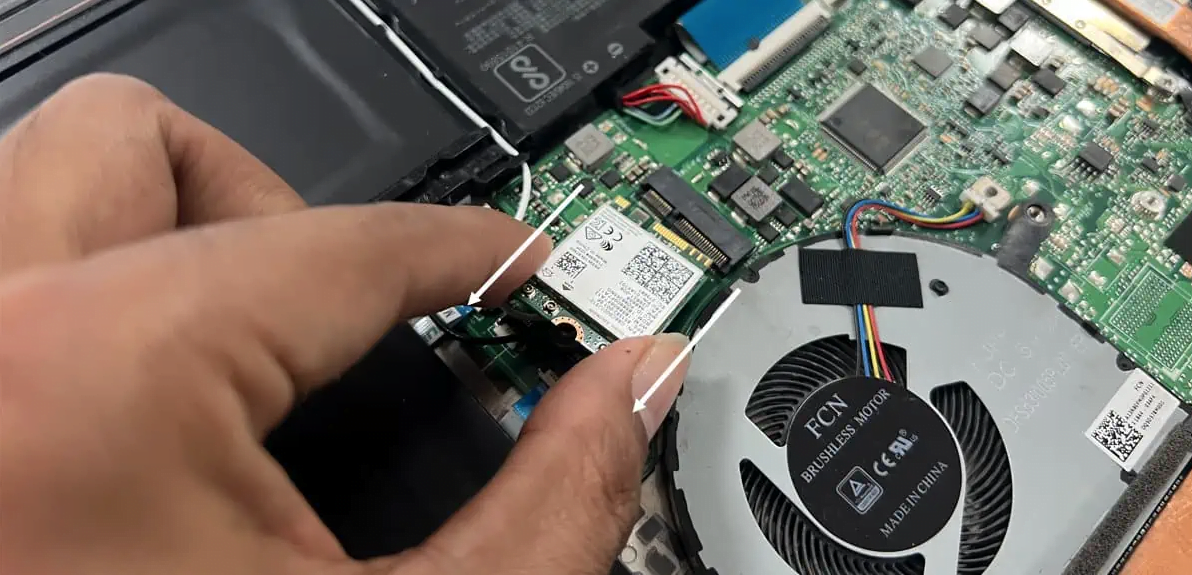
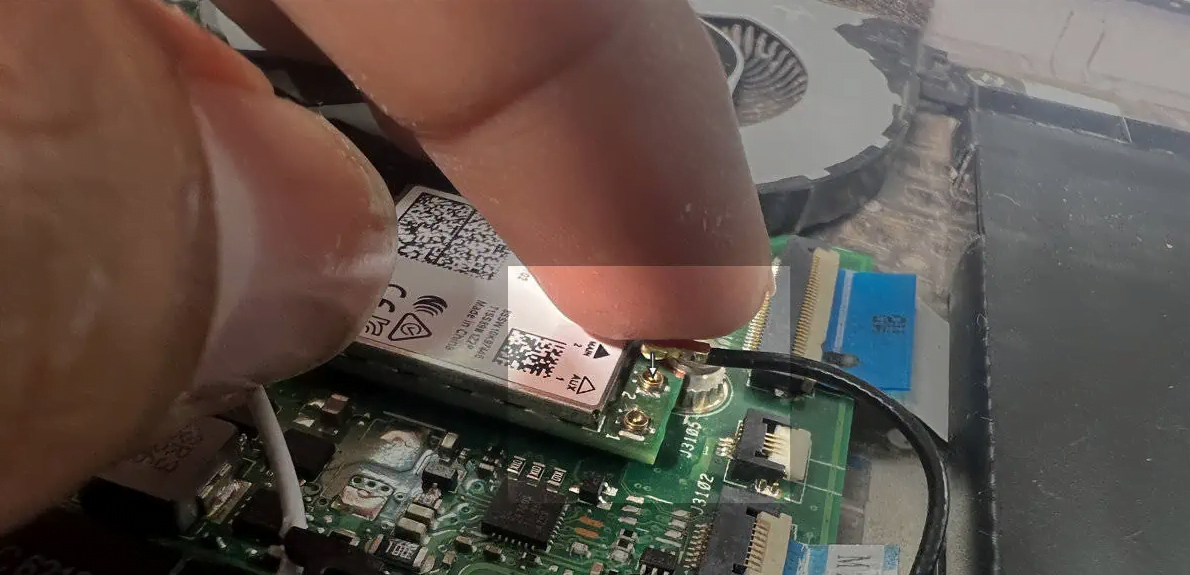
7- Now, reverse the steps to install the new WiFi card. First, install it into the M.2 slot.
8- Then, screw it in place and attach the wires. The wires should connect pretty easily.
9- Put the cover back on and install all the screws properly.
10- Finally, turn on your laptop. Use the steps from the Install WiFi Driver section to get your new WiFi card working.
End.
Did you like this article? Do not hesitate to share it on social networks and subscribe to Tech To Geek on Google News to not miss any articles!"Because of the Google update, I, like many other blogs, lost a lot of traffic."
Join the Newsletter
Please, subscribe to get our latest content by email.